Five amazing baits for summer bream
Want to land a big net of specimen bream this summer? Then check out these great bait tips for bream from bait expert Paul Garner as he has put together the ultimate list of bream baits to help you catch more now.
For more great tips from top anglers head to this year’s The Big One Show
Every summer I try to put together a good catch of bream.
This could come from a river or a stillwater, as both types of venue can contain shoals of slabs averaging 5lb and upwards.
My tactics are simple, but effective. The Method feeder is my first choice, loaded with a groundbait mix that won’t break the bank.
A lot of rubbish gets talked about how much bait you need to catch bream. Sure, a shoal can number dozens, if not hundreds, of fish, but remember – you are trying to catch them, not feed them! My experience is that heavy baiting for bream can be counter-productive.
If the fish are following a patrol route then no amount of bait will persuade them to stop. Introduce too much and they will leave most of it, including your hookbait.
A couple of kilos of bait is more than adequate for a day or night session. The bulk of this will be groundbait, with a tin of sweetcorn and some pellets and mini-boilies thrown in for good measure. If I have some frozen maggots in the freezer they will go in too, but they are just the cherry on the cake and not essential.
CHEAP GROUNDBAIT MIXES
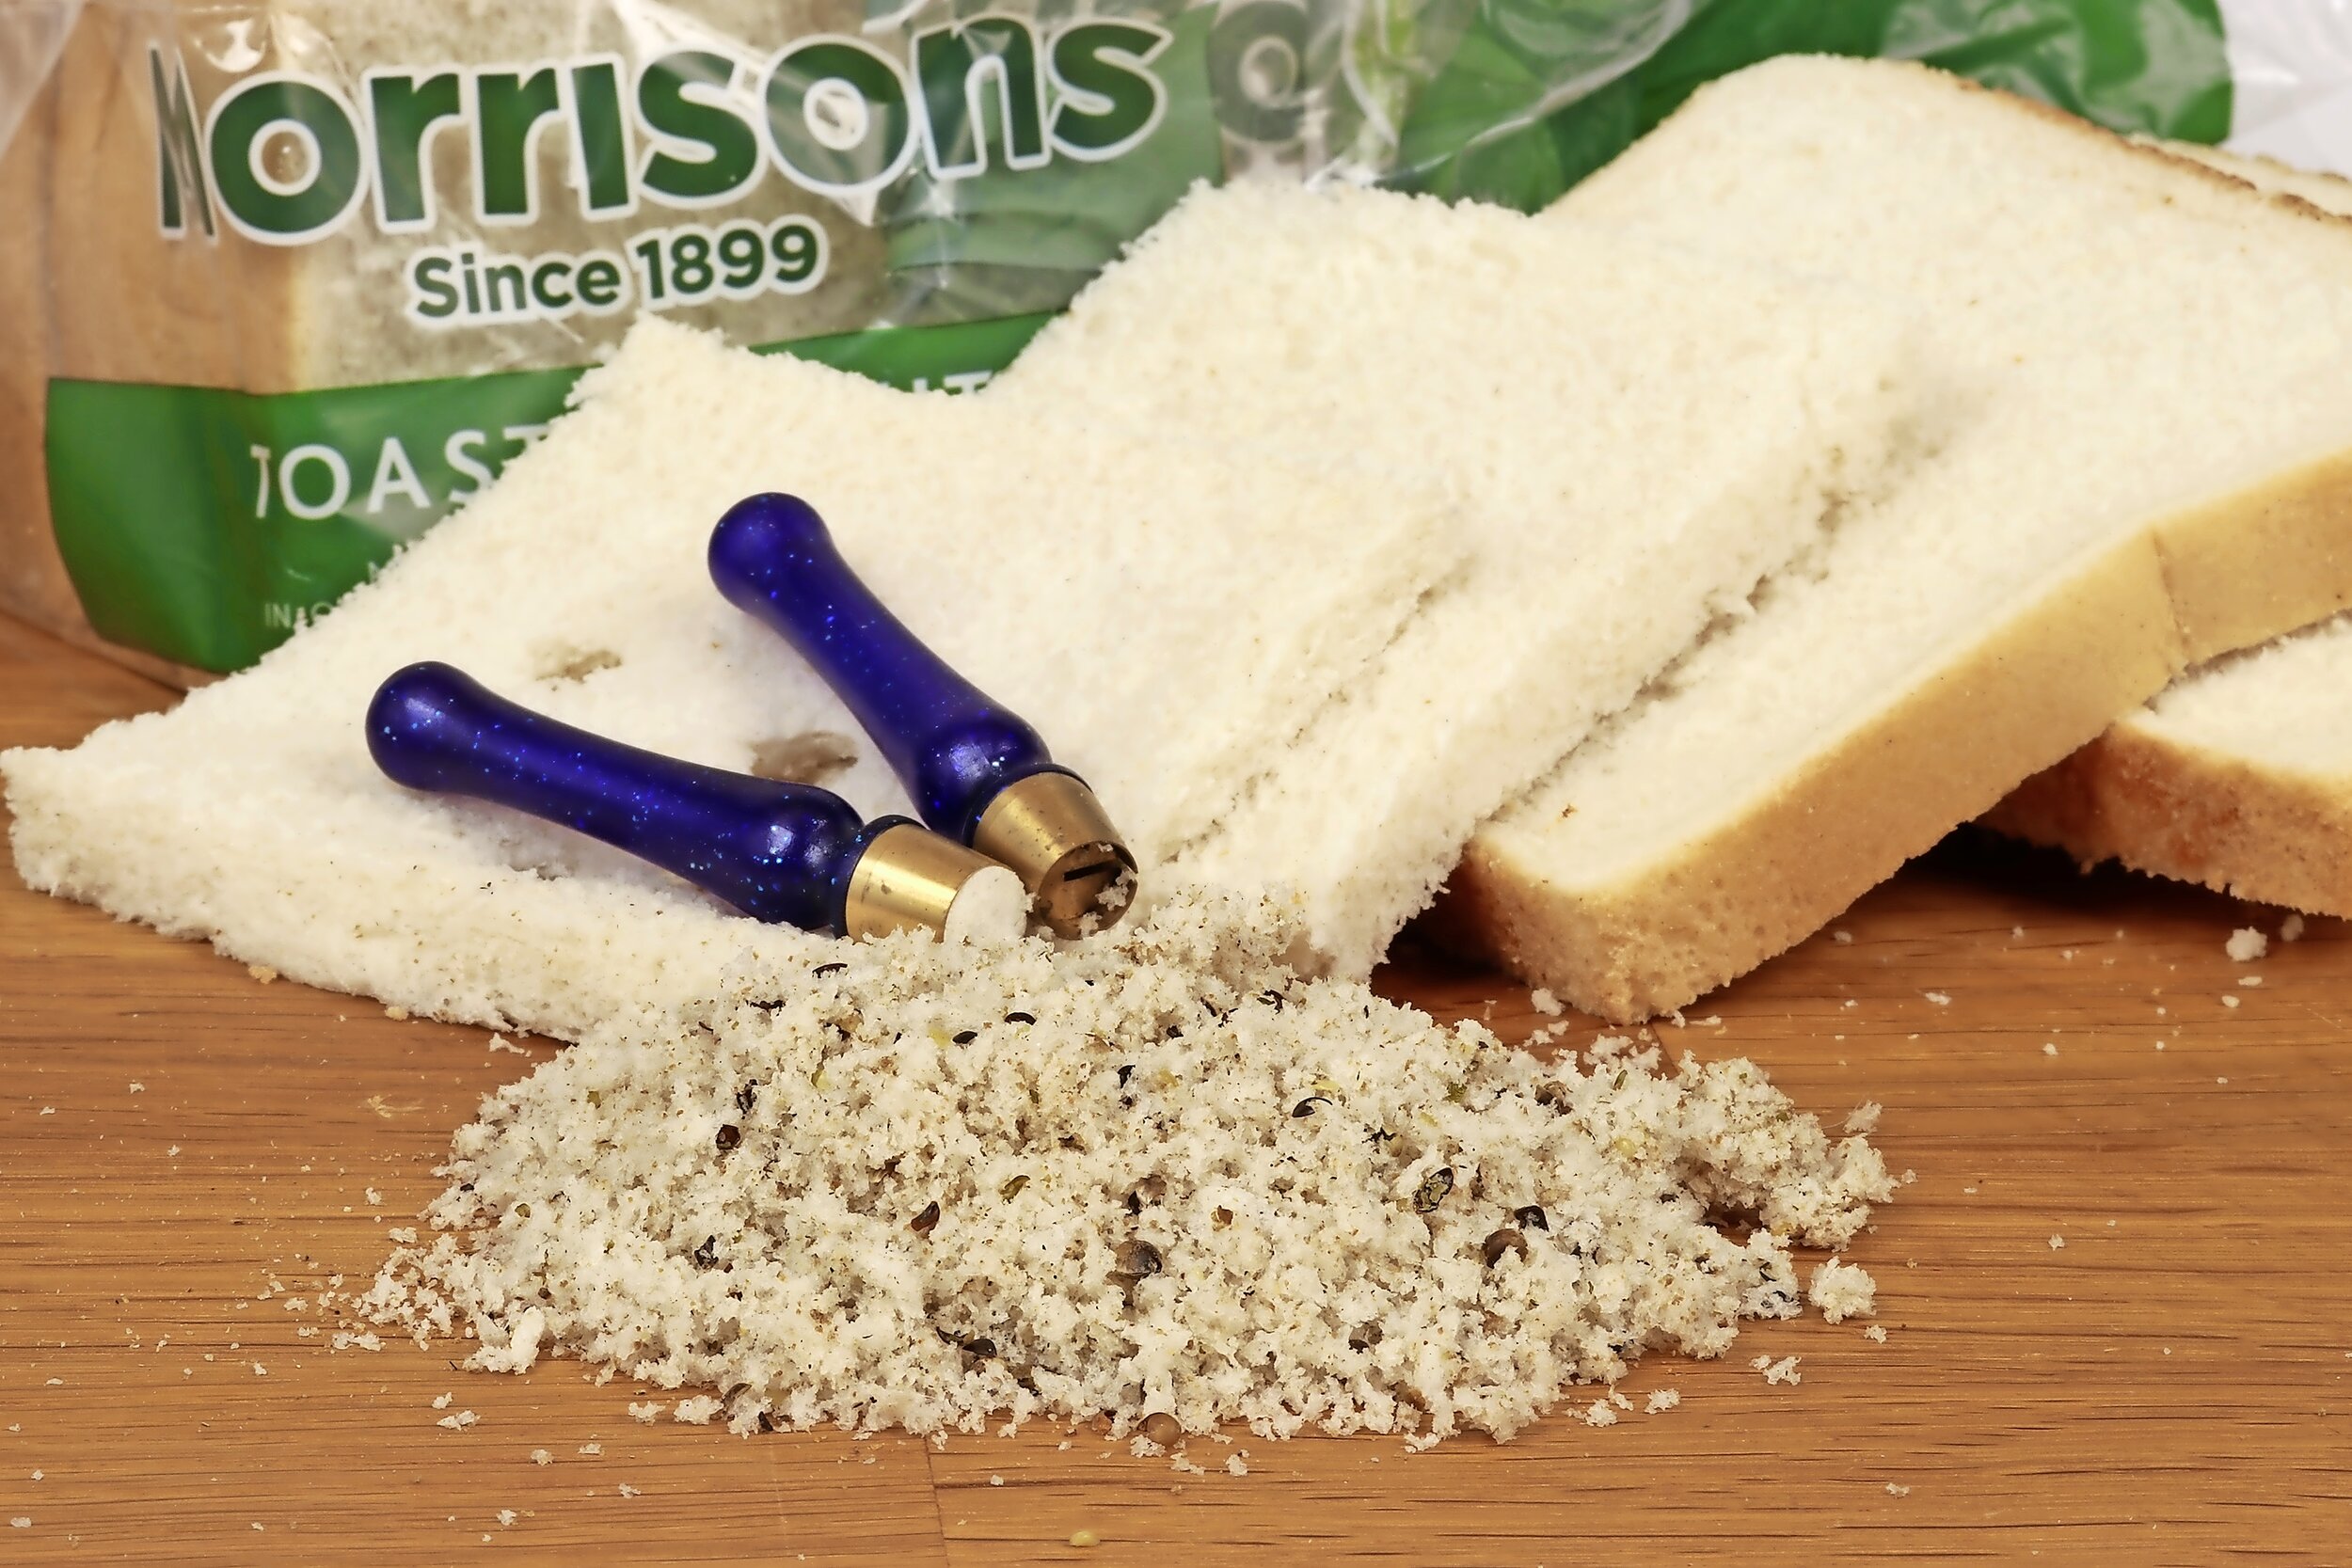
Bream do love fishmeal groundbaits, and a mix that contains plenty of crushed pellets will certainly do the trick.
It’s surprising how little fishmeal is needed in the mix to have an effect, though, so to cut costs I will use a 50-50 combination of groundbait and brown crumb, to bulk out the bait. Remember, though, that brown crumb does not bind particularly well, so this could well affect how much feed the groundbait can hold.
I use soaked flaked maize a lot. This resembles cornflakes in its dry state, because that is essentially what it is! When soaked it swells up and emits a milky haze with soft flakes that bream (and carp) really like.
I use molasses to flavour and sweeten the groundbait – I find it to be most effective for bream, and it’s cheap. You can buy it by the litre from animal feed shops.
Sweetcorn
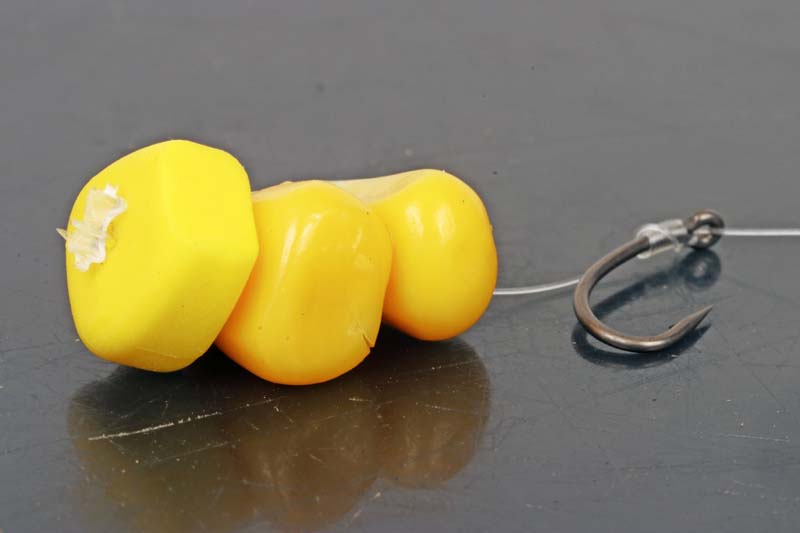
Bream love corn. Its yellow colour and salty taste make it easy for them to locate and they will spend a lot of time eating every grain. This makes it a top hookbait too and I normally use two or three grains on a hair to make the hookbait stand out. Because this is a relatively soft bait, look for grains that are fully intact. Try combining two pieces of real corn with a buoyant flake bait to produce a brilliant wafter.
Mini-boilies
If I am night fishing then 12mm boilies will often be my hookbait of choice, simply because they are long-lasting and I can have total confidence that they will still be there come morning. For bream up to about 8lb I use a single 12mm bait, but for bigger specimens I find two 12mm baits brings more bites. Try a sweet flavour, such as Strawberry Crush.
Dead maggots
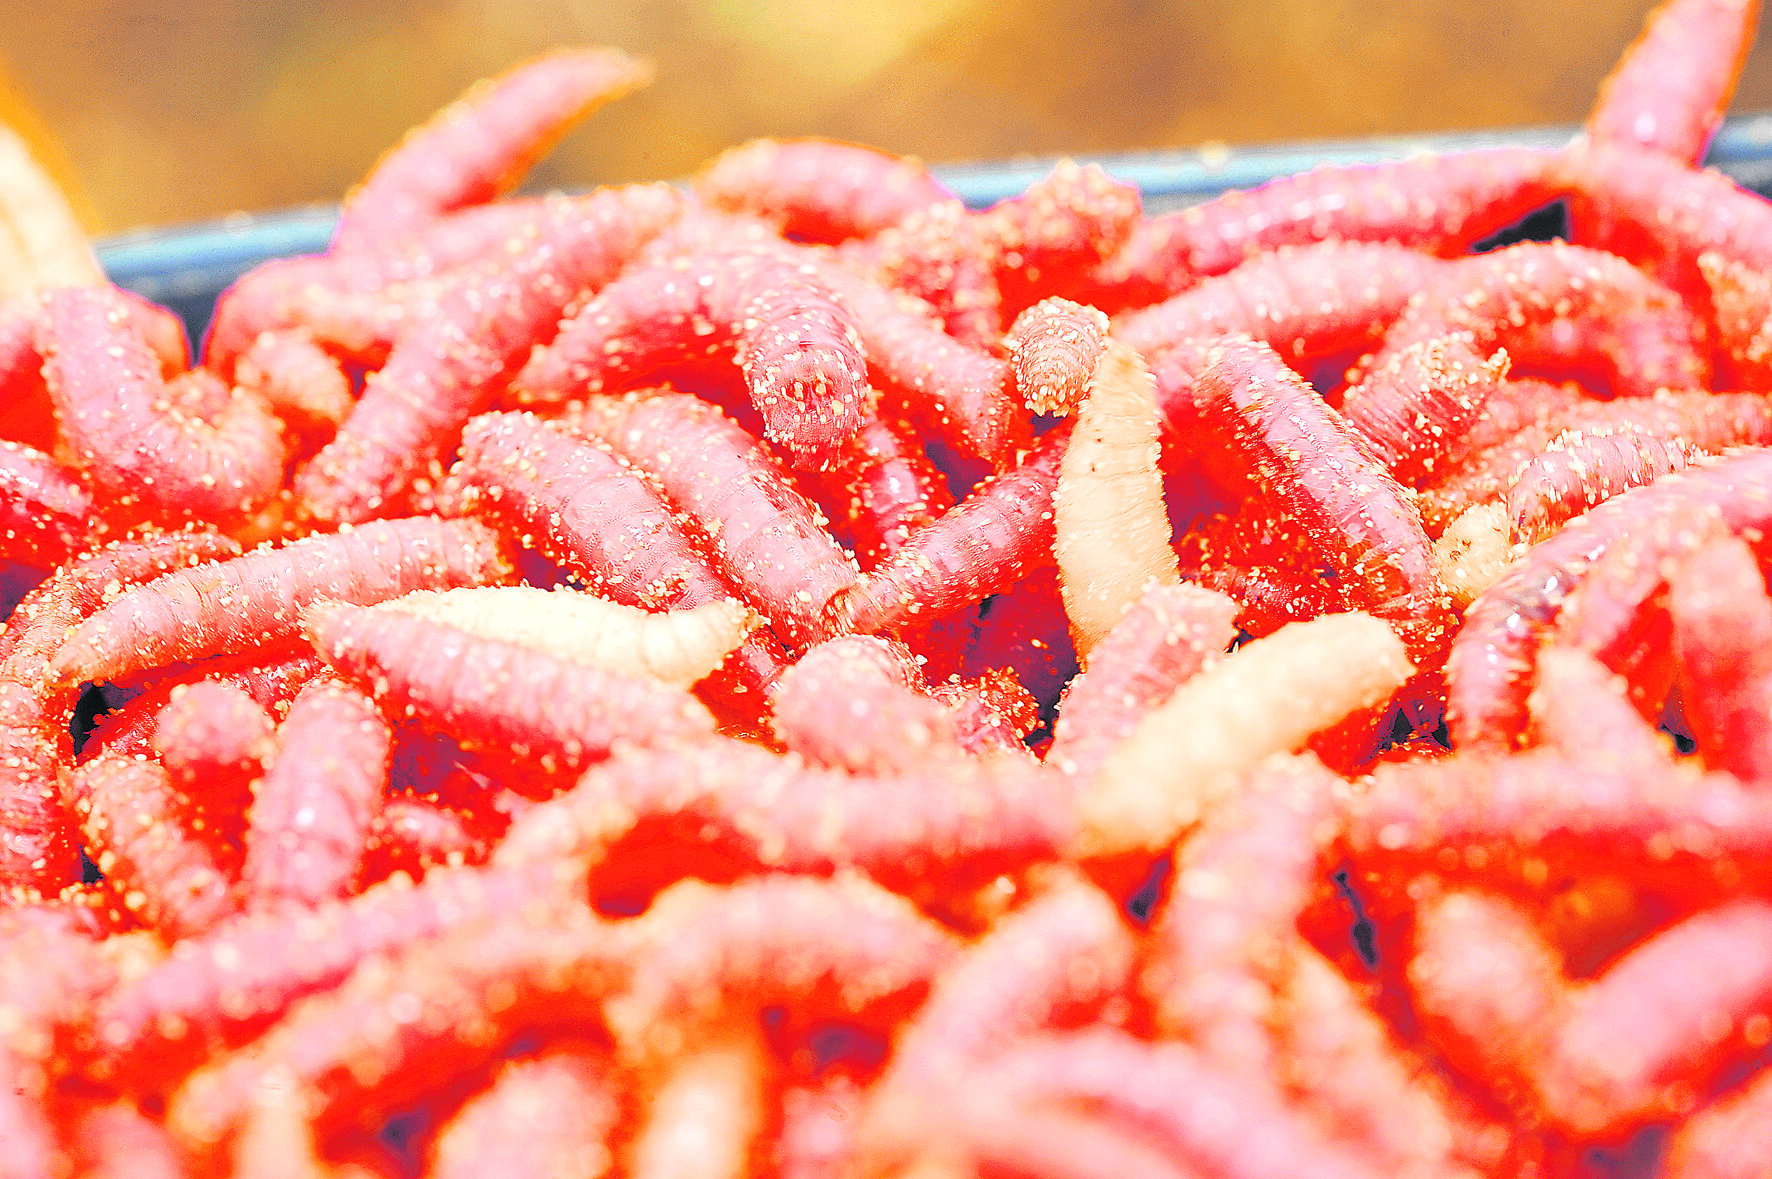
Live maggots can attract too much attention from small fish, even though they are a brilliant day-time bait. Switching to dead maggots both in your feed and on the hook can avoid this problem, as their lack of movement doesn’t attract as many small nuisance tiddlers. Try using a bunch of four maggots on a size 14 hook for best results.
Worms
Worms can be problematic if you are on a venue with a lot of small fish, but on a
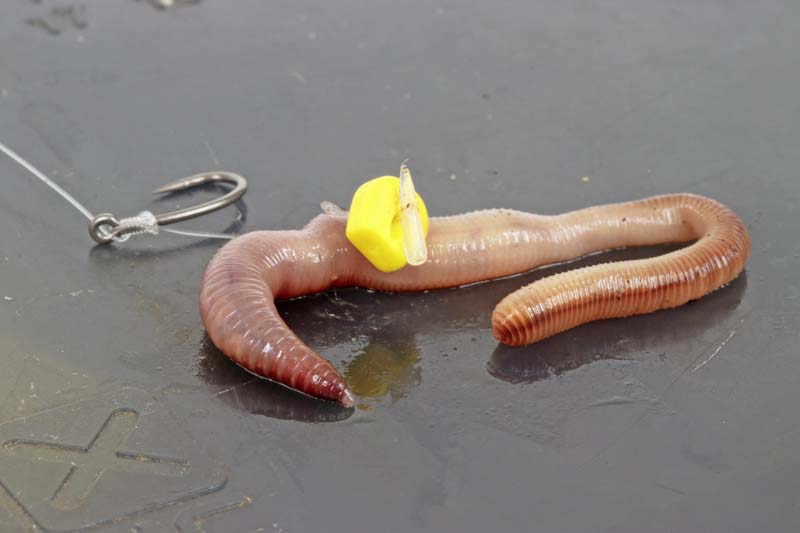
low-stocked pit they can be very effective. Try to get hold of some small lobworms – no more than 4ins long. I like to hair-rig these, adding a piece of buoyant corn to not only give the bait some buoyancy, but also to act as a giant bait stop.
Pellets
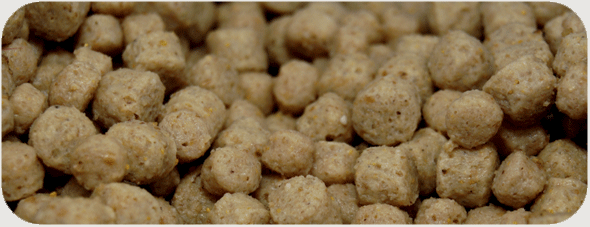
Bream love pellets, especially high-oil halibut pellets, and two 10mm baits hair-rigged in tandem have caught me a lot of big bream. You can buy ready-drilled baits that are very easy to rig, but the hole can be a little too large for a normal bait stop. Try using a Quick Stop, or add a tiny square of elastic band before the stop.
How to use hemp correctly when fishing for roach
Hemp is still a bait that so many anglers steer clear of when it comes to fishing for roach.
The seeds are fiddly to get on the hook, and when the angler finally gets a bait in the water he’s unable to catch anything.
That’s far from the truth. It may not every day that sees hemp work, but when you’ve got a swim producing a fish a cast on maggots and casters, there’s no reason why changing to hemp should lead to a halt in bites – provided of course, you’ve been feeding hemp from the word go.
This week’s coach is a real blast from the past – Pete Jayes. The Leicester angler has enjoyed a glittering career stretching back to his days with Ivan Marks and the Likely Lads.
Here are his top tips for catching big roach on ‘the seed’ this autumn…
Present it correctly
“Whereas maggots and casters are best fished overdepth, I think hemp works brilliantly when presented just off bottom and run over just a few feet of a river swim as opposed to way down the peg.
“I try and get the grain on the hook to act in the same way as the loosefeed underwater. Hemp on the riverbed won’t move with the flow, due to its weight, so why should the hookbait?
“I think roach line themselves up in the flow waiting for the hemp to arrive – if the bait acts suspiciously they won’t look at it.”
When tares work
“I never fish hemp without having a few tares with me because they are a brilliant hookbait that picks out the bigger roach in the swim. They are a much bigger bait than a grain of hemp, and they’re also easier to get on the hook.
“Once the roach are lined up on hemp it’s time to try a tare on the hook. I prepare my own, but to make them even softer I will freeze a few and then defrost them before use.”
Different rigs
“I always have two pole rigs on the go for hemp work because no two days are ever the same.
“You have to try different depths and shotting patterns to make the hookbait behave as much like the loosefeed as you can.
“I’ll fish a 0.4g bodied float plus a much lighter 4x14 slender Preston Innovations Chianti model. Both are shotted using nothing larger than No10 shot, as this allows me to move them up and down the line for different presentations. You can’t do that with heavier shots.”
feeding
“Varying how many grains of hemp you loosefeed is the road to ruin. I reckon roach like a constant stream going in – the more regular the feeding is, the better the fishing will be, so I fire in around 12 grains every run through and never alter this.
“Should I think that a change needs to happen, this comes by altering the shotting on the rig rather than how much I am feeding.”
Light lines, small hooks
“In keeping with the delicate presentation that I am trying to achieve, my lines and hooks have just as much finesse.
“A hook that’s too big and a line that’s too thick will make the hookbait act unnaturally underwater, so typically I fish 0.10mm mainline to an 0.08mm hooklink.
“Your hooks should be very light as well, but they need to have a wide gape to help the hemp sit properly.
“For me the best out there is a Kamasan B511 in a size 20 or 18.”
Best bait to catch bream on
When it comes to trying to bag up on bream, it's difficult to know what the best bait to use is. Wonder no more as we have gone to bait expert Dr Paul Garner to find out what the best bait is when it comes to bream fishing.
On a natural river or gravel pit, 100lb of fish averaging 4lb is my benchmark for a seriously good session. My tactics are nothing revolutionary, but I do make a few tweaks that make a significant difference to my results.
The centre of attraction
Bream are big fish that make a lot of wake as they move around – this can send groundbait and pellets in all directions. Rarely will a Method feeder deposit a neat pile of feed next to the hookbait, except if a fish cruises in and picks it up immediately. How far the bait spreads out and how long this takes depends on the number of bream in the swim.
To combat this I pack some of the bait tightly on to the feeder and either leave the hookbait hanging free, or load it right on the outside of the feeder. Try it – your catches are sure to improve.
Hookbait choice
Boilies and pellets seem to be becoming just as high up the menu for bream as they are for carp, but these baits are not always my immediate choice. Sweetcorn is another very effective bream bait – and underused at that.
With care, the classic combination of corn and a dendrobaena worm can be effective, but take care if you are fishing at range, as the shock of the feeder hitting the water can dislodge even these tough worms.
A bunch of dead maggots is another useful alternative. I prefer red, as they stand out less well, making them less vulnerable to the attentions of silver fish.
Four dead maggots on a size 12 hook is a formidable bream bait, especially when the water is clearer than I would like.
I keep pellet hookbaits relatively small for bream. An 8mm pellet is about right, even for big slabs. Only when I’m targeting double-figure fish will I go bigger than this, as I feel I miss fewer bites on the smaller baits.
Boilies follow a similar rule. An 8mm or 10mm bait is ideal for bream, preferably a wafter, as I am sure that I hook more fish on these semi-buoyant baits.
The flavour of the boilie is almost irrelevant, as I will be boosting it anyway and this will mask the locked-in smell.
Bream feeds
Pellets revolutionised bream fishing and today it would be difficult to think about not using these fishmeal-based baits.
Within reason, the more oily the pellets, the more bream will be attracted to them. Halibuts are perfect, but expensive to use on their own, so if I want to prebait, for example, I will use them in combination with cheaper baits, such as corn and flaked maize.
A spod is the bream angler’s best friend when fishing at range. If you clip up at the same distance as the rods that are actually fishing it’s easy to hit the spot every time, giving you a precisely controlled bed of bait. A spread of bait can be achieved in just 10 minutes, and it’s far more accurate than using a catapult. A bag of pellets and two tins of corn will be plenty for a day session or overnighter, as this will be topped up with bait from around the feeder.
Plain brown crumb is the ideal base for groundbaits, especially if you combine it with liquid molasses to produce a classic bream combination. I like to use a 50-50 mix of crumb and a fishmeal-based groundbait such as Sensas Crazy Bait Gold, Dynamite Marine, or Sonubaits Supercrush.
Sticky sweet feed pellets
Combining savoury fishmeals with sickly-sweet liquids might seem strange, but bream love the unlikely mix. I guess that the sweetness takes the edge off the bitter taste that many pellets have, especially those that are high in oil. This combination creates a potent feed pellet, ideal for spodding out or using on a Method feeder.
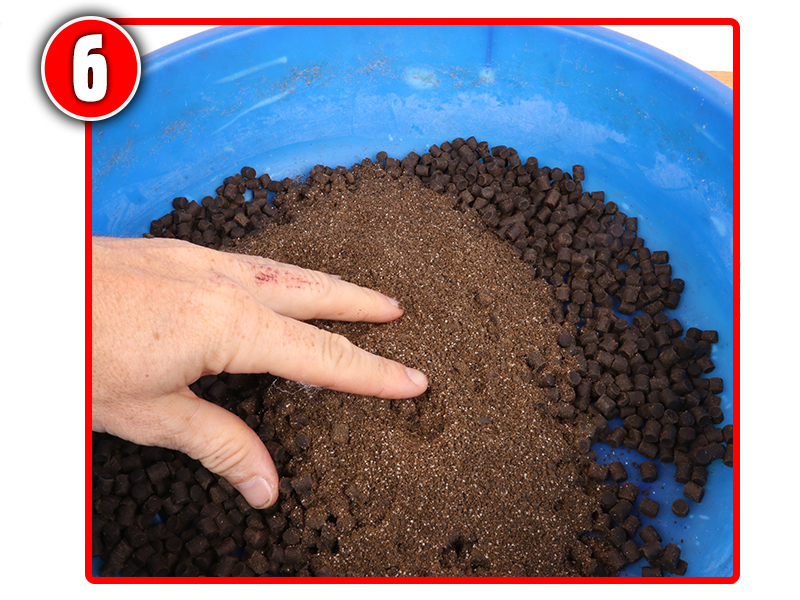
Use a coffee grinder to reduce a couple of handfuls of 6mm feed pellets to a coarse powder.
Add two tablespoonfuls of demerara sugar to the pellet powder and mix well.
Dissolve two tablespoonfuls of liquid molasses in a pint of lukewarm water.
Add a teaspoonful of liquid betaine to the water. Bream love the stuff!
Soak a bag of 6mm feed pellets in the liquid for six minutes, then pour off any excess water.
Add the powder mix to the damp pellets and shake to evenly coat the pellets in the powder.
How to make a great bream spod mix
Dynamite Baits specialist Paul Elt has got a great bream spod mix recipe that will pull the slabs into your swim and is a key part of you trying to land a specimen bream this season. Follow our simple step by step guide below to create this irresistible spod mix.
Mix 1kg each of Dynamite 6mm Halibut pellets and 4mm Halibuts.
Add a bag of CSL Spod Mix to the 2kg of pellets.
Two or three tins of corn give great visual appeal to the mix.
Half a jar of Frenzied Hemp goes into the mix, plus all the juice.
Finish off with a good glug of CSL Liquid Carp Food.
Dr Paul Garner's 10-minute make | The chopped worm method
The Method feeder is a great way of catching tench – the combination of groundbait and chopped worm is hard to beat, especially with my secret ingredient, Krill powder.
Into a bait bowl add three parts of Dynamite Baits’ Swim Stim Green groundbait to one part Krill powder. Mix it up dry to start with.
Wet the groundbait slowly until it will stick well to a flat Method feeder. Leave to stand for a while until the water is fully absorbed.
Finely chop a handful of dendrobaena worms so that they are reduced to a fine mush, then mix the worms into the groundbait.
Use a Quick Stop on a size 12 hair rig to hold a worm in place. The stop can be pushed through the worm, but will then hold it securely.
Alternatively, try swapping the worm for an artificial caster on the hair. This will often produce extra bonus tench.
Pop-up baits vs. Bottom baits
Fishing is all about the choices you make. There are many variables, but in carping one of the key decisions is whether to present your hookbait on the bottom or just above it.
Pop-up baits
Bottom baits
POP-UP BAITS
PRESENTATION
All rigs can tangle or get caught on detritus as the lead plummets through the water, but the buoyancy of a pop-up bait is much more likely to suspend your hook away from such problems. The distance between the lakebed and the bait can be infinitely tweaked, but do wise carp find a ‘hovering boilie’ suspicous?
TO BLEND IN OR STAND OUT?
The problem with pop-ups is that every single one of them is attached to a hook. Your free offerings cannot be suspended off the bottom like the hookbait and some anglers believe this means they stand out like a sore thumb. Conversely, standing out like this can be an advantage as carp home in on an eye-catching offering.
EASE OF USE
The rigs used to present baits off the lakebed needn’t be dauntingly complicated, but they do require a bit of thought. The weight needed to anchor the bait (either with putty, a split shot or sinker) is a consideration, and popular rigs like the chod and hinged stiff rig require concentration and practice to make perfect.
OTHER CONSIDERATIONS
A tub of pop-ups isn’t cheap, but who said all suspended rigs need to be made with boilies? Plastic baits like imitation corn are wonderful carp catchers and will last for session after session, fish after fish. Pop-up boilies are also generally much more durable than feed baits, meaning they can live in your rucksack for years.
BOTTOM BAITS
PRESENTATION
The vast majority of loosefeed you introduce into the water will collect on the bottom, and with their tough lips and underslung mouths, carp are also used to foraging for natural grub down here. But rig-obstructing debris also gathers on the lakebed, so bottom baits are best suited to clear areas where you know nothing will foul your hook.
TO BLEND IN OR STAND OUT?
It’s far harder for a carp to differentiate between a free meal and a boilie attached to a rig if both baits look and act the same. Shop-bought pop-ups cannot, and often do not, attempt to match the sinking boilies you pluck from a bag. With a bottom bait, this potential problem is eliminated and the carp has a far harder choice to make.
EASE OF USE
Bottom-bait rigs are generally simple. We’re lucky to sit here in 2014 with access to the knowledge gained by the pioneering anglers of years gone by. We know that anything mounted on a hair rig is very capable of catching fish. Bottom-bait rigs can be tied in seconds with supple or stiff materials, but they all work.
OTHER CONSIDERATIONS
It might be tempting to think popped-up baits are simple, and buoyant shop-bought boilies certainly are, but carp fishing isn’t all about these hardened spheres. If you want to fish tiger nuts, sweetcorn or pellets then presenting them on the bottom is by far and away the easiest way to do so quickly and effectively.
THE NEXT LEVEL: WAFTERS AND CRITICALLY BALANCED BAITS
What do you get if you cross a sinking bait with a buoyant one? A snowman.
No, we haven’t muddled up our Christmas-cracker jokes – one of the compromises between pop-ups and bottom baits is the snowman rig.
So called because, well, it looks like one, the snowman features a smaller pop-up mounted on top of a larger bottom bait. The result is a two-bait presentation that sits ‘upright’ on the lakebed, giving fish more chance to see it.
The buoyancy also counteracts the weight of the hook, theoretically fooling the fish into thinking the mouthful it has just picked up is not attached to anything. With a bit of tinkering, the two baits can be matched so that they fall gently through the water to rest on any bottom debris.
How to use paste
With its soft texture, instant attraction and awesome fish-pulling power, paste is one of THE best summer carp baits.
G.O.T Baits’ Gary Thorpe shows you how to get the best from it…
Having predicted a catch of well over 100lb by three o’clock, it looked like Gary Thorpe would achieve this goal in half that time.
With his swim almost solid with feeding carp catching them was easy, with hardly a minute going by before his elastic was at its fullfighting stretch.
But what had worked the fish into such a feeding frenzy?
The answer was a simple one – it was Gary’s paste bait.
Neglected by many, and wrongly dismissed by others as being too fiddly to prepare or impossible to keep on the hook, paste is a fabulous bait in the right hands.
In fact, Gary believes the anglers who aren’t willing to give paste a chance are making a mistake that’ll cost them a lot of fish.
And who would argue with one of the greatest paste anglers in the country and the current World five hour match record holder with a haul of 490lb 8oz of carp?
HOW TO MAKE GARY'S PASTE
Gary makes his hookbait up from G.O.T Baits ‘The Ton Up Paste’ powder.
“I prefer to make my paste from a powder because I can make it as stiff or as soft as I want with the addition of more water, or by adding less in the first place,” explained Gary.
“The trouble with readymade pastes is that you are stuck with what you are given, the majority of which are too stiff in my opinion.
“Don’t get me wrong, ready-made paste has its place, it’s great at close range on the waggler, but for pole fishing I like powdered paste that I mix soft.”
STEP ONE
Empty the contents of the bag into a suitable mixing bowl or bait tub.
STEP TWO
Start adding water to the mix a little at a time and mix the two together with your fingertips.
STEP THREE
The mix should become wetter. Leave it to stand for 15 minutes to enable the powder to fully absorb the water.
STEP FOUR
The paste is now ready for fishing with. Ideally it should be quite soft but just firm enough to grip the hook.
SETTING UP AND KICK STARTING THE SWIM
We joined Gary at peg 32 on the prolific Alders’ Farm Fishery Match Lake, where he was setting up a pole and the rest of his tackle for the day ahead.
It was a balmy, overcast summer day, with a light southwesterly wind causing an inviting ripple to form across the water.
All over the lake there were carp leaping clear of the water, just like returning salmon on a great Scottish river.
“Looks like we should have a few,” said Gary.
Hooking a rig on to a top-three kit of his pole, Gary added just three more sections to take the pole to six metres.
“I like to fish close in when I’m fishing with paste because it makes things so much easier,” said Gary. “The further out you fish, the further you have to bring the pole back, should you miss a bite or your paste falls off.”
At this distance, Gary plumbs the depth straight ahead of him and explores elsewhere in the swim to the left and the right.
“Plumbing up is very important in fishing, but it’s even more important when fishing paste,” said Gary. “The first thing I look for is a level and uniform bottom. It is no good trying to fish paste on a sloping bottom, as the paste will come off the hook and roll away, out of the swim.
“It’s vital to set the rig at dead-depth (the exact depth of the swim) as you will hit more bites and the paste won’t sink the bristle of the float at this depth.
“Fishing at dead-depth also helps to reduce the amount of foul hooked fish, where a fish swims into the line and causes a ‘false bite’ to register on the float.
“This can be one of the major problems when fishing with paste, as it really turns the fish on to the feed. The disadvantage of that is they go wild and will often swim into the line and cause a false indication.
“Unfortunately, you can’t really stop this happening, but the more you fish with paste the better you’ll get at distinguishing the false bites from the proper ones,” said Gary.
THE ADVANTAGES OF PASTE
As he started to tackle his swim Gary explained the reasons why paste baits are so good at this time of year.
Most obviously paste has instant appeal because it has no outer skin. Unlike a boilie or a pellet, a paste bait ‘activates’ the instant it hits the water, pumping out a slick of flavours and oils to attract the fish.
A well mixed, soft paste also has a texture fish like to eat, and if you use a big chunk it will also be an obvious target for a passing fish.
In fact Gary reckons it’s a bait that gives rapid results: “Bites are instant on paste - that’s what I like about it!” he said. “If fish are in the peg, look for a bite within minutes, if not seconds of lowering the bait in.
“If I’ve not had a bite after two or three minutes, I strike the paste off the hook, bring the rig in and re-bait with a fresh chunk. The beauty of this it that you are constantly topping up the swim as the session goes on.”
THE DISADVANTAGES OF PASTE
Despite its fish-catching ability paste does have a couple of drawbacks that do discourage some anglers from trying the bait.
The first problem many anglers meet is that the bait needs to be very soft to be at its best. This makes it difficult to use on rod and line as it tends to be flung off the hook when casting. It is a better bait for use on the pole.
Alternatively, you can use a stiff paste, moulding it around a bead, or paste cage, but in Gary’s opinion the hooking rates aren’t nearly as good with a firm paste. He prefers a soft bait, as it allows him to strike through it and straight into the fish’s mouth with nothing to impede it.
Another disadvantage is how time consuming it can be to produce the perfect paste. Many anglers who’ve experimented with making paste for themselves have found it very difficult. Lots of anglers have ended up with ruined bait that’s too hard or too soft!
Thankfully bait firms have now made many of the commercially available powdered paste products much more user friendly.
Some products have mixing instructions marked on the packet, while some paste powders even have a ‘water level’ printed on the packaging to direct you to mix the bait perfectly every time.
We’ve rated some of the ready-made pastes, see page 45 for our results. But these slight negatives don’t hide the fact that paste can catch more carp than any bait if you can perfect its use.
THE RIG TO USE WITH PASTE
Keep it simple is Gary’s advice when it comes to fishing with paste.
The first step is to select a float with a long, thick bristle that shows little dips of the float indicating a false bite and a longer stem to help make the float more stable in the water.
Always pick a float with a fibreglass or carbon stem rather than a wire one, these materials don’t bend like wire does.
The line Gary prefers is 7lb 8oz breaking strain (0.18mm) tied straight to the hook.
“I’m fishing for a large weight of big fish so the rig takes a lot of stick. Adding a hooklink would create a weak point,” he explained.
Gary’s shotting pattern was also simple with a bulk of number 8 shot halfway down the rig.
“There’s no need for sensitive dropper shots with this type of fishing as you are just looking for fast, positive bites,” said Gary.
“The bulk gets the bait on the deck quickly, where the fish are feeding.”
The rig was then completed with a strong size 14 Kamasan B911 hook.
“Always use a heavy-gauge carp hook when paste fishing,” Gary continued. “You’re doing a lot of ‘carp crunching’, so the hook needs to be able to cope with it,” he added.
THE SESSION
After plumbing up and cupping in a handful of 4mm pellets and a few chunks of G.O.T Baits Ton Up paste, Gary moulded a large chunk of paste around his hook, put it in a small pot attached to his pole, and shipped out.
Holding the pot just above the water, he then rotated the pole to drop the soft hookbait into the lake. After the float settled, it was just seconds before he had his first bite from a feisty 3lb Alders Farm carp.
Rebaiting, Gary shipped his rig back out into the water, eager to capitalise on this early success.
After fishing for 15 minutes, Gary had landed six carp, before the line went quiet – if you can call no bites for five minutes quiet!
To restart his peg Gary started flicking out a few pellets at minute intervals. He also began striking the paste off his hook if he hadn’t had a bite within two minutes.
“By striking the paste off the hook I’m constantly topping up the swim with free offerings,” said Gary.
Within 10 minutes of introducing the feed the carp reappeared and the pattern for the day was established.
Almost every put in saw Gary hook a fish of between 3lb and 8lb - the bait was usually taken within seconds of it hitting the lake bed.
After just four hours of angling and with his TWO giant keepnets already filled with fish, Gary had amassed a total haul approaching 200lb.
It was an incredible performance and gave clear evidence of how good paste is as a summer bait.
What’s more, with some of the modern commercial paste mixes reaching new heights of quality there has never been a better time to mould a piece round your hook.
If you’ve never tried it make the summer of 2006 your year of paste exploration - you won’t regret it!
Gary's top 5 paste tips
1. Take time getting the consistency of your paste right. It should be smooth, with no lumps and should just leave a slight residue on your fingers when you are handling it.
2. Keep it simple. There is no need for complicated rigs or shotting patterns when fishing with paste, let the bait do its job.
3. Try to fish as close in as possible. This makes soft paste a lot easier to fish.
4. Plumb the depth accurately using a plummet. The paste must sit perfectly on the bottom.
5. Feed regularly through the day. On commercial fisheries the fish are hungry, especially at this time of year, so you’ve got to keep some freebies going in on a little and often basis.
Pellets – the perfect fishing feed and bait
Pellets were originally created as an animal foodstuff or as a feed for stocked fish. The pellets were used to ensure that the animals and fish gained substantial weight prior to being sold to market. But anglers have latched on to these protein-packed food morsels and have discovered just how good they can be for attracting quality fish like carp, tench, bream, catfish, barbell and chubinto their swim.
They are produced by extruding. Basically the raw ingredients such as fishmeal and vegetable matter are mixed and forced through small tubes (called extrusion). This creates a sausage-like tube of the mix. This is then heated with steam to harden the mix. The final stage it to cut the cooked mix into the desired length. And that’s how they make pellets.
Luckily for all you carp, barbel, chub and catfish anglers out there, the large 21mm and larger halibut pellets needed another heat source to ensure that the centre of the pellets were cooked and harden. The only way this could be done was to force steam into the middle of the pellet, and that’s why some larger pellets were already supplied with a perfect hole in the centre that was ideal for a hair rig to be inserted. Perfect!
What do pellets do?
Basically, pellets are nothing more than compressed parcels of groundbait. Once submerged they will begin to break down and if they are left long enough they will form a carpet of fine mush on the bottom of the lake.
Some pellets take a lot longer to breakdown than others. Tiny 1mm pellets will take a few minutes before they turn to mush, while rock-hard 21mm halibut pellets will take weeks to fully break down.
As they are breaking down, the skin of the pellet will slowly begin to dissolve and if there is the slightest undertow in the lake the scent of the dissolving particles will travel through the water, triggering the fish to follow the scent and ultimately persuade them to pick up the bait, or mooch through the dissolved pellet particles looking for food.
Which pellet to use
We do have a large choice of different pellets available for us to try, from tiny 1mm micro pellets (smaller than a match head) to massive 21mm-plus pellets, so choosing the right one can be a little bit difficult sometimes.
Micro pellets are impossible to hook – they are designed to break down in the water really quickly and create a soft, highly-scented carpet of attractant that will pull fish right to your hookbait. Pellets from 4mm upwards are hookable, but they are also ideal as loosefeed too.
Halibut pellets – those rock hard, very oily, almost black pellets – are best used for either long-term sessions where it’s best to prime a swim and wait for those bigger fish to come along, or used as hookbait. These pellets are way too hard to be side hooked so the smaller pellets will have to be locked alongside the hook using a pellet band, while the largest halibut pellets should be drilled and then hair-rigged.
Expander pellets are another type of pellet favoured by match and pleasure anglers. Most expander pellets float when they are taken straight out of the bag, so they are perfect as a loosefeed when floater fishing. But to use them on the hook for the likes of bream, tench and carp, you will need to prepare them correctly.
To do this you will need a pellet pump.
All other pellets of a size large enough to be used as a hookbait will need to be attached to the side of your hook using a bait band. Alternatively they can be Superglued to the back of a hair.
Supergluing pellets
Gluing two pellets together around a hair is a great way to present a bait to the likes of barbel, chub and carp. All you need is a hair rig, some Superglue and two pellets that have perfectly flat sides.
Take a pellet and add a drop of Superglue to one of its flat sides. Lay the hair across the glue. Now squeeze the second pellet onto the glue and hold securely until the pellets stick firmly and the hair becomes trapped.
Drilling pellets
This is a technique favoured among catfish, carp and barbel anglers seeking to catch really big fish. They use giant halibut pellets for this technique.
You will need a drill bit or a bait drill, a hair rig, some bait stops and your large halibut pellet.
Take the halibut pellet and hold it securely by the flat sides. Push the drill into the centre of the pellets and begin twisting the drill to form a hole. Gently but firmly continue twisting the drill to deepen the hole. Do not be tempted to force the drill through the bait as you will only crack the bait.
Once the drill passes right through the bait you will be able to pull your hair rig through the hole, using a baiting needle, and lock the pellet in place using a row of three bait stops. One bait stop may not be large enough to hold the pellet in place.
Coarse fishing with casters as bait
Casters are the next stage in the life cycle of a maggot. They are the chrysalis of a maggot – a shell-like pupae that contains the soon-to-emerge fly.
Casters are slightly smaller than maggots and their shape is a lot more rounded. They are available at all good tackle shops and, like maggots, are sold by the pint.
Casters are a little bit more expensive than maggots due to the fact that they have taken longer to evolve than maggots, due to the fact that the maggot is stage two of the fly’s life cycle, whereby casters are stage three.
A pint of casters will cost around the £3 mark.
Casters are a superb bait that always tends to pick off the larger fish. Maybe it’s because the casters have a crunchy shell that the larger fish adore, or maybe it’s because the casters aren’t as often fished as maggots – but whatever the case, they certainly do make a great bait.
Turning your own casters
Although casters can be bought from tackle shops, there are times when they aren’t available as they have either sold out, or the bait producer hasn’t managed to run-off enough casters to go around all the shops.
To make a pint of casters you will need just over a pint of maggots – to take into account those that will die. The best maggots to use to create casters are white maggots. Coloured maggots just do not make good casters, probably due to the fact that they contain impurities, in the form of dies, that don’t help the fly’s metamorphosis.
When you get your white maggots home riddle them thoroughly and pick off any dead maggots and maggot skins by hand. You will now be left with a few maggots that have slowed their wriggling down and have started to transform into casters.
These should be tipped into a spare clean bait box and covered with folded sheets of damp newspaper, with the lid placed upon the box. Do not use dripping wet newspaper as the water may gather at the base of the bait box and suffocate some of the casters at the bottom. The best place to store these soon-to-be-casters is in a fridge.
Continue riddling your maggots twice a day, removing the casters and adding any new ones to the supply in your fridge. Within a few days you’ll have more than enough fresh casters to last a session.
Caster colouration and what it means
Buy a bag of casters and you’ll undoubtedly find casters of different shades. The freshest ones will be white or a cream colour, while the oldest will be almost black. Try to buy your casters as fresh as possible as they will not only last longer, they will give the fish a different bait to target – it’s amazing sometimes that a lighter coloured caster will bring about bites much faster than a dark one, and vice versa.
One thing to bear in mind, when you are buying or storing your casters, is the fact that the darker a caster becomes the more buoyant it will be. Light-coloured casters sink very quickly, while those much older, very darkly coloured casters will float.
Dark, floating casters can be used to great effect on occasions, particularly during the summer. Simply leave a helping of casters out in the sun (but beware of birds scoffing them all) and allow the sun to dry them out and turn the shell dark brown. A full day in the sunshine will crisp-up the shells, darken them dramatically and transform them into floaters. They can now be used on the hook to present a really slow-falling bait to catch fish on-the-drop, or they can be catapulted out as feed for surface feeding rudd or carp.
Hooking casters
Most baits are best used with a hook that matches the size of the bait, but casters are best used with a hook that fits inside the bait. A size 20 or 18 hook fits perfectly inside a single large caster, but that’s not to say that casters cannot be side hooked, they can.
The most important point to note when hooking casters is to do it gently and carefully because if the caster bursts it will become almost useless. And remember to use a very sharp hook!
Casters and groundbait
Casters are one of the best baits to add to groundbait. Why? Because they provide a mass of protein-rich food that the fish will happily feed upon once they find the flavoured groundbait crumbs. But another great reason why casters are so good in groundbait is because they don’t wriggle, therefore they won’t break up the groundbait as it flies or when it lands on the lake or river bottom.
Caster myths
A lot of anglers think that adding crushed casters to a groundbait mix will make it a lot more appealing to fish. Although the extra scent of the crushed casters will draw in fish, crushing the casters will do more harm than good.
The shells of crushed casters float and therefore as soon as the ball of groundbait breaks down, or a fish disturbs it, the caster shells will begin to rise. This will attract the fish and they will follow the rising shells, and they will move away from your groundbait.


