Adam Wakelin's way with winter skimmers
Winter feederfishing for bream can so often revolve around tiny little changes making a big difference and nowhere more so is this true than in the distance you fish at.
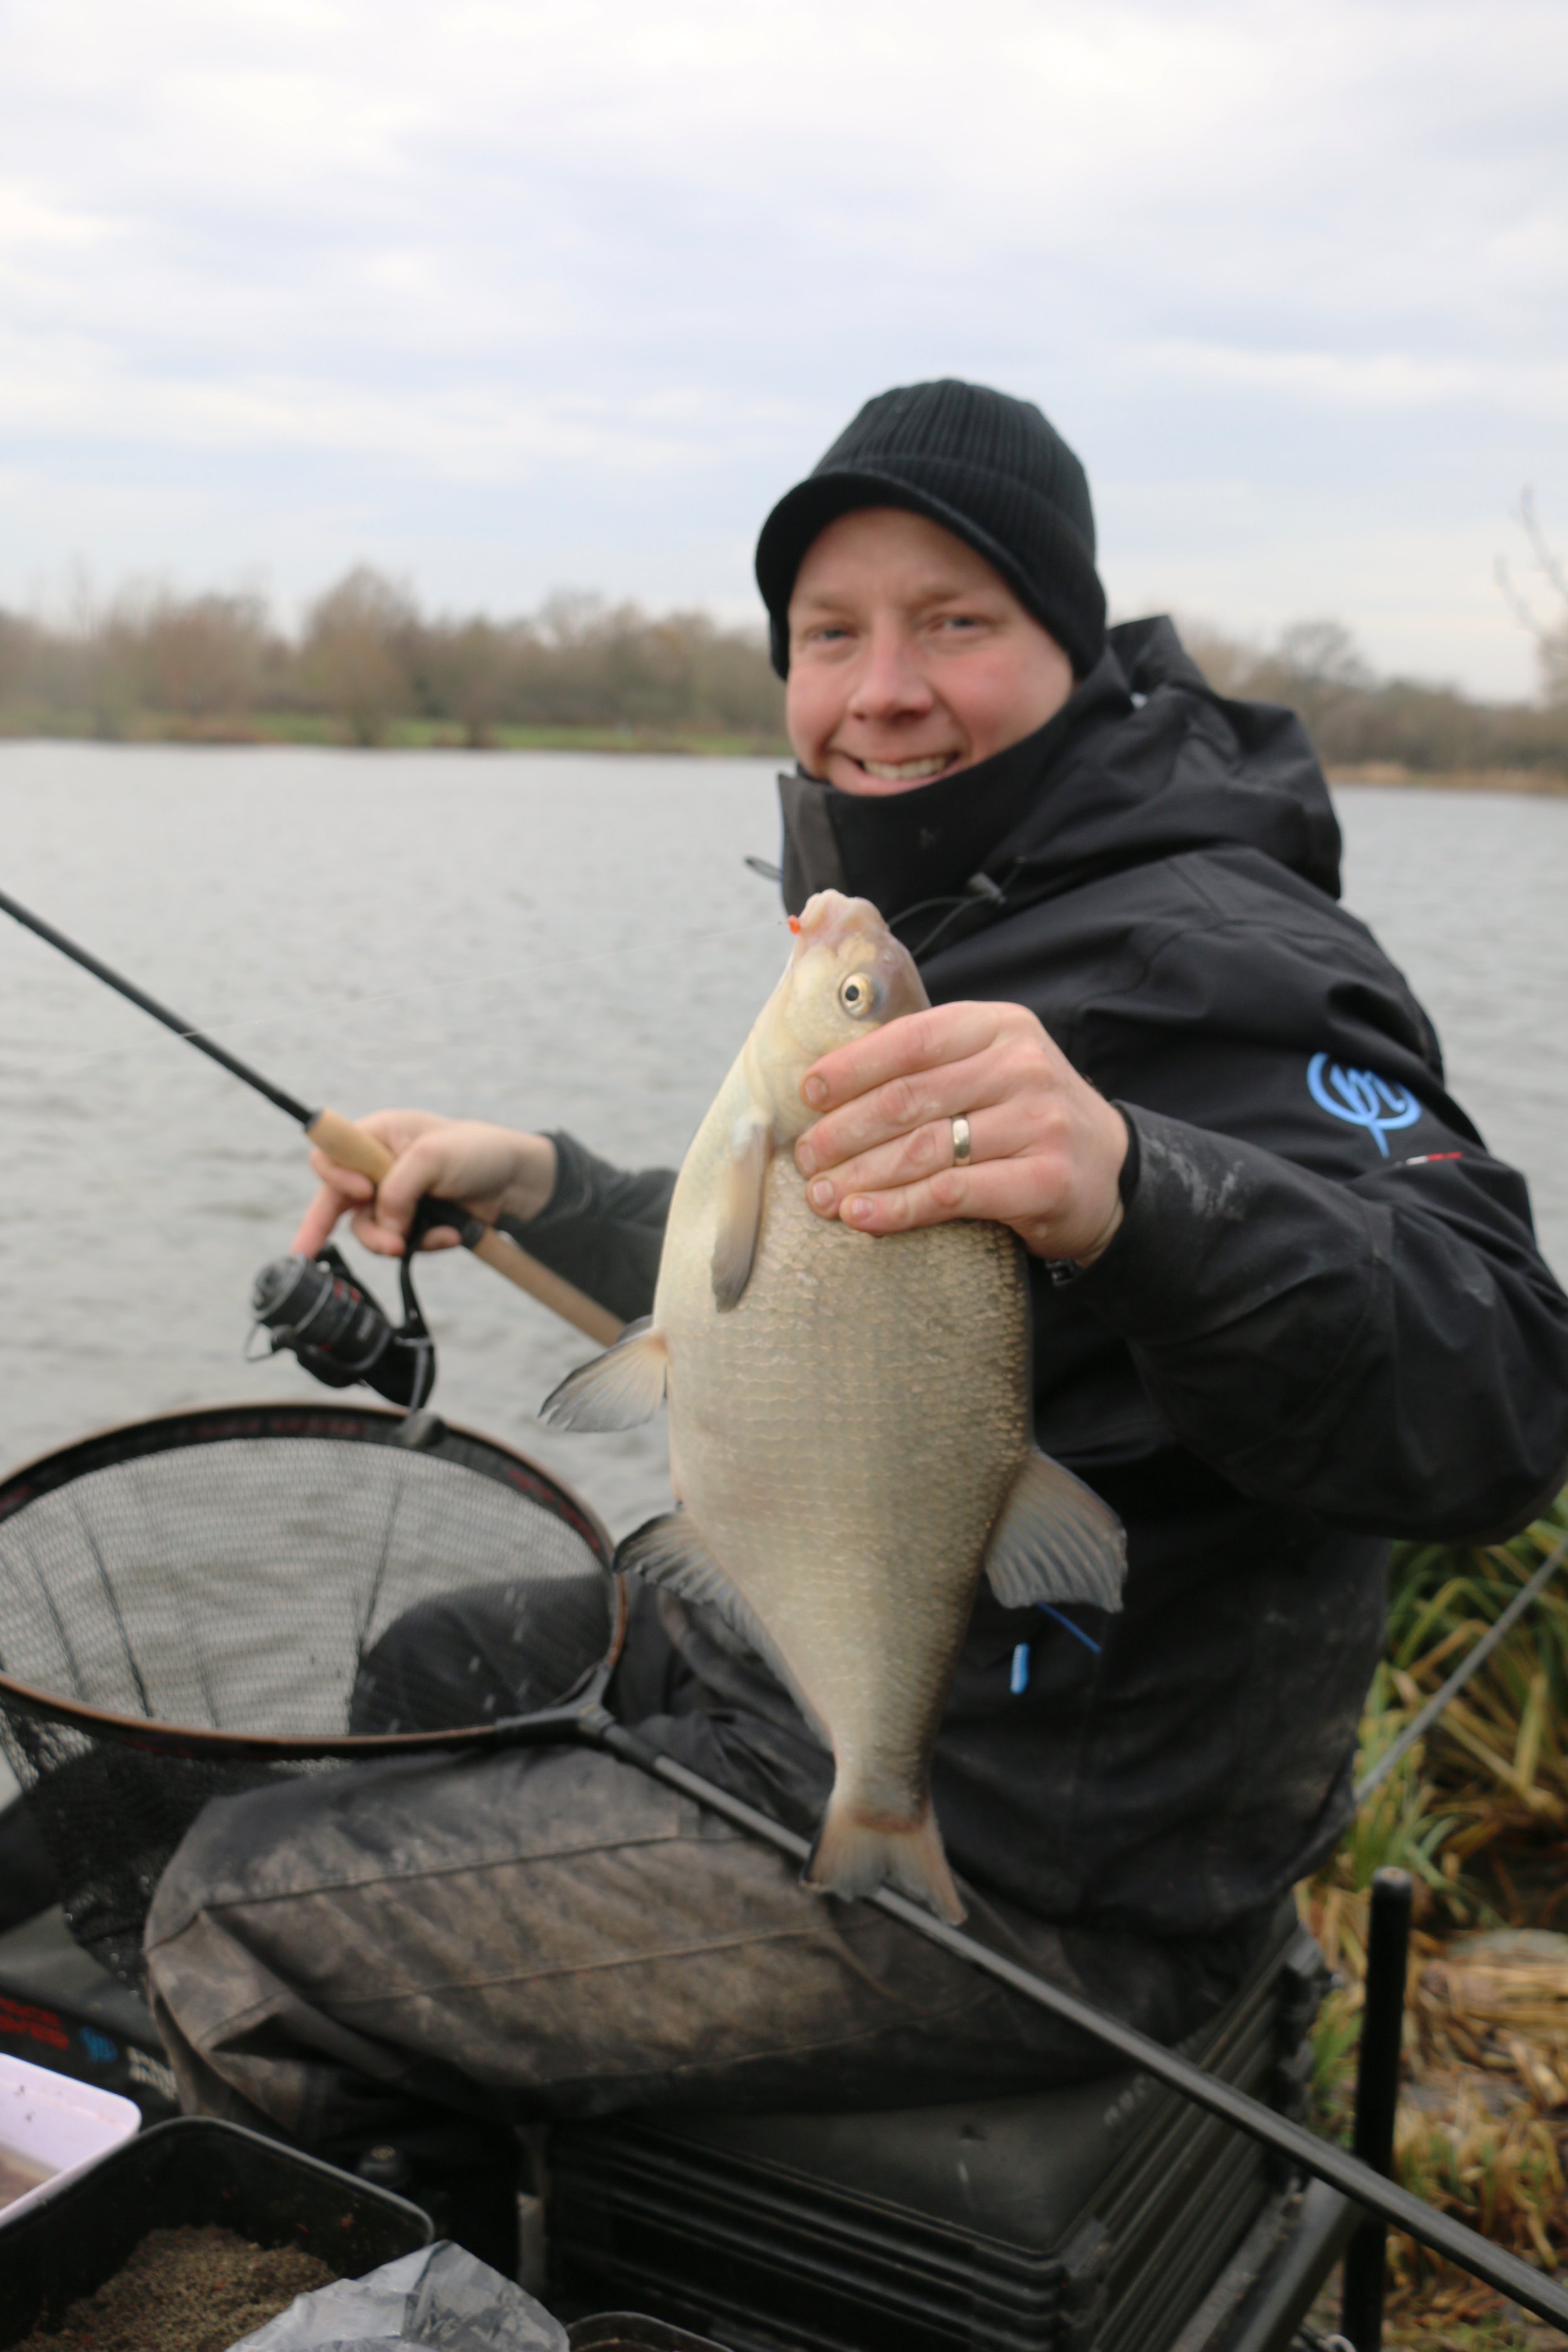
Plug away on one line and you will catch to begin with but when the bites die off, too many anglers keep at it more in hope than anything else that the bream will return. The truth is that they rarely do but nor is it the case that they have stopped feeding. Very often, the fish will simply have moved a few yards further out or even closer to the bank.
This can be down to clarity of the water and the pressure that’s being put on the fish when a few of their mates get caught but when the tip stops moving, don’t just sit there. Wind in, take a few turns off the reel or add a few and get back in. The change is often immediate!
The Main Lake at Barston Lakes is a typical example of this change. I’ve fished plenty of matches when the bites have stopped and you have to follow those bream around. It’s common at Barston for the bream to move closer onto a long pole line that pole anglers commonly fish and you almost need to have two separate lines on the go at once, allowing you to chop and change.
The right distance
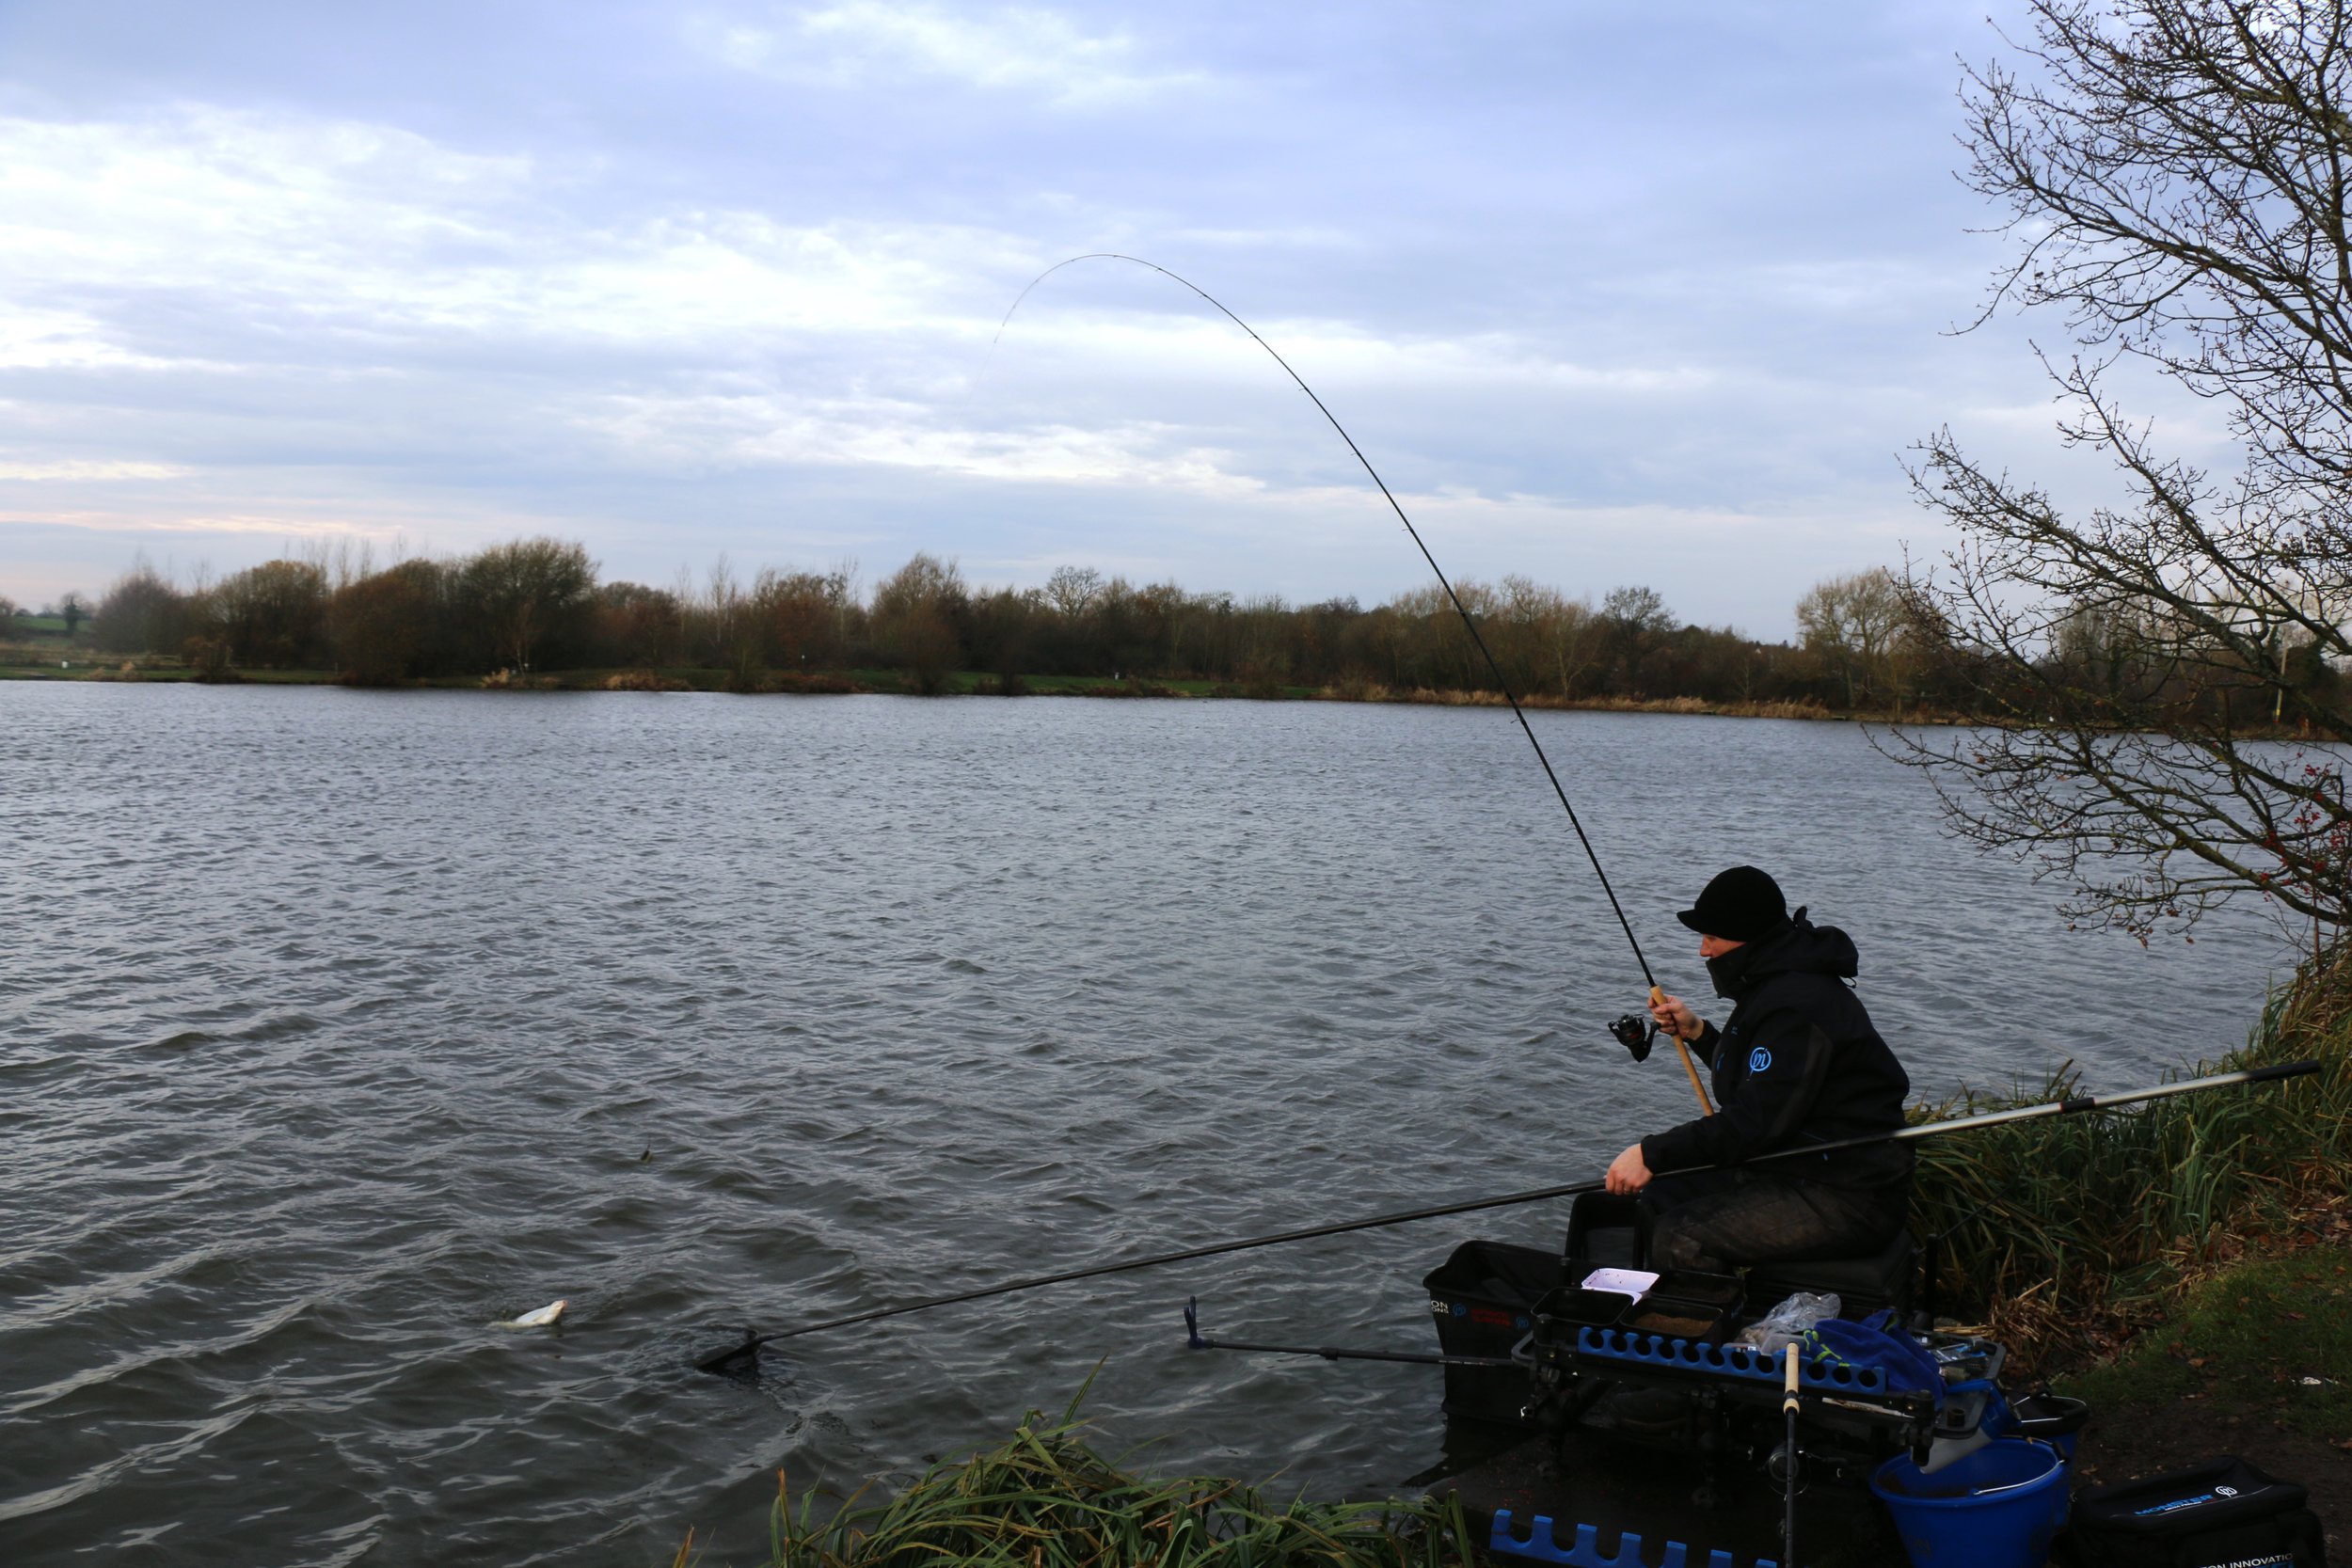
To kick off with and provided the water has a bit of colour in it, I will begin fishing at around 26 turns on the reel. This is a comfortable distance to cast but far enough out to encourage a number of fish into the swim. When it all goes quiet, it simply needs line adding or taking off the cast and I firstly go longer, only by four or five turns. If this doesn’t work then the fish may be closer in so I drop the cast to around 20 turns. Again, if this draws a blank then I may need to throw even further than I did. At some point though, you will find the fish and catch them.
Two feeders for two jobs
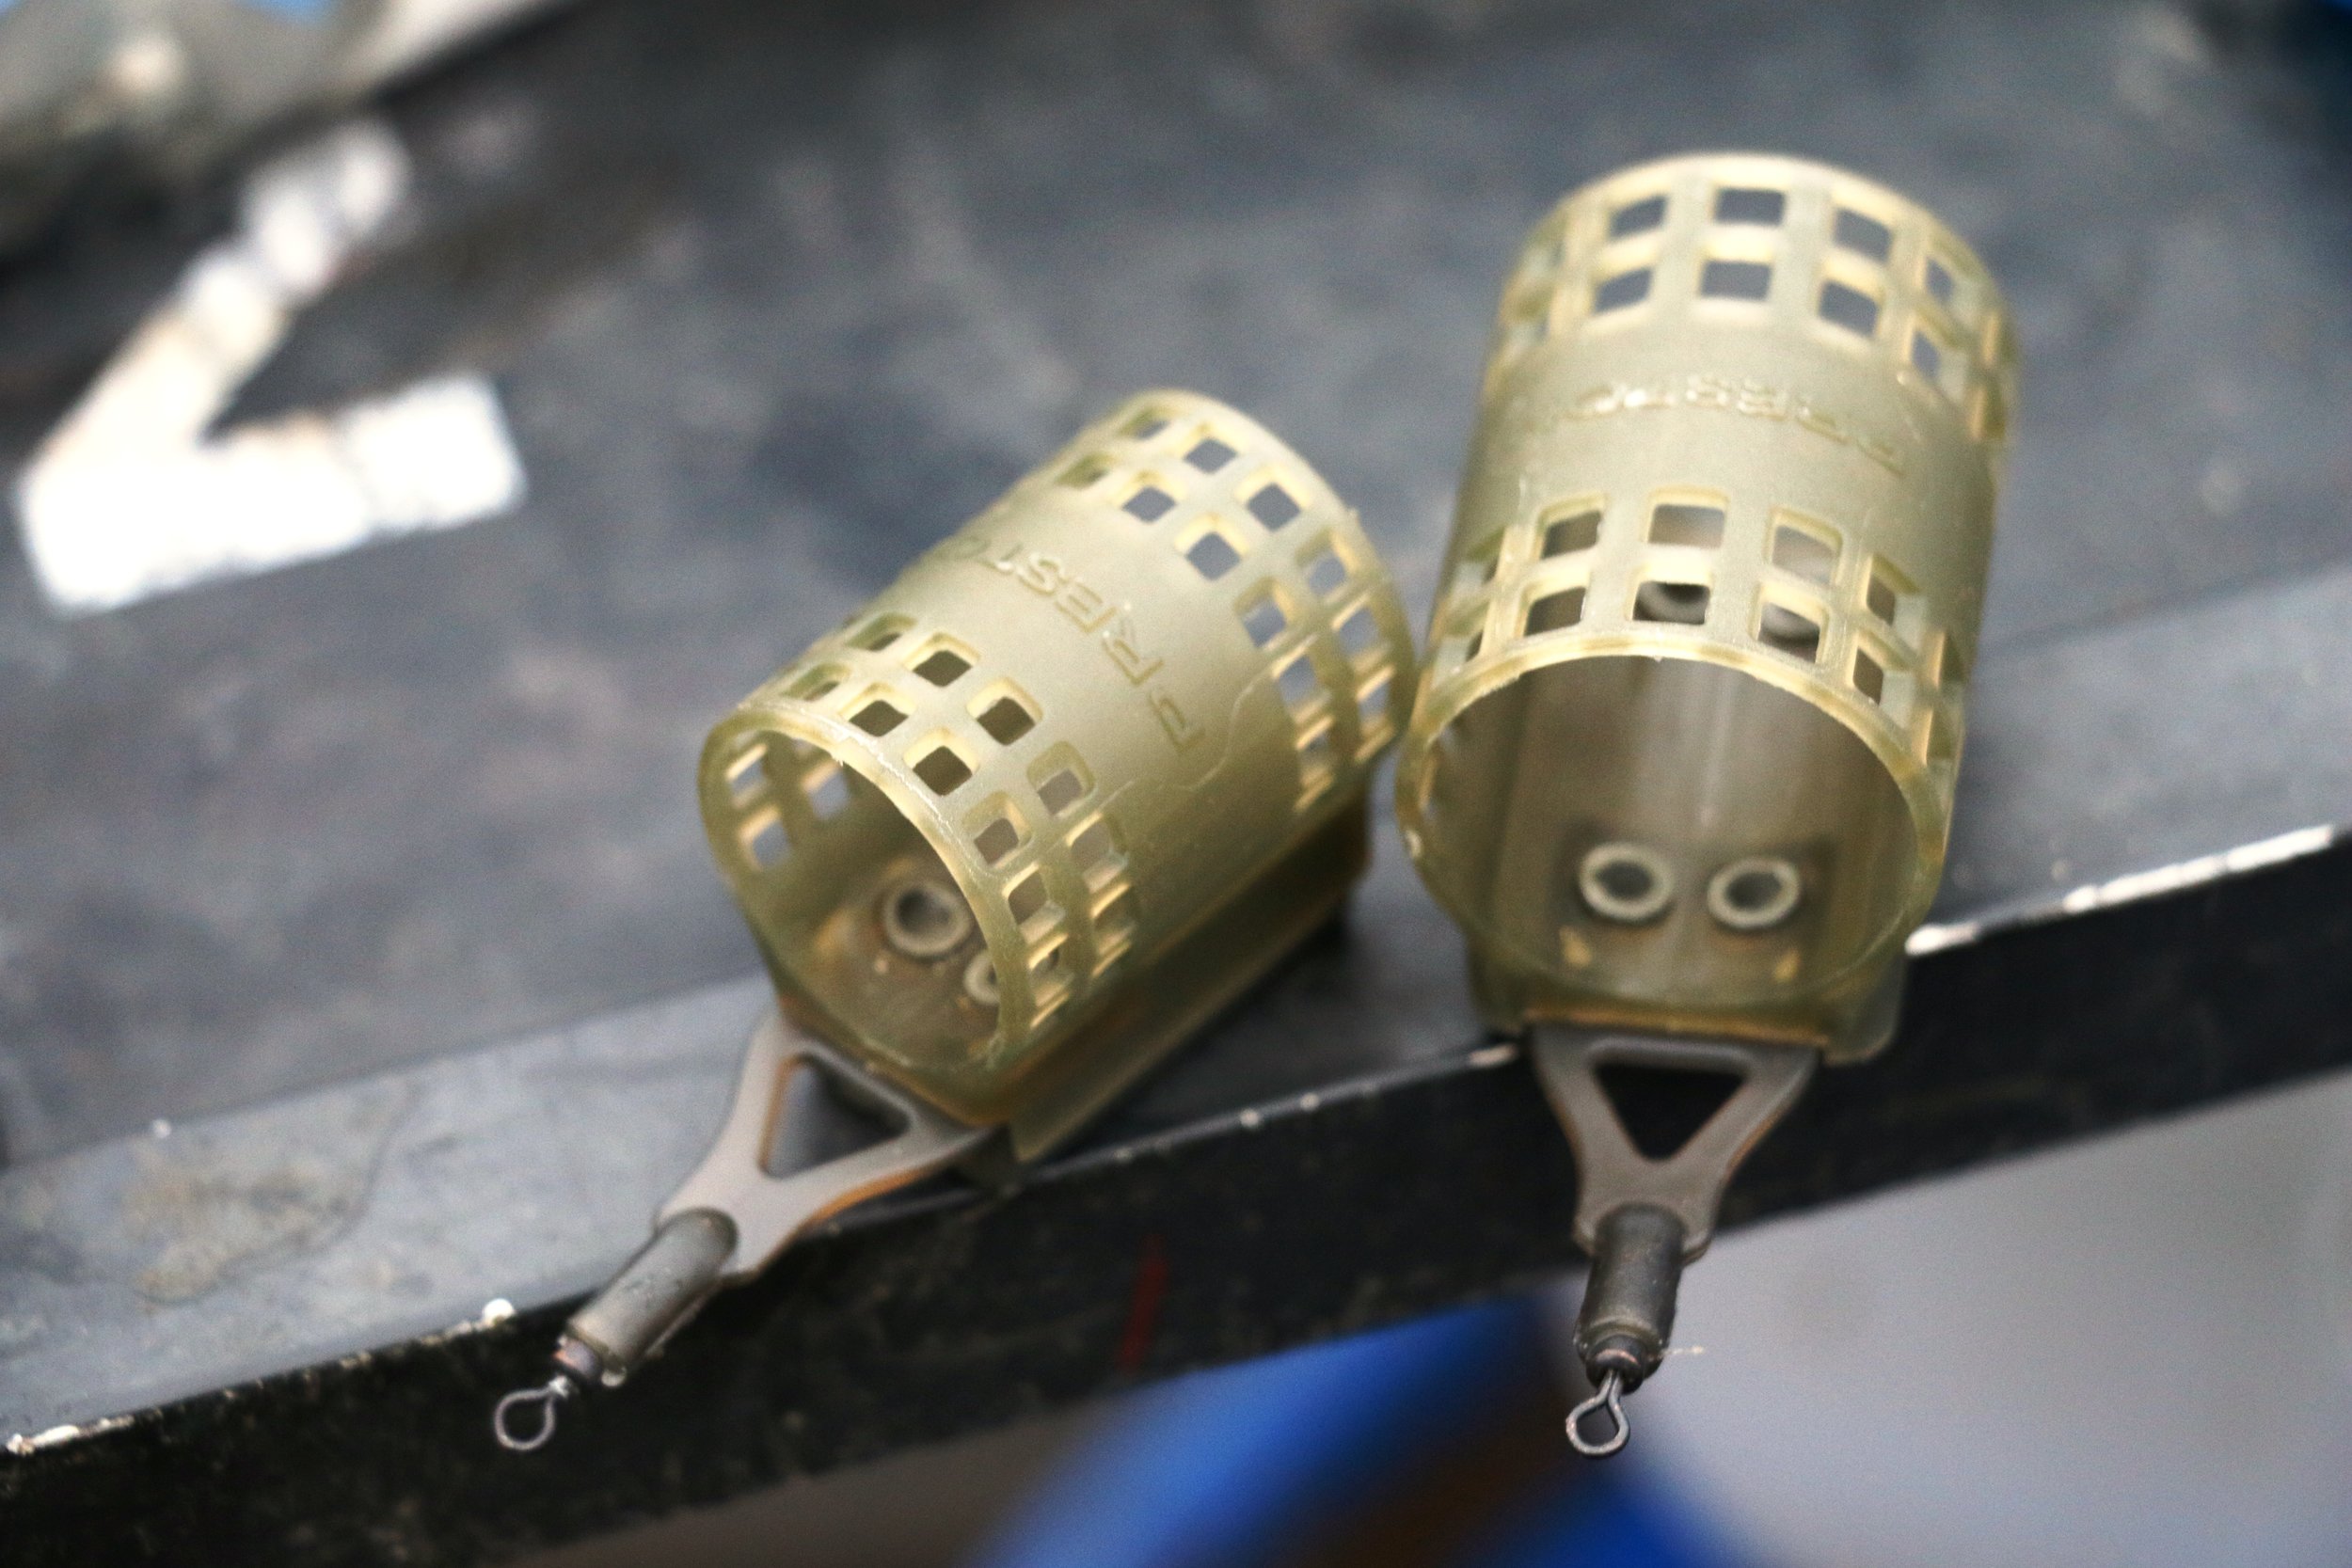
Although Method feeders catch a lot of bream in the summer at Barston, in winter I think the fish want groundbait at opposed to pellets so the cage feeder is the answer. The Main Lake is relatively shallow so a cage or plastic open end works well and my favourite is the Preston Innovations Plug It in the small 20g side, heavy enough to reach the spot but without putting in too much bait.
I will have a second rod set up though and this uses an in-line Cage feeder with a shorter hooklink. The reason for this is that because the bream are used to seeing Method feeders with the bait close by, they often attack the feeder to get the bait - the short tail puts the hookbait nearby. You’ll know if this is happening when using the Plug It feeder and longer tail because you will get a sharp knock on the tip very quickly after casting and then nothing. Then it’s time to change!
Rigging up
Things are relatively simple on this front with 4lb Power Max mainline to a 50cm link of 0.11mm Powerline (shortened to 8-10 inches for the inline Cage) and a size 16 PR412 hook. I do use a shockleader though, even with mono as it gives me a bit more poke when playing a bonus carp or F1 under the rod tip. This is several metres of 8lb Korum reel line. The rig itself runs on the mainline with the feeder on one of my home-made feeder links above a six inch length of twisted line to eliminate tangles. Needless to say I clip up to make sure I’m on the right spot each time.
Rod choice
It is easy to get an old favourite rod out of the bag every time but different lengths will make fishing so much easier. I have three of the new Preston Innovations Equis rods ready to go in my bag and for relatively short range, the 11ft model, a classic bream rod will do. However, if I need to cast beyond say 30 turns, then you will struggle to be super accurate unless you scale up to the 11ft 6in rod – that extra six inches really does make all the difference! There’s also a 12ft rod for really long casts when the water is clear and cold. Winter bream fishing in my experience is about distance and not depth – find the range that the fish are feeding at. The depth is irrelevant really.
Bloodworm and joker
These are baits that can stop a lot of anglers in their tracks. They think it’s too expensive and difficult to use but both are simply not true. A match pack of worm and joker is cheaper than buying half a kilo of worms and two pints of casters and you don’t have to faff around with leam to use it. Both are so natural to fish compared to casters or maggots and in winter when every bite counts, this is crucial.
The joker goes into my groundbait while bloodworm is used in bunches on the hook alongside dead maggots and pinkies. You don’t need to be packing the feeder with lots of goodies at this time of year so there’s no place for micro pellets, chopped worm or casters!

Three types of groundbait
Plain groundbait is okay to use when you are catching but in clearing water, I find that you need to put something in the feeder that makes something happen. Damp leam is the answer as this will put a bit of a cloud into the water that the fish can’t help but investigate.
So on my tray I have a bowl of just Sonubaits F1 Dark groundbait, a second bowl that is 50/50 F1 Dark and damp leam and finally a bowl of just leam. I’ll switch to leam when the swim seems dead or if I am changing lines and want to get things going quickly. When I’m catching again, I go back to just groundbait. To these feeds I will add a good helping of joker, not loads of the stuff but certainly enough to hold the fish when they arrive.

Hookbaits
Dead maggots and fluoro pinkies are my starting bait as a single maggot or double pinkie but as soon as I can, I want to get onto bloodworm. When I am catching well, I then make the change to five or six worms crammed onto the hook, perhaps tipped with a dead pinkie. Bream love bloodworm and once they find it, they can very rarely resist it!
Feel your way in
How long should you leave the feeder out there for? Surprisingly, the answer is not too long as I think that if the fish have been drawn in, a bite shouldn’t be long in coming. I don’t bosh in several feeders of bait at the start, preferring to build the swim simply with what’s in the feeder on each cast and I wait 10 minutes between chucks. If you are catching though, this will be much quicker and so you will be getting the feed in faster.
How to fish winter commercials
Here’s our extensive fishing guide to help you keep on catching on pole, waggler and feeder on commercial carp fisheries during the colder winter months.
It’s packed with handy hints, tips and advice that is sure to keep your float going under and your quivertip slamming around.
So, whatever style of fishing you prefer, take a good look through this in-depth guide and you’ll soon know exactly what changes you need to make to ensure you keep busy on the bank throughout November to April.
WHERE TO FISH
This is absolutely key to ensuring that you continue having fairly hectic sessions that will not only boost your confidence, but help keep you warm too as there’s nothing worse than sitting motionless for hours in damp and cold conditions!
Three key tips we can give you here:
Fish a commercial that you have fished during the summer.
Fish a commercial that’s well stocked with not only carp, but also roach, skimmer bream and chub if you can.
And choose a commercial that’s not too deep – average depth of 4ft with 2ft margins will be ideal.
Here’s the reasons why we suggest you follow those tips when picking a particular winter commercial water…
If you fish a certain venue in summer you will know where the lilies are and where any weed beds might well be. You’ll also know the depths of some swims so that will provide a lot of knowledge that will put you ahead of the game when picking a swim.
Carp will hold up within or very close to submerged lily stems and weeds during the winter – and that’s well worth remembering.
Picking a venue that’s heavily stocked with fish is an obvious one, but nevertheless some anglers keep on trying to catch from venues that are already difficult to fish in the summer – they don’t stand a chance when it’s cold!
The depth of the venue is key, and if there are shallower parts and deeper areas of around 4ft you are onto a winner because the fish may well be in the deeper water first thing in the morning (as the water will be warmest there) but then if it’s a sunny day with little wind the water will warm up significantly in the shallow areas and that’s where the carp will move during the afternoon.
PICKING THE RIGHT SWIM
Watercraft, past experiences in the summer and asking the right questions will all play an absolutely crucial role in finding the fish in winter.
When you arrive at the water, ask the bailiff or the owner where the fish were caught yesterday. It’s dead simple and it could put you on masses of carp.
If there’s no-one to ask, then watercraft and previous experiences come into play.
Watch the water closely to see any signs of life. Look for swirls, clouded water, bubbles – anything that could give away the presence of any carp. Even just the one small swirl at the surface could give away a huge shoal of fish as they pack together tightly during the winter so where you find one carp you’ll normally find masses of them.
Finally, past experiences will tell you where the lilies and weeds were during the summer. If you haven’t got anyone to ask and you see no signs of fish life, head for areas that used to be weedy as the carp won’t be too far away from those spots.
WATCH THE WEATHER
If you’ve got just the one day to go fishing and you’re going to go regardless, most of this section doesn’t count as you’ll not have a choice. But if you’ve got a week off and you could go any time during that break, choose your day wisely.
The very best time to go to a commercial carp water during the winter is after a few days of settled and mild weather. That’s when the water temperature will have risen and the fish will have become a little more active.
Note any direction of wind too. A southerly breeze is perfect as it brings with it milder temperatures and the promise of better sport.
If there is a wind blowing when you arrive at your lake, opt to fish with the wind hitting your back. Not only will you be more comfortable (as you can set up a brolly for protection) but the fish may well be sitting it out in the sheltered part of the lake as it will be warmer there.
We regularly use the internet for weather forecasts and there really is none better than Metcheck. It’s a free website that has provided us with near perfect forecasts for years.
THE BAIT TO TAKE
Less is more when it comes to commercial carp water fishing when it’s cold. Basically, you won’t need much bait, and below is a list of the typical feed and hookbaits that really work on a stillwater in winter and why. We don’t recommend you take them all – three feed baits will see you through a typical session.

Sweetcorn
Two tins will be enough. This sweet-scented bait is brilliant in the cold. Why? Because the smell disperses easily and will draw fish into your swim readily, plus the bright colour can be easily seen by fish. There’s no need to flavour it – just use it straight from the can. But remember to take your can home, or bin it properly. Carp, chub, bigger roach and skimmer bream love sweetcorn.

Fluoro pinkies
These brightly coloured mid-sized maggots are brilliant when it’s cold as they stand out well in the clear water, they don’t fill the fish up and all commercial fishery species are fond of them. One pint of fluoro pinkies should be more than enough for a day.

Worms
One of the very best attractors during cold weather is chopped worms. Dendrobaenas are by far the best for chopping up because they can be bought in bulk fairly cheaply, they emit lots of attractive juices and the worms are large enough to provide you with a multitude of different sized pieces to use on the hook.
The chopped worm pieces can be introduced by hand in the margins, cupped in over your pole line or added to your groundbait each time you fill the feeder up or throw a ball in.

Bread
A small chunk of bread flake works wonders on clear coldwater commercials. It stands out well and because of the lightness of bread, it flutters down to the bottom very slowly, ensuring that any nearby carp, roach or skimmer bream can see it and make a move to take it.
Bread is best fished in conjunction with a punch crumb groundbait, available from all good tackle shops. This groundbait needs mixing very carefully and it should be riddled after mixing to remove any large lumps.

Pellets
Both hard pellets and soft expander pellets will catch fish when its cold. If you do intend to use expander pellets on the hook, you should feed hard pellets as well to hold the fish in your swim.
Expander pellets are available pre-prepared, or you could simply pump them yourself.
The best feed pellets to catapult or cup in to your swim around your expander pellet hookbait are small ones – 4mm is about right during winter. The reason you should use smaller pellets is because they won’t fill the fish up so readily, and they break down quicker than large pellets to release a scent trail through the water.

Casters
These are well known fish-catchers when it’s cold. Half a pint of good quality casters (meaning a varied selection of light to dark colours) will be enough as they don’t wriggle into the bottom silt, so they won’t vanish out of your swim. Feed them very sparingly, or simply just use them as a change bait over the top of your loosefed fluoro pinkies or chopped worms.

Meat
Cubes of shop-bought luncheon meat work very well for winter carp. From half-centimetre to 2cm cubed chunks, they all work very well indeed. But care must be taken when fishing meat in winter as it is a very filling bait so only use chunks of meat on the hook and fish it over either small feed pellets (4mm or even micro pellets are best), or fish it over meat that has been cut into thin slices and pushed through a maggot riddle to form tiny morsels that can be squeezed into small nuggets and fed by hand, or introduced via a pole cup.
HOW TO FISH
There are a few fundamental changes you will need to take into account to ensure you keep catching throughout the winter, and they are all detailed right here…
Fining down
You may well have heard this phrase mentioned a lot when anglers talk of winter fishing. Basically it means whatever tackle you used in summer, reduce it for winter fishing.
If you used size 16 hooks in summer, use size 18 or even 20 in winter. If you used 0.14mm hooklengths in summer, use 0.12mm or even 0.10mm in winter. And straight wagglers should be replace with insert wagglers as they are more delicate to help spot tentative bites.
The same goes for pole floats too – use a slightly lighter rig than you would normally use in the summer, incorporating small micro shot rather than an olivette or bulk shot.
Quivertips need scaling down too - use the lightest glass tips you have to see those shy, gentle bites. You may even need a target board positioned at the tip of your rod so that you can see the bites.
Your pole elastic and reel mainlines can be reduced in strength too as the fish aren’t going to fight anywhere near as hard during the winter. No12 elastic maximum and 4lb mainline should do the trick on most commercials during the winter.
Swap power float rods for normal waggler rods, and Method feeder rods for straightforward leger rods.

Start on the bottom
If you are float fishing, always start your session fishing with your bait set overdepth as the fish are far more likely to be swimming around close to the bottom. As the session progresses you might get more bites if you use a shirt button style shotting pattern so that your bait falls gently through the bottom half of the water to get bites on the drop.
Feed very little
Tentative feeding is key in winter. Just a pinch of fluoro pinkies, casters or pellets, or three grains of sweetcorn is all it will take when you reach for your catapult or pole pot. And only re-feed your swim after you get a fish or you may end up simply filling the fish up with your loosefeed rather than catching it!

Search the water
Finding the fish is the hardest part of winter commercial fishing, and one of the best ways to find them is to use a leger rod and an Arlesey bomb. Create a simple leger rig, use a fairly light 2ft-long hooklength of around 0.12mm diameter high-tech line and a grain of sweetcorn on as size 18 hook.
Cast the rig out to a likely looking spot a fair distance from your peg and tighten up the line gently to create a slight bend in the quivertip. Now wait for 5 minutes to see if you either get a bite or spot a line bite.
Bites will be the usual ‘pull round’ of the quivertip, while line bites are quick plucks on the tip made by fish swimming into your submerged mainline.
If you start to see line bites that means there are fish in front of you, but they are somewhere closer than where you cast, so retrieve the rig and cast 10ft or so shorter than you did before.
Keep doing this until your rig lands amongst the fish and you start to get proper bites. And when you’ve found one carp, you’re very likely to find many more as they shoal together in winter.
Many match anglers use this searching technique during the winter, and may matches have been won using it too.
How to catch bream from Fenland drains

Fenland angler Paul Goult loves watching a swingtip rise to the gentle tune of a big drain bream. Here he reveals how to fish for bream at his favourite Middle Level in Norfolk...
Fen drains are 350-year-old man-made waterways, cut out of the surrounding marshland so that it could be converted into agricultural land. They also help to prevent flooding. They can be found nationwide, but the most numerous are in the East Anglian Fens.
Many anglers dismiss drains as a waste of time because of their apparently featureless appearance. Nothing could be further from the truth! With huge shoals of roach and bream, specimen tench and some enormous pike and zander, drains can easily throw up a redletter day, especially for those anglers prepared to put in the time to locate the fish and perhaps prebait as well.
Fishing on the King’s Lynn AA controlled stretch of the Middle Level Main Drain, Paul Goult was here to show us the quality of fishing that the drains has to offer and to put the Fens back on the angling map. Having fished this stretch since he was 12 years old, Paul has more than enough insider knowledge, and armed with his trusted quivertip and swingtip rod, he set-off in pursuit of some Fenland bream dreams.
Why drains?
“I just love the challenge of the drains,” says Paul, “Especially if you’re prepared to put the time in.” This is one of the most important tips Paul gave us.
The very fact that most drains are fairly featureless means you have to focus more on the little that is there. For example, pump houses are excellent places to target. They cut out a gully in the bottom and oxygenate the surrounding water – a classic fishholding feature. Other features worth targeting are lily pad beds or reed fringed banks. Another feature that can be excellent, especially for bream, is any spot where lines of gravel cross the drain – here the bottom can be heavily contoured. These spots tend to be rich feeding grounds, very attractive to all manner of species. Such areas can be difficult to find, but with the help of a local angler or a local tackle shop you will soon be put in the right direction.
Anywhere that was a hot spot in targeting today. Bream are creatures of habit, and tend to frequent the same places year in, year out.”
“The best time to target the huge bream shoals is after they have spawned – early July onwards, up to around about mid-October, just before the first frosts,” says Paul. As for the best time of day, during the summer Paul starts his sessions early in the morning soon after first light. As the colder nights set-in, you dont have to get up quite so early.
Here, a 10am start is all that’s required.

Tactics
Tactics on a drain can vary considerably depending upon the species that you’re targeting. For this session Paul had his sights set firmly on bream and so was looking to lean on a leger approach. After catapulting in six balls of groundbait, he generally starts with a simple bomb rig, combined with his trusty swingtip rod – a little used tool these days. With this method, Paul will also continue to fire two or three balls into the swim every hour. If the bream are being a bit awkward however, Paul will swap over to a feeder rig. “This can be a great way of pulling the fish in,” says Paul, “Especially when they’re really having it!”
Unlike a canal, most drains are deep, around about 13ft-14ft, with very steep sides. Due to this depth, the casting of a feeder or bomb won’t tend to spook the shoal, even if you’re casting every five minutes. This is further helped in that all drain fish are wild, with most having never seen a bait before.
Fishing the tip
Swingtip fishing these days has sadly become a bit of a forgotten art, but there is simply no bite indication system more sensitive – a belief strongly held by Paul. “I was brought up fishing the tip. It’s a fantastic method and much more sensitive than even the lightest of quivers. The other advantage is that the bites are unmissable, as the fish feels no resistance,” he says.
One of the main problems when bream fishing is line bites. This is amplified when the shoal is particularly large. With a quivertip it’s easy to mistake line bites for actual takes. This can lead to foulhooked fish and a spooked shoal. The advantage of the swingtip is that it increases the time for a bite to develop, particularly when using long tips like Paul.
“With a line bite, the tip may rise half way up and then come back to rest,” says Paul. “If it is a genuine take, the tip will rise all the way to the top and the rod will start to shake. Now is the time to strike!”
How do I fish the swingtip?
End tackle: Generally used with a straight leger set-up. The leger itself needs to heavy enough to avoid tangles and wraparounds if the tip bounces on the cast. Therefore look to use a lead of around about 1oz-11 ⁄2oz.
Set-up (A): The correct positioning for the tip is 20 degrees from the vertical, with the end of the tip just touching the water. This allows the tip just enough movement to indicate drop-back bites as well as forward takes.
Casting (B): Swingtips can be difficult to cast for the novice, but with a little practice it soon becomes second nature. Before making the cast, look to see that everything is clear and that the lead is hanging from the rod tip. Once the lead hits the water, keep the line slack to allow the lead to fall straight down. Keeping the line taut will swing the lead out of position.


Paul’s tackle
FOR his session today, Paul is using both a swingtip rod and a quivertip rod.
The swingtip rod is 12ft in length. This is fairly long for a swingtip rod but ideal for the drains because it allows you to reach over nearside weeds and to pick up line quickly on the strike – some of these drains require casts of 40 yards or more.
The tips that Paul uses are also longer than standard. “I prefer longer tips,” says Paul, “Because they allow you to read line bites more easily and allow more time for the bite to develop.”
One disadvantage of using a longer, larger swingtip is that they are more difficult to cast. It is therefore necessary to use a larger bomb than normal to avoid the tip swinging back on the cast and cracking off.
Paul’s quivertip set-up is slightly heavier than an average bream set-up, being a Preston Innovations Carbonactive 12ft feeder rod with the medium tip inserted. This is rated at around 2oz. “Slightly heavier tips are needed on the drains,” explains Paul.
“When the drain is run off, it’s surprising how much movement there is. Combine this with a little wind and it soon becomes obvious that a 1oz-11 ⁄2oz tip is just too light.”
Prebaiting
As drains tend to be relatively unfished these days, it’s a good idea to formulate a plan of attack. The first time that you target a particular swim, it’s always a good idea to prebait in order to pull the shoal in. Generally Paul prebaits a couple of times before fishing. “I’ll prebait one night, then two nights later, looking to fish the following morning.”
When prebaiting a swim on the drains, don’t be shy. The bream shoals can be huge and it won’t take long for them to eat half-a-dozen balls and move on. Paul balls in around 12 kilos! “For prebait bait I use pure brown crumb. During the session I add 25 percent Van Den Eynde Pro Gold. To this I also add a pint of casters, half a kilo of Dynamite Baits 4mm trout pellets and two tins of sweetcorn.”


1. Pour the sweetcorn and juice from its can into a polythene bag.
2. Add a few squirts of your chosen colouring or flavouring.


3. Powdered colouring can also be added – you only need half a teaspoon for a can of corn.
4. Blow into the bag, agitate the corn, and leave in the fridge overnight.
Additives
The addition of a bait additive to your mix can give you a great edge. Bream tend to have a very sweet tooth and with this in mind, Paul likes to add Sensas Aromix Bremes into his groundbait mix.
Around one third of a bottle is added to the water and mixed prior to being added to the groundbait.
“Another additive that I rate very highly,” he says, “is Van Den Eynde sweet liquid molasses. It’s a fantastic addition to groundbait and also a great additive to use with sweetcorn.”

How to fish the pellet cone

Pellet cones are great little tools for making compressed cylinders of micro pellets that sit on your hooklength, just above your baited hook.
These little parcels of strongly-scented goodies will quickly draw the attention of nearby carp, tench and bream, leading them to follow the smelly trail and quickly find your hook bait.
When cast out they put the micro pellet loosefeed in a small area around your hookbait - absolutely perfect.
It’s best fished on a straight lead rig with hair-rigged hookbaits such as mini boilies, corn and pellets, and is ideal for fishing for carp, tench and bream on commercials.
Use a rig which allows you to clip your 12ins hooklength on and off your rig. And it's also advisable to tie quite a few spare rigs too, just in case you suffer a breakage, the hook becomes blunt or the hair becomes damaged in any way.
Here's how to set up and use a pellet cone in five quick and easy steps...
Step 1

Soak a pint of 2mm or 3mm micro pellets in cold water for around 30secs, then drain and leave for 30mins. This should make them soft enough to stick together.
Step 2

Select the required size of cone and fill with pellets. Compress the pellets inside the cone tightly to ensure they are well packed in.
Step 3

Thread a baiting needle through the cone and pull your baited hooklength back through the cone by attaching the loop in the end of the hooklength to the needle.
Step 4

Pull the hook into the cone so that the hookbait sits directly underneath the cone. Remove the pellet cone by pushing at the thin end of the cone and slide it off your hooklength.
Step 5

Clip the loop on the end of the hooklength back into the snap link swivel, then you are ready to cast out.
How to fish the feeder for bream in rivers

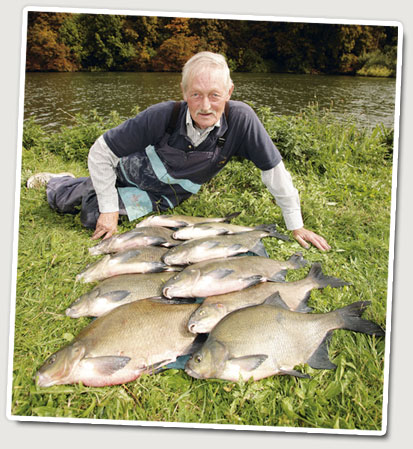
In 1956 a 15-year-old Dave Bosher, fishing on the Child Beale stretch of the River Thames, hooked his fi rst decent bream.
This fish started a love affair with river bream fishing that has continued for over 50 years.
Now, he’s back in the swim where it all began, an area that he has grown up near and fished in for the past half century.
Similar to all those years ago, the River Thames’ bream shoals are still here and they are here in abundance.
“I remember seeing shoals over 100-yards long and from bank to bank; literally hundreds of thousands of them,” said Dave.
“It’s a sight that I have never forgotten and it keeps drawing me back - year in, year out.” With a commendation this good, we just had to send the IYCF cameras along to the Child Beale stretch, located in Theale Park, near Pangbourne, Berkshire, for a masterclass in river bream fishing.
With five decades of know how and experience under his belt Dave had to be the perfect choice to take us through the finer points of catching big, slabsided River Thames bream…
THE FIGHT OF A RIVER BREAM

Punching his groundbait swimfeeder 60 yards across the river, it landed with pinpoint accuracy over the area he’d been baiting.
Moments later, a large splash on the surface revealed Dave had got the bream going - the fish were rolling over his bait.
“They’ve been having it all morning,” Dave revealed. “It took an hour to get the first bite, but since then it has been fish-after-fish.”
Placing the rod on his raised rod rest, Dave carefully tightened up to the feeder, placing a slight bend in the quivertip of his feeder rod.
A few minutes later he had a sharp line bite, no doubt caused by a big slad-sided bream turning in the water,. Within seconds the tip sprang back as a fish picked up his hookbait and dislodged the feeder.
A broad sweeping strike over his right shoulder saw Dave pick up the line and connect with a hefty fish. Standing up, to get a better angle to hold the bream out of the weedbeds littering the bottom, he deliberately played the fish towards the bank.
Unlike their flabby, lake-bound cousins that can fight a wet paper bag, river bream fight like tigers.
Once they turn their broad bodies into the flow, they use the current to test your tackle to the very edge of breaking point.
It took Dave over five minutes to bring the fish from where he was fishing, 60 yards out, to a position where he could successfully land the creature.
Once it was in the net we were able to appreciate why it had taken so long to land. Weighing just over 8lb, it was a magnificent specimen and testified how good river breaming can be.
PRE-BAITING
Being nomadic, pre-baiting an area the day before you fish can tip the scales in your favour. If you put a bed of bait down you should stop a shoal of bream in its tracks.
These fish are eating machines, spending their days searching for food. If you can give them a load of freebies, you should be able to hold them, as it gives the shoal the confidence to stay in the area.
“I pre-baited an area last night” explained Dave, “not only does this concentrate the shoal, but it helps to get their heads down feeding.”
Dave pre-baits with what he is planning to fish with. In this instance, it comprised four kilos of two-parts brown crumb, onepart Dynamite Baits Black Swim Stim groundbait and a kilo of 3mm pellets.
Although four-kilos isn’t a lot of pre-bait for a big shoal, Child Beale is a match fishing stretch, so it sees a lot of bait.
“I only want to put out enough bait to give the bream a taster of my groundbait mix. They will then be more receptive when it comes to the actual session.”
LOCATING THE SHOALS
One of the hardest things, with regard to river bream fishing, is trying to locate the shoal.
A nomadic species, they can roam for miles along a river, looking for food and stopping off in areas that offer consistent feeding opportunities.
This means the best place to start your bream quest isn’t even by the water. To short-cut the shoal search chat to local experts, such as a tackle dealer or bailiff, to see if you can pinpoint the rivers’ noted bream swims.
“The thing about this stretch is that bream are always here,” Dave said.
“Maybe there is a bloodworm bed out there that attracts them, but for whatever reason they’re always in the same area, year-after-year.
“My advice would be to ask around and once you have found a good area, remember it. Once you have found an area that they like, you have won half the battle.”
CASTING AND KEEPING THE SHOAL
As with stillwater feeder fishing, it is always best to line up the cast with a permanent far bank marker and cast to the line clip. This ensures you are accurately casting every feeder where you want it. Once you have the bream feeding in the area, cast slightly short of your prebaited area. Therefore, if you hook a fish you are not dragging it through the rest of the shoal, which will avoid spooking them. Dave’s final casting tip on rivers is DO NOT twitch the feeder back to empty it, as you would on a stillwater.
“By twitching the feeder back on this stretch you will only pull the hook into weed, ruining the presentation,” said Dave.

TACKLE
For his session on the Thames, Dave was using a Daiwa Connoisseur feeder rod combined with 6lb Berkley Trilene monofilament line.
Unlike many bream anglers, Dave never uses braid, preferring the stretch that mono gives.
“I find mono is more forgiving than braid,” he said.
“Once in the flow these fit river bream put up a tremendous scrap and as braid has no stretch, the fish can easily come off. On a river these fish aren’t shy and when you have to play a big fish through the flow, braid is a recipe for disaster,” he continued.
Six pound line may sound heavy for bream fishing, but when you are making around 100 casts in the day and playing 7lb-plus fish across the flow, it would be suicidal to go lower.
Correct quivertip choice is also vital when river breaming. On a stillwater, it is best to use a very light tip, such as a 1oz model, to register any shy bites. While you still need to fish as light a possible on a river, you must ‘beef’ things up a bit and match the strength of the tip to the strength of flow.
This involves a little trial and error, with Dave suggesting you carry a selection of different weighted tips.
“The best way to select a tip is to start light, around 2oz,” he explained.
“Then cast the empty feeder to where you will be fishing and put the rod on the rest to see how the tip reacts. If the strength of the river bends the tip right round, you are using too light a tip and it will offer too much resistance to a taking fish.
“If the tip remains arrow straight, then the tip is too heavy and will not show delicate bites. If the tip just bends slightly, it is spot on.
“This may sound time consuming, having to tackle down and re-tackle to change tips, but it is better to spend a few minutes getting things right now than spending the next few hours blanking.”
Dave’s choice of swimfeeder for the day was a Drennan Gripmesh. These cage style feeders are ideal for shallow water, but for fishing in deeper water Dave wraps PVC tape around them. This stops the groundbait exiting the feeder too quickly when it hits the water.
“The weight of these feeders is ideal for casting. The groundbait will add another ounce and this balances my set-up perfectly for casting to the area I want to fish,” Dave added.
Dave’s hooklink is 18 inches of 0.16mm (5lb 5oz) WB Clarke Match Team high-tech line.
Again, this might sound heavy, but the weed in the Thames can be very thick and a lighter hooklink will not give you the strength to land the fish. The hook is a strong size 14 Drennan Carbon Chub.

DAVE’S FAVOURITE HOOKBAITS
Four red maggots: This is Dave’s first hookbait choice and the bait he generally kicks off with. Four maggots are a little more selective, but if you start to get plagued with roach and perch swap to another bait.
Worms: Two small dendrobaena worms threaded up the line to leave the hook exposed is Dave’s unique way of presenting worms (below).
“It’s like a reverse hair-rig, where the bait is presented above the hook rather than below it as with a normal hair-rig set-up.”
Double caster: One of the all time classical bream hookbaits, casters are a bait that are loved by bream all over the country (above right).

HOW TO PUT THE GROUNDBAIT TO WORK
Plugging one end of his swimfeeder with groundbait, Dave filled it with casters and then plugging the other end,
He then cast five feeder loads of casters followed by five feederfuls of worms to lay a small bed of feed.
Retrieving the rig, Dave used some groundbait to sandwich casters inside his swimfeeder, threaded two worms onto the hook and cast towards the spot he’d prebaited the day before.
After an hour of recasting every 10 minutes, the bream moved into his swim and Dave started to get among the fish.
It was exciting fishing too, as every bream used the flow to test Dave’s tackle to the limit.
After spending a few hours watching Dave do battle with over 70lb of hardfighting bronzed bream, it became apparent that river ‘slabs’ are a very different beast to their lake-bound counterparts.
If you are the type of person that has always written off bream fishing as boring, lacklustre and dull, then you are definately missing a trick.
Maybe you should head down to your local river and have a few hours fun with these bronze-flanked beasts.
Let’s face it, these fabulous fish have kept Dave Bosher going back to the same swim for 50 years and you don’t get a much better commendation than that!