
Carp Fishing Tips | 10 essential tactics to summer carping
Carp fishing sensation Scott Lloyd has given us his top ten essential tips to carp fishing. Take a look below to see what you can add to your next session.
Large mat
Not only is having a well-padded unhooking mat an absolute essential for fish care, but the right one can be handy for transporting kit around the lake. I’m always on my toes and if I see an opportunity of a quick bite I want to be round there and on it. The Thinking Anglers mat is superb for protecting the fish, it folds on itself, and has buckles and straps. So I can transport a couple of rods, a net, some tackle and bait, all folded inside.

Binoculars
These have been a revelation for me in recent years. If the carp are within 30 yards of the bank, I can normally find them, but if they’re further out, the only clue to their presence can be a few small bubbles or a slight surface disturbance.
Sometimes you can’t be sure whether it’s a fish or just a bug going across the surface, but the binoculars will let you know just what’s going on, instantly. I use the Fortis ones and their range and clarity is incredible.

Strong, reliable hooks
Perhaps the most vital piece of kit in your entire armoury – strong, sharp, reliable hooks. The Thinking Anglers ones tick the boxes, and the chod patterns, in particular, could pull a car in! I know it’s all the rage, but I don’t tend to sharpen my hooks either, as any tinkering could potentially damage the point or weaken the hook.
Safe to say, if you have any doubt about the hooks you use, give something else a go

Fluoro leaders and putty
Having watched carp freak out countless times when they come into contact with mainline, I try to keep everything pinned down, particularly the 6ft or so above the rig. Fluorocarbon mainline helps massively, but with mono or braid, I’ll use a fluoro leader. To be extra sure, I add a few blobs of tungsten putty along the leader too, as well as putty or a tungsten dropper bead on my coated braid hooklinks.

Spare spools
I carry three spools each of braid, mono and fluorocarbon. Each one suits different fishing situations. I use braid the majority of the time, as it allows me to fish accurately and helps land carp in weedy situations.
However, not all lakes allow braid, which is why I carry the other two.
If I’m fishing close in, or with naked chods, then I use the fluorocarbon. If I need to fish a little bit further out, then I would use the mono, as it casts far better.

Headtorch
If you need to move in the night, make rigs or simply deal with a fish, the last thing you want to be doing is shining the light on your iPhone. A good quality, reliable head torch is vital. I take a spare, as well as plenty of extra batteries.
Cap and glasses
If I left these at home, I’d go to the nearest shop to buy some more – they’re that important!
The polarised glasses take off the surface glare and the cap shields my eyes. Both stay on my head at all times until it gets dark!
A good mix of baits
I like to carry a wide selection of hookbait colours, smells and buoyancies – bright pop-ups and wafters in both fruit and fish flavours, ‘match the hatch’
pop-ups, and some bottom baits – typically plenty of Krill boilies in both 12mm and 16mm.
I take particles too, especially in summer, typically hemp, maples and crushed and whole tiger nuts.
I also stash ‘extras’ in the van, such as pellets, powders, liquids and floating baits. These won’t go off, and ensure I can cover every eventuality!

Big leads
Carp in busy day-ticket waters soon learn to deal with standard set-ups, and most anglers use leads in the 2oz-3oz range. Having watched countless fish feed in the edge over the years, I know they find big leads much harder to deal with. I use anything from 5oz upwards.
Big leads also hold the bottom better, helping to counteract the effects of undertow or drifting weed.
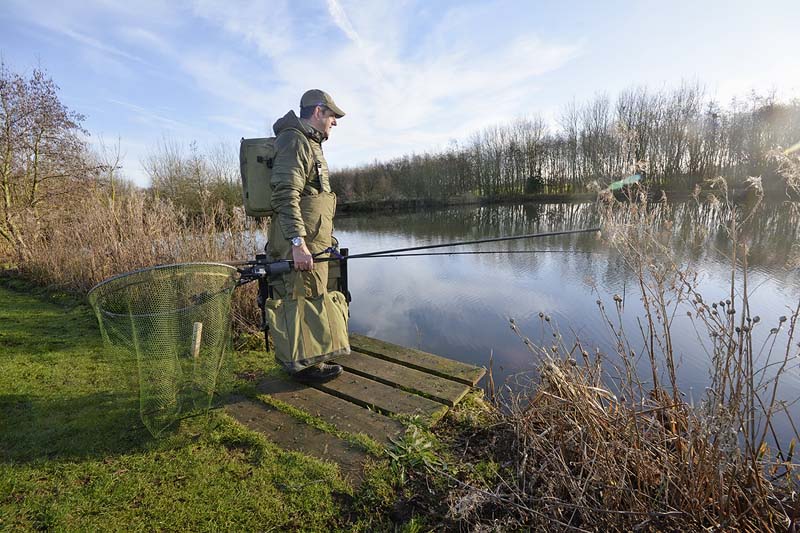
Waders
Not only are waders great for going into the lake and placing rigs, but they are also great for getting out in the water to allow you to get a better view of the lake.
On a lot of the places I fish, the swim gives you a narrow view and you are limited to what you can see.
With the waders, I get to go out on the shallow margins and look up and down the lake for carp.
They are also great for handling and dealing with carp, which makes them an essential in my book!

Match Fishing tips | How to use the shotgun maggot feeder
The maggot feeder is normally seen as a winter method on commercials when you need to eke out a bite from torpid carp and F1s – but it works in high summer too, reckons Middy and Dynamite Baits ace Dan Hull.

We’re not talking about the classic blockend model of feeder much-loved by river anglers in search of chub. Instead, Dan takes a feeder designed purely for commercial carp work and builds it into his summer maggot attack to produce a tactic that catches the carp but eliminates problems from roach and rudd.
It’s all down to the Sawn-Off Shotgun feeder from Middy, a new piece of kit that allows him to pack dead maggots and his hookbait inside a consignment of groundbait or micro pellets.
Once broken down, the feeder ejects the contents in one hit, something no carp in the area can ignore. More importantly, it won’t pull in small fish attracted by maggots leaking out of the feeder over a longer period of time.
It’s a bit like fishing the Method, as the feed breaks down to reveal the hookbait. With the Shotgun, Dan can also put a good helping of maggots by the bait to help big fish make their minds up in no time.
To put it all to the test, Dan visited Leicestershire big weight fishery The Glebe, home to lots of carp but also those potentially troublesome roach...
A mid-session winner
“There will always be spells in a session when the carp aren’t that responsive, and this often happens around midday.
“Piling in bait as you did at the start doesn’t work, and you’re left scratching your head a little bit, but this is where the Sawn-Off Shotgun feeder with maggots really pays off.
“By casting it across to a feature or far bank, as I have at the Glebe, I have ‘new’ water to fish for carp that haven’t had any bait fired at them yet and may have backed off from where I began fishing.
“Maggots are also a superb bait that carp don’t often see in the summer compared to corn and pellets, so if things slow down I’ll certainly pick the tip rod up and spend a fair bit of time casting the feeder.”

Why it works
“The Sawn-Off Shotgun allows me to tuck the hookbait inside the feeder and to dictate how quickly the contents come out. This means there’s no bait spilling out immediately, which can attract roach, and I am able to cast very tight to vegetation without any danger of the hook catching in branches or reeds. Getting as close as you can to cover can often make the difference between a quick bite and a long wait!
“How fast the feeder empties is simply down to how wet or dry I make the groundbait – the drier it is, the faster it will eject, whereas wetter and it will stay in for longer. This is also useful if you think too many small fish are being drawn in immediately.
“In shallow water, dry is best but in deeper swims, go for a damp fishmeal mix, my favourite being Dynamite Baits Swim Stim.”

Regular casting key
“Carp respond to noise in summer. Keeping the feeder going in not only makes this commotion but also ensures that plenty of bait is going into the swim.
“Chucking every two or three minutes, as you would a Method feeder, is perfect. The aim of the game is to get quick bites once the fish have turned up and are tuned into the feed.
“Bites can be aggressive but I’ll wait till the tip pulls right round and won’t strike at small indications from active fish swimming around the feeder.”
Filling the feeder
“To load the Shotgun I fill the body with dead maggots and then cap it off with groundbait or, if you prefer, dampened micro pellets, which are particularly good in deeper water.
“I then either leave the hookbait hanging out of the feeder if I think I am going to get a fast response, or I will tuck it inside the feeder should roach be about. Tucking the bait in should produce an unmissable bite as the contents of the feeder empty and the carp sucks on every maggot that it can find.
“A hooklink of around 6ins is ideal, ensuring that the hookbait will always be close the feed once the Shotgun has emptied.”

Match Fishing tips | Pellet waggler tactics to help you catch more!
There are plenty of anglers that just can’t get along with pole fishing and they’ll never cash in their rod and reel.

Many in this category regularly rely on the feeder to get their fix but we’ve reached a time of year where it just isn’t as effective as it was a few months ago.
While it is still deadly up against islands and in shallow water, it can be a long wait in between bites when chucking into deeper water because many of the fish are sitting off the bottom.
The answer to the problem is simple – switch to the waggler! This style enables you to explore the entire water column and Dan Hull wouldn’t be without it.
“When the water is cold the fish are likely to be close to the bottom but now that is has warmed up they could be sat at any depth,” explained the Dynamite Baits and Middy-backed angler.
“The beauty of the waggler is that it enables you to make subtle tweaks that can put you in touch with fish in an instant.”
But there’s much more to it than just chucking out a waggler and merely hoping for the best as Dan revealed…

Discreet or blatant?
There are lots of elements that will determine how many carp you catch. Arguably the most important of the lot is the type of float you use.
Modern waggler fishing on commercials is widely associated with using a float that causes a commotion when it hits the surface. This noise draws in fish that link it with the sound of food breaking the surface.
That isn’t always the case though, and analysing the form of the venue and the conditions is a must before make your choice.
“If you are on a venue that is in top form and you are fishing in really warm conditions then a chunky pellet waggler that makes a lot of commotion will work well.

“Alternatively, if anglers have struggled of late then it pays to use a more traditional, lighter waggler that will enter the water more discreetly. This is because fish that are cagier and not actively looking for bait are more likely to spook away from any disturbance rather than being attracted to it.”
Setting a routine
Whatever type of waggler you use, you can’t afford to be lazy. When presenting a hookbait up in the water, the carp will smell a rat and ignore it if it’s sat motionless for long periods.
Casting every 30-60 seconds keeps the hookbait falling through the water column and a similar routine is also required when it comes to feeding.
“I only feed five pellets each time I pick up the catapult but I’m doing this every 30 seconds,” said Dan.
“I feed just before I cast out and then if I don’t get a bite within 20 seconds I twitch the float and ping a few more over the top. If that still doesn’t work I repeat the whole process.”
The only exception to this rule is when he suspects the fish are still in the peg but have wised up to the routine. In this scenario, he makes a couple of casts without catapulting any bait. This forces any carp that wants to feed to take the hookbait.
Dan starts the session fishing at 2ft deep. Failure to catch at that depth indicates the fish are sat below his hookbait and he adjusts the rig to fish a foot deeper. On the flip side, he shallows up in six-inch increments if he is missing bites or foul-hooking fish.

Picking your bait
Pellets are the only bait that Dan feeds when fishing the waggler for carp at this time of year.
The size he uses is dependent on the distance he is casting.
“I use the smallest pellet I can get away with to reach the spot where I think the fish are. More often than not 6mm pellets do the trick but if I need to go further and can’t reach the area with them, I step up to heavier 8mm pellets that can be catapulted the required distance.”
In most situations Dan matches his hookbait to what he is feeding. From time to time, however, it can pay to hook something completely different to fool any bigger, wily carp. A Dynamite Baits Washter is his change bait because they sink at a slower rate than pellets, giving fish that aren’t actively feeding and sat just under the surface the chance to engulf it.

Working the peg
Feeding the same spot is an area to work off but every cast doesn’t need to go in the same hole!
“It’s inevitable that the odd pellet will fly away from the target and I am convinced that the bigger carp that are caught less often sit back and feed on these.
“With this in mind, casting a few feet away from where you feed can produce the goods from time to time. I’ve lost count of the number of times the bites have dried up and then a chuck to a random spot produces a proper lump!”
Put in the effort then there’s very few tactics that can offer the excitement of summer waggler sport.

River Fishing Tackle | 10 essential items for the new season.
To celebrate the new river season, Angling Times staff have picked out 11 of their favourite tackle items they wouldn’t be without on the bank.
From specimen barbel and chub fishing to silver fish on the float, these items of kit come highly recommended after months and, in some cases, years of use.
DINSMORES TEAR DROP BAIT DROPPERS
A bait dropper gets a bed of bait down fast, and Dinsmores Tear Drop versions are some of the best – reassuringly heavy and super-easy to use.
The 60g, small version is ideal for slow-moving water, or where a smaller amount of bait needs to be dropped. The medium size (120g) is great for faster rivers.
Price: £9.99, £13.99

VASS WADERS
VASS includes thigh, waist and full chest waders in its portfolio but my favourite is the Vass-Tex 305-5L – tough, breathable and up to three times more waterproof than other waders.
You get padded knee joints, reinforced boots and a zip-tight chest pocket to store bits and pieces. Elasticated shoulder and waist straps ensure a snug fit.
Price: £249.99

Visit: ww.vassrainwear.co.uk
DRENNAN AND DH ANGLING STICK FLOATS
I love float fishing on my local River Nene and have two favourite patterns – Dave Harrell’s No1 Insert Sticks and Drennan Big Sticks – for fishing in depths from 4ft to 14ft.
Decent shoulders on both allow me to slow the rigs down when bream and skimmers are the target.
For up-in-the-water roach and dace fishing the hollow, high-vis tips on the DH Inserts offer sensitivity, while the heavy wire stems settles them quickly.
Drennan Big Stick: 2BB (1g), 3BB (1.4g), 4BB (1.75g), 5.5BB (2.25g), 7.5BB (3.5g). DH No1 Insert: 2x4, 4x4, 6x4, 8x4, 10x4, 12x4, 14x4. Price: £1.85 to £2.25

VAN DEN EYNDE SUPER ROACH GROUNDBAIT
Slow, deep Fenland rivers and drains call for a mix that will get down fast and hold plenty of loose freebies without breaking apart.
In natural brown or dark black, Van Den Eynde Super Roach is just that, and works equally well for skimmers and roach. Use it in the feeder, ball it in or introduce it with a cupping kit.
On the tidal rivers of the Broads, Super Roach will make short work of getting down in 12ft of fast-paced water. In shallower water, you can ‘lighten’ it by adding Van Den Eynde Special or Supercup.
In 1kg bags, Super Roach will always find a place in my bait bucket for summer river fishing.
Price: £3.99

DYNAMITE BAITS BIG FISH RIVER RANGE
I started using these last season, and was so pleased I’ve already stocked up for the season ahead.
My favourite for chub and barbel is the Cheese & Garlic flavour – I use the groundbait, Buster hookbaits and paste. The groundbait is particularly effective in a large feeder plugged both ends to deliver pellets and boilies.
The paste is great in coloured water, wrapped around a boilie.
Price: From £4.99

DRENNAN SPECIALIST BARBEL HOOKS
A MUST for any river angler targeting chub, barbel and carp, these hooks are Incredibly strong and super-sharp, and extremely hard for fish to deal with.
In sizes 4-16, they can be used with a wide variety of baits and presentations. A Teflon coating significantly reduces glare on bright days.
When roving and rolling meat for summer barbel you can guarantee I’ll have a size 6 Drennan Specialist Barbel hook on – they hold the bait perfectly.
Price: £4.25

DAIWA HYPER SENSOR LINE
Daiwa’s iconic Sensor line is tough as old boots, holds a good knot, doesn’t twist easily, and is very sensibly priced.
New Hyper Sensor does all the above but its lower diameter makes casting easier and its low-stretch properties put you in immediate control when trotting a stick or waggler. Shot can be moved around without causing annoying pig-tails. Basically, the best just got even better. On 300m spools.
Price: From £6.99
NISA FEEDERS
The wide, canalised North Bank of the River Nene responds well to feeder tactics with soft groundbait, a long tail and red maggots, and my favourite pattern is the Nisa Open-End.
They come in several sizes and weights and are strong and reliable, attached running-style via a link swivel and tough rubber band.
Sizes: Mini, Small, Medium and Large in weights from 12g to 44g.
Price: From £1.49
DAIWA 13FT POWERMESH SPECIALIST FLOAT ROD
For floatfishing for barbel the 13ft Daiwa Powermesh Specialist Float Rod is the perfect choice – incredibly strong yet very light in the hand. As you will be holding the rod all day long this is very important, and the 13ft length allows for excellent float control.
Price: £107.99

DRENNAN SPECIALIST LANDING NETS
A good net is crucial for big barbel and chub and you’ll struggle to beat Drennan’s Specialist Landing Nets.
In sizes from 18ins to 26ins, they are comfortably big enough to land any barbel you may hook, and the deep mesh is perfect for resting a fish.
The frame is fixed to a solid spreader block, rather than having put-in sections, and this allows fish to be lifted with ease up a steep bank.
Price: £19.95 - £24.95

River Fishing Tips | SIX early season tactics to keep you catching
The river season is here and to help you get started in the best way possible we’ve gone to specimen ace Dai Gribble to give us his best early season river fishing tips to help you catch more this year.
1) Beat the vegetation
On many stretches of river the bankside vegetation will have grown up during the closed season, making many swims you fished back in March difficult to access.
Make sure you have the appropriate clothing to be able to get to such swims – you don’t want to be restricted in your choice of spots because you’re wearing shorts, for example. It’s far better to wear nettle-resistant trousers to avoid having to tiptoe into swims like a ballet dancer!
Shoulder-high vegetation brings insects, many of which bite and sting, so make sure you have some insect repellent and anti-histamine tablets with you to ensure you don’t have to cut your fishing trip short.

2) Go for visible baits
One of my favourite methods on rivers at this time of year when visibility is good is stalking.
Casting a bait to a fish you can see, and hopefully watching it take it, is exhilarating stuff.
I find natural baits such as lobworms, slugs and even snails are perfect for this approach.
Not only are such baits fairly heavy, meaning they can be cast easily with no added weight, but they are very visible. This makes it easier to spot when a fish has taken the bait.

3) Protect your hookpoints
When legering in a river, opt for a hook pattern with a beaked point, which is least likely to be damaged on gravel or other hard items on the river bed.
This is particularly important in rivers as the current will move the hook around until it settles in one position, and it is this movement that increases the risk of damage to the hookpoint.
Even with beaked point hooks it makes sense to check the hook for damage between each cast, just in case.

4) Use bigger floats
Using as light a float as possible might seem logical to improve sensitivity when fishing for roach, dace and chub, but in many cases that is at the cost of control.
A heavier float is easier to control and a well-controlled float will lead to more bites, as the bait will be far better presented.
When using floats such as Loafers and Avons with the line attached top and bottom, it is essential that your line floats.
Spray your spool with silicone line flotant before tackling up to ensure the line immediately above the float is well coated.

5) Make a barbel mix
Pellets are a very effective bait for barbel. My feeder mix will draw the fish in and keep them feeding for longer.
I use Hemp and Hali Crush groundbait and Sonubaits Barbel Pellets mixed in a 3:1 ratio.
Small particles are best for keeping fish in your swim and I use a range of sizes of pellets from 2mm up to 6mm, so the fish don’t get preoccupied on one size of bait.
Make the mix firm so it stays in the feeder and gradually breaks down, releasing a trail of attraction downstream.

6) Wade Safely
Wading makes swims more accessible for floatfishing on rivers when you’re after barbel and chub – just remember to take care.
Never go wading into water where you’re not sure of the depth, and either use a wading staff or a landing net handle to check the depth in front of you.
Get your kit prepared too – I tend to wear a small tackle bag around my waist to store bait and any rig essentials I might need, but remember not to overload yourself.

River fishing tips | How to use a waggler on summer rivers
Small rivers in summer can be prolific and frustrating in equal measure. The problem is that often you can see hundreds of fish in the clear water, but catching them can be difficult!
Never fear, top match angler Mark Pollard is an expert on these waters, and for this week’s lesson he offers some timely pointers for the early season…

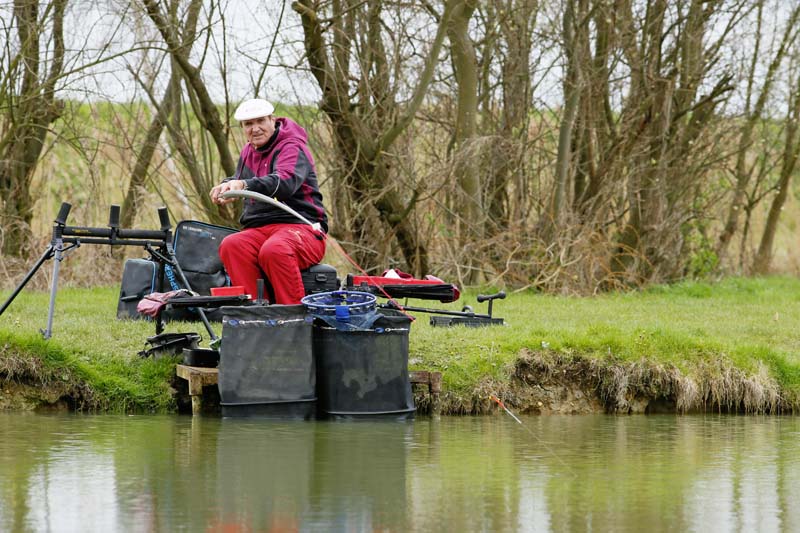
Swim selection
“Spot an overhanging tree that a huge shoal of dace is basking under, or a clump of reeds that a big chub keeps investigating, and it would be so tempting to plonk your seatbox down right in front of the fish-holding feature.
“But minutes after unloading your tackle into the peg you’ll once again scour the water excitedly and the fish will have mysteriously vanished.
“I will always place my box well upstream of where I eventually want to catch the fish. If you sit right on top of them they will definitely move off elsewhere, so it is better to try and catch them from further away.
“It is important to make sure that the area between where you are sitting and where you intend to get the bites is free of large snags and obstructions, as you will need a clear area to run your rig through and bring fish in.”
Careful feeding
Maggots and casters are the best bet when silver fish and bonus chub are on the cards. You have to keep feeding if you want the fish to feed confidently, and it is important that you do it right.
I let my rig start running through the swim and aim to have my loosefeed land a couple of metres behind the float. It will catch up with your hookbait at the point where you are trying to get a bite, making your rig look a lot less suspicious to the fish.
I want to feed the fish just enough so that they will start to compete, but at the same time I need them to find my hookbait quickly so that I get a bite each time the rig runs through.
Hookbait depends on the size and species you are targeting, but triple maggot or caster is a winner when you are trying to fend off small fish, while a single maggot works best when you are happy catching fish of all sizes.

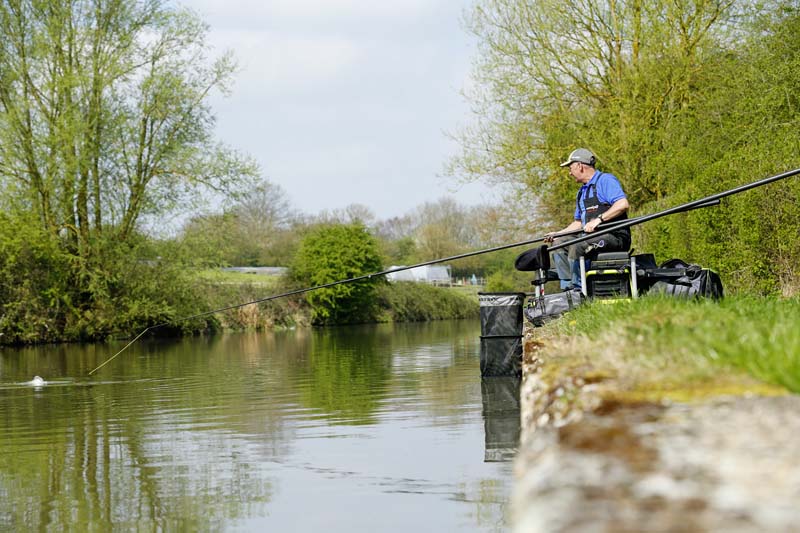
Leave the pole alone
Waving a long length of carbon over the top of the shoal of fish will instantly spook many of them. A waggler is a much better option.
I like to run the float through the swim, allowing the current to push it through to make the hookbait move at a natural pace.
A swim that is fairly slow-moving will enable you to have full control of how the float trots. I always leave the bail-arm open and this allows me to let the float run as far as I want, while also giving me the option of placing my finger on the spool every now and then to stop the rig moving.
A 3g or 4g loaded waggler locked in place by two float stops provides the best control on small rivers, with 4lb mainline through to a 0.10mm hooklength to a size 18 hook.

Chub Fishing tips | Catch them off the top in summer
Catching at the surface is one of the most exciting ways of fishing – and it’s not only limited to stillwaters.
During the early part of the river season, chub can lose their natural wariness, and that’s when you can tempt them from the top.
Chub Study Group member Martin Barnatt is a master of this type of fishing.
Here’s how he does it…

Priming the swim
“On shallow, clear rivers you really can’t beat floating bread for big chub, but they aren’t used to seeing large quantities of bait floating past above them and they soon wise up that something isn’t right.
“So all I do is tear off just one 50p coin-sized piece of bread with its crust and throw it in, standing slightly upstream of where I think the fish will be, and watch it run down with the flow.
“If fish are there it will get taken in an instant. If it doesn’t I will throw one more piece of bread in, and if that still isn’t swallowed then that swim isn’t worth fishing.
“Once I have spotted a fish it is a case of hooking on a piece of bread and running it through the swim. There’s a high chance the rod will hoop round seconds later.”
The simplest of rigs
“All you need to do is tie a size 8 hook to a 7lb mainline. It’s then a matter of keeping the bail-arm open to release line and let the hookbait run through the swim.
“Make sure you keep your finger close to the spool as you’ll need to pin your finger on should a fish take the hookbait. That way you create resistance to set the hook on the strike.”
Swim selection
“Chub love to sit close to cover so if you are going to a venue you have never visited before, swims that have very obvious features should be your first port of call. These include large rafts of debris, overhanging trees or other areas with dense vegetation.
“Once you have caught a fish from a spot it is only worth one more run through the swim and the likelihood is that won’t produce a bite. It is then time to move on, but don’t be afraid to revisit later as the shoal will have resettled and there could be another opportunity to put another fish in the net.”

Tackle essentials
Rod and reel: An 11ft feeder rod with a bit of power and a 4000 size reel
Landing net: Use a lightweight net and handle to make it easy to carry when roving around
Forceps: Chub can swallow a bait in an instant
Bait: Half a loaf of crusty bread is all you need
Hooks: Take a couple of packs of size 6 and 8 hooks to deal with different hookbait sizes.
Bream fishing tips | How to catch specimen bream.
Are you after your biggest ever bream this summer? If you are then here are six fantastic tips to get you going from former Drennan Cup champ Dai Gribble.
1) Do your homework
Bream are creatures of habit, perhaps more so than any other species. In my experience they regularly feed in specific parts of a lake at the same time every day.
The top of gravel bars and large areas of shallow water surrounded by deeper water are my favoured spots for finding big bream.
Unlike tench, I have found that bream prefer to avoid weedy areas, so this means that in weedy lakes any area where the weed is absent or thinner is well worth investigating.
You can start your search by looking at overviews of the lakes you’re planning to fish on Google Earth.
2) Watch for rolling fish
Big bream are generally nocturnal feeders and often have a tendency to roll on the surface, particularly just as the light falls at dusk.
If you observe bream rolling at the surface it is very likely that they will feed in that area, so any time spent finding rolling fish is well spent.
Sometimes bream roll with a classic ‘porpoise’-style roll and are unmistakeable, but on occasions they can barely break surface – with just the tips of their dorsal fins visible.
Investing some of your hard-earned cash in a good set of binoculars can really help you to spot such behaviour.

3) Talk to other anglers
Carp anglers can often be a good source of potential bream swims because on most waters they outnumber other anglers and inevitably catch bream.
In my experience they are generally happy to share information about where and when they have caught bream.
A swim where bream have been caught recently is well worth trying but bear in mind that most carp anglers don’t weigh bream so the size of bream might be smaller than claimed!

4) Fish into the wind
In the absence of any obvious clues as to where to fish, a good place to start is fishing into the wind as far out as you can comfortably cast and bait up.
The undertow created by the wind will take a trail of attraction from your baited area out into the lake, maximising the chances of bream being drawn into your swim.
By fishing as far out as is comfortable, you maximise your chances of drawing fish from as far away as possible.

5) Get a bed of bait out
Given their nocturnal nature, laying down a large bed of bait prior to dark is the best approach. If boats are allowed it makes life much simpler – if not, a Spomb is the easiest and most accurate method of baiting up.
A small number of big bream can eat a lot of bait and even on low-stocked waters I introduce plenty of bait 4kg of crumb or fishmeal based groundbait, 2kg of 2mm or 4mm pellets and a couple of tins of corn.
The aim is to ensure bream will stay in the area for a long time and I don’t want to risk feeding more bait over the top of feeding fish as that’s likely to spook the shoal.

6) Add hookbait samples
I introduce very few – perhaps 30 – hookbait samples, and try to spread them out. I want the bream to search for them among the masses of smaller items.
The size of my baiting area depends on the size of the feature I am fishing to, but typically I aim to cover about 8m wide by 2m deep. This allows me to fit three rods on to the baited area, even if it is very windy.
Introducing this amount of bait takes time, but effort equals reward. I like to bait up in late afternoon so the swim has time to settle down. The only disturbance will be casting my rods out, ideally about an hour before dark.

Match Fishing Tips | Three winning tactics from Jamie Hughes
It’s easy to think that fishing on commercial carp waters is all about one dominant seasonal tactic.
That could be fishing shallow in warmer weather or chucking out a bomb or feeder when things turn a bit colder – but to catch consistently throughout the year, the successful angler needs to be able to turn their hand to a bit of everything.

Nowhere is that more apparent than on the match scene, when staying one step and one fish ahead of your rivals is essential to consistent success.
Getting your tactics right and making the correct decisions during those five hours of fishing will very often be the difference between a win and a near-miss.
One man who knows better than most about getting this right is the unstoppable Jamie Hughes, who recently booked a place in his third big-money final. The Wirral man has now earned a spot in the Fish O’Mania XXVI, Maver Mega Match This and Golden Reel Angling Championships finals. If he wins the lot, he stands to pocket a projected £180,000!
Qualifying victories have come by fishing a range of methods based around the pole, from shallow tactics for big carp to battling gales for shy-biting F1s.
Now the Matrix/Spotted Fin superstar, already a triple winner of Fish O’Mania, reflects on those wins and what he learned from each match.
Here he shares his top tips for successful fishing on commercials in the next few weeks…

Victory No. 1 | Fish O’Mania XXVI Qualifier
Venue: Tunnel Barn Farm Peg: New Pool 5 Weight: 146-3-0
It was blowing a typical March gale for this one, so fishing the long pole was out of the question. That forced me to focus on the margins and going short at 5m. However, the lake is dominated by F1s that you have more of a chance of catching than ‘proper’ carp at short range.
When fishing in such terrible conditions, it is important to keep things simple and comfortable for yourself. Trying to fish long would only waste time and give you bad presentation in the first place. What I noticed during the match was how crucial the feeding was.
Put too much in and the F1s would come up in the water where they’re much harder to catch. It was a case of feeding less often but with a decent hit of bait each time. This put enough feed into the peg to keep the fish there but ensure they stayed firmly on the deck.
The decision to fish hard pellets rather than expanders was important too. I do this a lot because my theory is that every time a fish takes an expander it gets caught so naturally they associate them with danger.
Hard pellets are different, as the fish see lots of them as feed and so aren’t as wary of them.
Top tips
1) Don’t be afraid to use heavy rigs when it is windy. At times the weather means that you simply can’t go lighter. A 4x16 float sounds big, but when there are waves on the lake its stability is an absolute must.
2) Even though you think you might not be feeding a lot, foul-hooking F1s is common. If this happens to me, I first cut back on how regularly I am feeding. Feeding more but less often is the way to go – feed too little infrequently and I just don’t think you’ll get enough fish into the peg to catch consistently.
3) How well you catch in the edge can be governed by the depth. Ideally, 12ins-20ins of water is perfect but even if it’s deeper than this a good weight is still possible. In this instance I’d have an eye on catching shallow, as F1s, in particular will want to come off bottom, especially if you are feeding maggots regularly by hand.
Victory No2 | Golden Reel Qualifier
Venue: Woodland View Peg: High Pool 27 Weight: 266-10-0
In contrast to the Fish O’ match, this one was on a warm, still day when we fished in T-shirts and carp were the target. Before the start there were lots of fish cruising about close to the surface all over the lake and, when this happens, I find that they’re not really in the mood to feed.
Dobbing or mugging comes to the fore here. This basically means spotting a fish and dropping a single hookbait in front of it, trying to get the carp to take it. Fishing this way is hard work, but it’s amazing how many fish you can catch if you do it right.
The most important thing I learned from this day is how the colour of your pellet hookbait can make a difference. I began fishing a normal plain-brown 6mm pellet but was only catching one out of every four fish that I saw.
Switching to a much darker pellet did the trick and I then nailed every single one – I presume this was down to the colour of the pellet, which created a silhouette against the sky that carp could see far more easily.
Another difference to normal mugging was that most of my fish took the pellet as it was just reaching the maximum depth of my rig, around 2ft. I think that at times the carp watch the bait fall past them, respond to this movement and follow it down before sucking it in, so fishing very shallow was never going to be as good.
Top tips
1) Be prepared to have a crack at any fish you see! I caught a few on a top kit but then went out to 16m. Have the belief that you can catch cruising fish at short range – mugging is rarely a method that sees you catch all day on one line.
2) Invest in some polarised sunglasses as these make such a difference. They cut out any surface glare, allowing you to see each fish and judge in which direction it is swimming and whether it has seen your bait and is showing an interest in it.
3) I always use a long pole between the pole and float when mugging so the fish won’t be spooked by the pole tip. Around 3ft to 5ft is ideal, and I like to use a light float as well – only around 0.2g with all the shot beneath it to give me a concentration of weight to help swing the bait into position.
Victory No3 | Mega Match this Qualifier
Venue: Tunnel Barn Farm Peg: house Pool 29 Weight: 135-8-0
Although a lot of the lakes at Tunnel Barn are narrow snakes, this peg is actually in open water, and on the House Pool there’s an even mix of carp and F1s. You need to have an eye on catching both, and that meant fishing both shallow and on the bottom.
The match actually went pretty smoothly, starting short before moving out to 14.5m on the bottom with banded hard pellet. Once I started getting line bites or saw the odd swirl, I changed over to a shallow rig and this worked well too.
When fishing shallow, however, a change in weather conditions can kill the fishing stone dead.
Whether it’s air pressure or rain I don’t know, but midway through we had a big thunderstorm and the bites ceased completely! This is when being able to go back and fish on the bottom paid off, and I did this by feeding more heavily than you normally would when fishing shallow.
Top tips
1) By feeding heavily with 4mm pellets I knew that I could catch shallow and that a good percentage of the bait would get to the bottom. I caught 40lb of carp late on by changing to the deck. If I hadn’t been so positive in my feeding, those fish wouldn’t have been there in the first place.
2) When you haven’t got an obvious feature, where do you fish? I like to be well away from where I’m sat but far enough out that I can feed comfortably with a catapult and control the rig. This is why 13m or 14.5m would always be my starting point. Later I could add a pole section to follow the fish out.
3) The bottom of the House Pool is very silty, but I could see the carp bubbling. In this instance a bigger hookbait was needed, something that would stand out on the bottom – and that meant a 6mm or even an 8mm hard pellet.
Tench Fishing Tips | Six must have items for tench fishing
Tench fishing season is upon us so we’ve gone to former Drennan Cup champion Dai Gribble to give us his top tips to help you catch a tench this season.
• Refine your hooklink materials
Tench do get caught by carp anglers using thick line and big hooks but a more refined approach is much more productive.
When considering what hooklink material to use, it needs to be strong enough to land big tench. That might mean up to 12lb breaking strain in weedy waters and as low as 6lb in clear waters.
I prefer hooklinks that can be cast regularly with little chance of tangling so in most cases I choose mono over more supple braid.
However, I do use braided hooklinks, normally with smaller baits, as their suppleness helps with bait presentation. Braid will lie flatter over weed and be less obtrusive too. By carrying a range of hooklink materials I can tie up what I think will be the best rig for any situation.

• Go smaller with your hooks
On many occasions during the season, and on some waters, tench show a preference for feeding on small baits. Even specimen-sized fish will ignore larger offerings.
Often I will use just two artificial or real maggots as a hookbait rather than anything bigger.
Small hooks are essential for this because they allow you to present maggots in such a way that tench are likely to pick them up as part of the loosefeed.
I’ve used a lot of hooks over the years and have now settled with Korum’s Specimen hooks. I carry them in sizes from a 12 down to a size 16. Don’t worry about scaling down... I’ve caught plenty of big tench on a size 16!

• Carry a selection of feeders
For tench I carry a good range of feeders in different sizes and weights.
I use Korum 2oz Combi-feeders or mesh Combi-feeders combined with a Heli rig for most of my tench fishing, but I’ll opt for a small feeder if I want to feed less.
For distances beyond 60 yards a small feeder can be cast more accurately, too, particularly in a side wind.
When fishing close in, such as at the bottom of a marginal shelf, opt for inline feeders so the reel line can be pinned down easily.
Inline feeders are also better for fishing in heavy weed, as the feeder does not get tangled in it when fished in this manner.

• Use quick-change Heli rigs
The helicopter rig is undoubtedly my favourite rig for tench, as they have brilliant anti-tangle and hooking properties.
They’re also really easy to set up, particularly as I use the Korum Ready Heli Kits straight from the packet!
Start by threading the kit on to your line and tie a feeder on the end of your mainline – job done!
The best bit about them is the quick-change clip, which means you can change hooklinks in a matter of seconds.
I tie all my hooklinks with a figure-of-eight loop at the end. This goes over the clip and is held in place with a small rig sleeve.

• Spombs are essential
I’m a big fan of using lots of small particles. Typically I will feed hemp, a mixture of 2mm Sonubaits pellets -Krill, S-pellet, F1 and Robin Red – plus maggots, casters and chopped worm.
The quickest and easiest way of getting this mix into my swim is with a Spomb.
Tench are inquisitive fish, and I have found that a Spomb does not seem to scare them – indeed, I have often had bites while putting bait in over the top of them.
I like to feed little and often to ensure there is always some bait in the swim, and the Spomb is the perfect way to keep a tench swim topped up.

• Always choose heavy bobbins
The right type or, more specifically, weight of bobbin is crucial for bite indication when tench fishing.
I like to use bobbins fitted with 10g weights as they keep my line nice and tight. This improves bite indication and ensures that the wind does not affect them.
If I’m fishing at long range in very windy conditions, which create a big undertow, I’ll add another 10g weight.
I don’t like the current trend for really short chains on bobbins because many bites are drop-backs.
A longer chain allows the bobbin to fall further, which gives you much better indication.

Match fishing tips | Master F1s on the pole with Bob Nudd
Few will argue with the effectiveness of the pole for all types of fishing.
It offers pinpoint presentation, feeding and control of the rig at all times – but on commercials, when your target may be fast-biting F1s, it really comes into its own.
So after a good start on the feeder on Decoy Lakes’ Horseshoe Lake, it’s time to switch to the pole in search of the venue’s fast-biting F1s. Averaging 3lb, these are lovely fish to catch but they can be very finicky, which makes using the pole even more of a necessity.
Faced with a lot of open water and a reasonable depth, it can be difficult to know how far out to fish and how exactly to feed. But, as ever in fishing, I like to keep things simple. If I get the basics right, the fish won’t be far behind.
Distance – long or short?
You can fish with up to 16m of pole if you wish but I’d warn against this for a couple of reasons. Your control of the rig at longer distances will not be as good as when fishing closer in, and if the wind does get up during the day, wrestling lots of carbon can be hard work.
With this in mind, I’d recommend fishing 11m out. On every fishery I’ve visited down the years this puts you into the deepest water. This is a comfortable range for rig control and accurate feeding, and it also makes for easy shipping in and out of the pole.
That’s not to say you couldn’t fish closer in than this but, in my experience, the closer to the bank you fish, the longer it will take for the carp and F1s to move here and settle confidently.
I’d reserve fishing just a few metres out for the final hour of a session. Even then, I’d expect only a few bites.
At all times I use two pole rollers. Not only does this make for easier and quicker shipping and unshipping but it is also much safer for your pole. Using one roller can see the pole fall off or tip back and get blown away by a gust of wind.
Balanced tackle
There’s every chance of hooking a double-figure carp or a big barbel on the pole so I can’t afford to fish too light, even though this will get me more bites in the long run.
That means my rig is made up of 0.16mm Browning Cenex Hybrid Power Mono as mainline, while for the hook I’m happy to use ready-tied varieties. I’ve caught thousands of fish on the Drennan Barbless Carp Maggot pattern. This is coloured red, but it doesn’t seem to matter. It’s a very light hook and so perfect for shy F1s.
These are tied to an 0.14mm hooklength but to my mind the most important part of my set-up is the elastic. Too heavy and you’ll bump fish on the strike, too light and it’ll take ages to land them!
My pick is Browning Xitan Microbore in the 1.9mm grade, which works out at around a No7 to No9 strength in old money. This is set at a soft tension through my pole top kit, and by using a side puller system I can control exactly how much elastic is being used.
Generally I will fish at dead depth with maggots or expander pellets, and the only change to this will be if I switch to a bigger bait such as a grain of corn or a hard banded 6mm pellet in search of a better fish.
In this instance, I’ll go an inch overdepth to play a bit of a waiting game.
Lower the rig in
Chances are that if you lay the rig in and let it fall in an arc, there’s more chance of a roach getting it. By lowering the rig in slowly, as if it were going down a plughole, I know that the bulk of shot will work quicker and bypass any small fish. Be careful to do this gradually, though, otherwise, you may get a few tangles!
Kinder pots rule
If I was fishing for just big carp then I’d definitely feed using a large pole cup to get a lot of bait into the peg. As I’m after predominantly F1s, though, a smaller pot on the end of the pole is much better.
This ensures that just enough micro pellets are going into the swim every drop-in to catch a fish quickly, but leaving enough to keep any other fish in the area on the hunt. If I big-potted, then I’d be giving the fish too much choice as to what to eat, and bites would be slower as a result.

The bait menu
I’m well aware that Horseshoe Lake is full of small roach, so I can instantly discount maggots as a feed from my plans. Although carp and F1s love them, the trouble you’ll get from small fish won’t be worth the hassle, so that means pellets all the way!
However, if the venue had few silver fish in it, I’d probably go for maggots – it’s all about the species of fish you’re expecting to catch.
My feed is made up of Van Den Eynde 2mm micro pellets that I dampen down before fishing to ensure they all sink. For the hook I’ll start on double red maggot but if roach are a problem, I’ll immediately switch to a 4mm Van Den Eynde RS Elite expander pellet – F1s in particular are suckers for an expander.

Floats – it’s like roach fishing
Because F1s are shy-biters you need to think about the float you are using. Obviously the wind strength and any tow on the lake will play a part in this decision but I like to fish as light as I can get away with. For fishing the pole into open water, I’d be thinking of a float taking between 0.3g and 0.7g. It’s a very similar thought process to the one I use when fishing for roach on my beloved drains and rivers.
I’m a big fan of slim pencil floats and although they may not look it, they are very stable and for this session, a 0.3g DT Floats model will be ample. Shotting is made up of a simple bulk of four No 9 shots plus a single No 9 dropper all grouped in the bottom third of the rig. The bulk is important as I suspect that many of the roach will be swimming around off bottom so I need to get through them quickly. The float is always dotted right down so that I can react to every indication – often all you’ll get from an F1 bite is a tiny ‘dink’ on the bristle. My advice is to strike at everything!

Use a solid pole!
I expect a quick response when starting on the pole and so it proves, with four plump F1s in four drops. Marvellous! However, the roach have also clocked on to the pellets being fed and are doing their best to take the double maggot hookbait at every opportunity. The logical step is to change baits so on goes a 4mm expander. There are good and bad aspects to this, the good being that the roach aren’t interested. The bad is that it’s taking much longer to get a bite compared to using maggots. However, when the float does go under it’s an F1 or a carp.
Tempting as it is to want to get bites and catch quickly, the reality is that at this time of year it often isn’t going to happen. If I could catch an F1 or a carp every five or 10 minutes in a pleasure session I’d be perfectly happy, and that seems to be the pattern of the day. It’s a bit of a wait, but eventually an F1 finds that expander too difficult to turn down.A couple of hours’ fishing fly by and before I know it, we’ve reached that magical time on commercial fisheries when the carp begin to move close in.
Match fishing tips | Fish at half-depth and catch more carp!
On a typical snake lake peg, fishing tight up to the far bank with a bait presented on the bottom can lead to foul-hooked fish.

It’s annoying, and it does the chances of building your peg up no good at all. Is there a remedy?
Most definitely, and it involves fishing shallow. Shallow in 2ft of water? It may sound daft, but far from being the height of lunacy, it’s a tactic that’s given me 200lb match weights from venues such as the Snake Lake at Essex water Puddledock Farm.
This lake has identical-looking swims with a typical 2ft to 3ft of water tight to the far-bank beds of sedge. Although I use the term ‘shallow’, the truth is that I’m going to be fishing at half-depth and looking to catch carp that I can see moving in the swim.
It’s a little bit like dobbing in open water in many senses, getting into a routine of feeding, keeping your eyes peeled and then laying the rig and bait into the path of a carp. Done right, the elastic will be ripped out of the pole with every fish hooked properly in the mouth!
Hold your horses!
My simple plan for fishing shallow is to identify a couple of areas in the peg with sedge or reed cover and fish these – but not from the word go. It takes around 30 or 40 minutes of feeding to get the fish into the area hunting around for the bait. It is vital that you can see the carp moving in the peg to catch them. If there’s no movement, this means there are no carp off bottom and you’d be better off fishing on the deck.
Swapping lines
Having two spots gives me the option to rest swims when the fish have had enough, but I will pick one as my main fishing area, normally one that offers easier fishing and feeding, combined with more cover.
When the bites tail off here, I’ll change to my second area. The rest can do the swim a power of good, with the fish returning within 10 minutes of the change.
How shallow?
Many fisheries have a rule on how shallow you can fish, so for this approach so you may be limited. However, in 2ft of water, 12ins or a little less is ideal for putting the hookbait into midwater. I find that you rarely catch carp just inches deep unless they are actively slurping at the bait on the surface.
Feeding
Bait and feed is hard 4mm pellets, but far from piling in the bait and waiting for the pole to be yanked over I begin by catapulting in 10-15 pellets each time to make some early noise and get the carp mooching around. Once I see a few moving, I cut back to five pellets each time. If this doesn’t work I’ll cut back further to just one or two. Should this draw a blank then I’ll turn to my last resort of a couple of bigger 6mm pellets to make some splash.

Find some cover
The right sort of peg is crucial and I’d want a peg that offers reeds or beds of sedge to act as cover. This will keep the carp feeling safe with the foliage over their heads and also lets me hide the pole tip away from the fish. Try it in a barren swim with just a bare far bank to fish to and it’s never as good.
Simple rig
The float is a tiny 4x8 MAP SF3 pea-type float taking a few No10 shot underneath. This acts more as a sight bob, as when it goes under, the elastic often follows! Lines are 0.18mm Power Optex main to a hooklink of 0.13mm and a size 18 Kamasan B911 eyed fished with a bait band. Elastic is MAP’s TKS Twin Core in the red grade.

Hide the pole!
This is the most important part of fishing this way. Put the pole over the heads of the fish and they’ll clear off, so I try and use those reeds or sedges to my advantage and hide the pole in among them.
I basically look, and once I see a carp moving right to left I tuck the pole behind where the fish is moving from and lay the rig in front of it. The pole tip is never put over the top of the fish! Sometimes I may even rest the pole on the sedge itself.
Six steps to casting accurately while fishing
A crucial aspect of catching specimen fish is to ensure you’re fishing and feeding accurately over the right spot.
Last week I showed you how to set up and use a marker float rod to find hidden hotspots and depths in your swim.
Once you’ve found the feature you want to fish, you need to measure the distance from the bank, and then get your baited rods and baiting-up kit (spods, Spombs etc.) to hit the same spot.
This means you’re feeding and fishing in the perfect fish-holding features you’ve found with your marker rod.
Here’s how to do it…
Essential advice for casting accurately
‘Save’ the distance on your marker rod
After you’ve cast out your marker rod and found the ideal hotspot – gravel bar, drop-off, clear patch, depth – start to gently reel in to wind the marker float under the water until it reaches the lead.
It’s vital not to reel too hard as you don’t want to move the lead, and using a really big lead around 4oz will help you achieve this.
When the float is at the lead, ensure the marker rod is in the same position as your rods will be on your pod or banksticks, and place the line under the reel’s line clip. You now have that distance ‘saved’ on the rod and you can use it to mark out your other rods.

Set up other rods
Distance sticks are an invaluable tool in the specimen angler’s armoury. I start by setting my two sticks 12ft apart, the same length as my rods.
I then place the lead and marker float at the base of a marker stick and, letting line off the reel spool, wind the line around the sticks, counting each ‘wrap’ around them until you hit the line clip.
I like to use marker sticks that have toggles on a string running between them, as these allow you to mark the distance precisely.
Once you’ve removed the marker rod you need to do the same thing with your actual fishing rods.
Start by placing your bomb or feeder around the base of one stick and then wind the line around the sticks until you get to the same number of ‘wraps’ as the marker rod.
Instead of clipping up, I prefer to tie a short length of bright elastic to my line which marks the distance to your spot.
You can do the same with your spod or Spomb rods to ensure you’re feeding accurately, although I prefer to clip this rod up using the line clip on my reel.

Mark with elastic
When marking the distance with elastic, I like my line marker to be placed at the tip ring so it’s easy to spot after casting.
If using a marker near the reel, the cast only has to be slightly short for the marker to be on the spool, and there’s also the chance that a marker near the reel can get caught in the bobbin or alarm as the fish takes line on the bite.
The main advantage, though, is that with practice you can stop a cast as you hear the elastic going through the rings.

Tying an elastic marker
I like to use fine pole or marker elastic to mark my lines. I prefer a thin elastic, as this has least impact on the cast.
I use about 5cm of pole elastic and tie it on by creating a loop and passing one end of the elastic through the loop four times. It is just like tying a grinner knot on to the main line.
Pull the ends of the elastic very gently to ensure the knot tightens up neatly. I like to ensure the knot as tight as possible without breaking the elastic – that way it doesn’t move after a few casts. The only way to find out how tight to pull it is by trial and error!

Clip the line up
Although I mark my distance with elastic I also use the line clip on my reel to ensure I’m fishing at the exact range.
Clip up with the line marker about two feet past the tip ring to allow for the slack line that needs to be taken up after casting.
When casting, use the rod to cushion the impact and then follow the end tackle down with the rod-tip until it hits the bottom, then sink the rod tip to help submerge the line as quickly as possible.
Check where the line marker is when the line is tight – if it is short of the tip ring you need the marker further from the rod tip when clipping up, and vice-versa.
Generally, the deeper the water the further the marker needs to be from the tip to ensure that when everything has settled the marker is where you want it – at the tip ring.
Once I’m on my spot I will remove the line from the clip so when I get a run the fish can take line.

Cast at a feature
All the stages so far enable you to cast an exact distance, but the direction of the cast is equally important.
Once you have found the spot you wish to cast to, take note of what is on the far bank as this will be what you need to aim your cast at.
It doesn’t have to be a far-bank marker – a buoy or other floating mark may be better – but beware of relying on anything that can move about!
I like to set my rods up so that they point directly where I am casting. Not only does this improve bite detection, it helps you cast accurately if mist has obscured your chosen mark.

Bream Fishing tips | How to catch more from canals
The leaves are finally bursting into life on trees and bushes, and for the canal angler this means big fish become a viable target, be they tench, chub or – on the majority of venues – bream.
From big shipping canals to narrow classic waterways, skimmers and bream abound but they don’t give themselves up easily. Many a time a peg will ‘fizz’ with bubbles but you can’t get a bite, let alone catch a fish.
Patience is important. Bream can leave it late in the day to feed but you must accept that there may just be the odd fish in the swim. The important thing is getting these stray fish to feed and make it worth the time you’re spending fishing for them.
What to feed
Fifteen years ago I’d never have thought that pellets and corn would catch on a canal, but they do now. However, in spring nothing beats a good old chopped-worm-and-caster approach.
This all-out particle attack pulls in big fish and also means that the bait stays put when a boat goes through. Groundbait is good but roach love it, and they can be a pest when trying to catch bream.
If a boat ploughs through, the crumb can be washed a good few feet down the swim. This doesn’t happen with particles. I feed finely-chopped worm and caster in a 25:75 ratio and then add a few dead red maggots in with them. Around three-quarters of a large pole cup goes in at the start.
All in the timing
Don’t be in a rush to get fishing over here. I’ll begin a session fishing squatt short and long for roach. This will take around an hour and a bit, and it is the perfect length of time to let the bream swim settle.
During this time I will also fire a few casters in with a catapult but not too often, as you get a spread of bait when loosefeeding and this can push feed into that far-bank cover where you can’t get a rig in!
Hookbaits
When the time comes to fish, I’d begin with a single caster and a single dead red maggot or double caster on the hook. These are super skimmer baits and pick up big perch too.
As a change, or when I know some big fish are on the feed, I will slip on an inch-long section of worm tipped with a dead maggot.
Where to fish
Cover always holds fish, so you have to fish to a bush, an overhanging tree or some brambles or on a featureless peg, tight up to the far-bank tins. However, I wouldn’t feed or fish bang up against the cover as this is somewhere I may want to try later in the day when the fish move. Instead,
I’ll make my bed a few feet away from the cover on top of the far-bank shelf – I’m looking for a minimum of 18ins of water here.
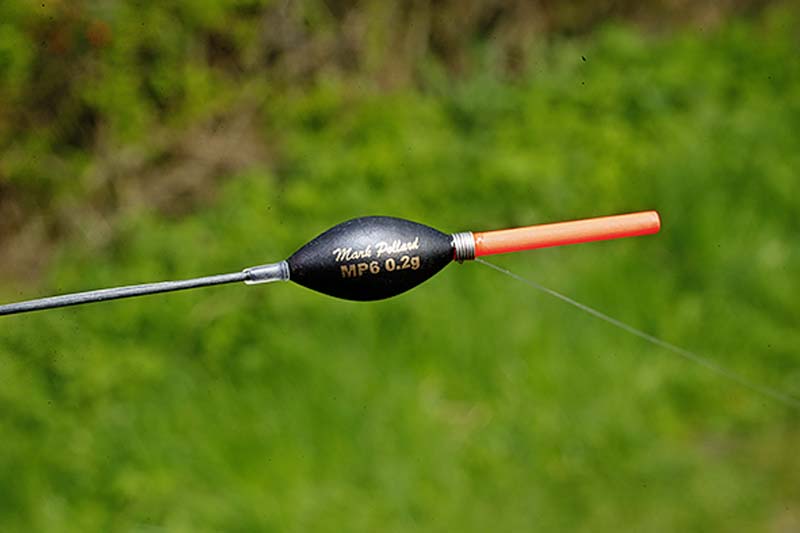
The rig
Although you are after big fish close to snags, don’t fish too heavy – 0.12mm Matrix Power Micron mainline to a hooklink of 0.10mm and a size 16 Kamasan B511 hook is more than enough when matched to a grade 6 Matrix hollow elastic.
If I was fishing bang up against the cover, though, I’d consider changing to a solid No6 elastic so that I can pull fish to safety quickly.
The float is a 0.2g MP6 shotted with a simple bulk, and I plumb up to fish at dead depth. Going overdepth will only lead to the float being dragged under when the canal begins to pull as a boat goes through a lock.
Topping up
So let’s say you catch a skimmer. Do you feed more? My rule is to feed after every three or four skimmers because if you get one, chances are that much of that initial feed will still be there. Only when I rest this line will I feed again with another three-quarters of a pot of worm, caster and dead maggots.
Much will depend on how many fish are in the peg, though. When there are quite a few you can wait a lot longer between feeds – but if there’s only the odd skimmer about and I’ll be juggling my swims, I’ll be topping up more often simply to try and get that odd fish to have a go quickly and ensure I’m not wasting too much time waiting.
Save your match with this secret swim
Commercials are still a bit too cold and clear to poke a tiny rig tight to rushes in 18ins of water.
So while you’re waiting for things to pick up you’ll need to find a spot of deeper water a metre or so further out from the bank – something that Spotted Fin man Andy Dyson calls his ‘secret’ margin swim at his local venue Old Hough Fishery near Sandbach, Cheshire.
Too many anglers go straight into the shallow water against the bank, only to abandon it 15 minutes later with no bites. Instead, spend some time plumbing up and identifying the right place to focus your margin attack, as the former Winter League champion explains...

When to fish it
“Very occasionally you’ll catch here early in the match, but most of the time it’s classic ‘margin’ fishing, the final two hours being the time to concentrate your efforts here,” he explained.
“I try to fish and feed just inches from the edge of the second shelf before it goes into the deep water. That way the fish don’t need to expend much energy to find my bait. I’ll also fish well away from my platform until the water colours up – we’re talking 11m to 13m on the pole.
“This distance puts you in front of the fishing pallet next door and this is where the fish know they’ll get fed from bait thrown in at the end of the day,” Andy continued.
“A marker to line the float up on that exact spot is a must, as going just an inch the wrong side can leave you biteless.”
Feeding
“If you’ve got the space I would definitely have two of these lines on the go down either side. This not only doubles the chances of catching well but will also let me feed differently,” Andy said.
“Generally I’ll use a small pot and trickle in six grains of corn and a few micro pellets, but if things aren’t going to plan, dumping in a big hit of bait with a pole cup can do the trick. Having two lines lets me do both and decide which is better.
“Feeding will begin after an hour because if things are going well I will have a look on this line after two hours of a match,” he continued.
“In goes a small pot of corn and Spotted Fin GO2 F1 micros, to which I give a good squirt of GO2 F1 Liquid Food. I’ve caught a lot of fish using this stuff and think it can do no harm when every bite is precious.
“Once I begin fishing here I drop in another small pot of feed after every fish, bite or indication as I’m not trying to pull in a mass of fish – and besides, I don’t think the fish want a lot of bait in the first place,” he added.
Fish at dead depth
“It’s crucial to plumb up and set the float at dead depth, not only to prevent line bites when the fish arrive, but to let me know quickly if the rig is off course – should it be an inch or two into the deep water it will sink with the weight of the corn hookbait and I can reposition it immediately,” Andy said.
“Dead depth produces positive bites and, at times, the big F1s can rip the elastic out before you’ve lifted the pole as they move into the shallower water, take the corn and swim off!
“Lines are 0.16mm main to an 0.12mm hooklink, both Middy Lo-Viz to a size 18 Middy KM4 hook – quite big enough for carp.
“My elastic is Middy’s pink grade Reactarcore and my float for here is Warren Peaty’s Pukka model in the 4x12 size.
“This pattern takes a simple strung bulk of shot with two No8 backshots above the float to keep the line relatively tight, enabling me to hit quick bites.”
Corn is king
“For the hook you can’t beat corn, one or even two grains if the fishing is good.
“Pellet just doesn’t seem so productive, and on the match lakes at Old Hough there’s been a stocking of small F1s that just love pellets.
“They’re not the fish I want to catch in the edge, so I do all I can to avoid them and hook the bigger fish.”

Hit & run fishing
“I’ll not spend much time fishing here unless I’m getting bites, as I can spend my time better elsewhere in the peg.
“It’s a bit of a hit and run job, dropping in and catching just two or three fish. And I’m not a fan of fishing here if I feel that only one fish is present. I want a few to be there stirring up a bit of competition. If I only get the odd knock, there’s no point fishing here for any length of time – I’ll catch the F1 that’s there and that’ll be my lot.”
Finding the right spot
“First job is to find the key area to fish and at Old Hough, a lot of the snake lakes actually have two marginal shelves to go at,” Andy said.
“I will use the plummet to find the very edge of the second shelf, which can be two or three metres out from the bank. This offers enough water for the carp and F1s to feed confidently in but, more importantly, allows me to pick them off as they move up from the deepest water in the middle of the lake.
“Chances are the fish won’t move all the way into the very shallow water but by fishing this second shelf, you can pick them off late in the day while other anglers will be trying to catch tight into the bank.
“It’s a waiting game, but I’ve gone from having 15lb in the net with an hour to go to weighing in 80lb of big F1s at the whistle, thanks to a great last burst on the ‘secret’ line!”
Carp Fishing Tips | 10 Tricks to help you catch carp on the float
So that’s it then. Another river season is done and dusted, leaving anglers with the choice of canals or stillwaters to fish in the coming weeks and months.
For most, lakes will be their pick, especially as warmer weather and longer days see carp begin to feed with gusto.
It’s still a funny time of year, though, as the water won’t have warmed greatly or coloured up but the fish will be willing to feed.
A range of tactics can work, even fishing the margins or (on very mild days) up in the water, so that leaves a lot of choices to be made, not only in terms of the methods to use but also feeding and bait decisions.
To help get you on the right track, Preston Innovations and England man Des Shipp this week reveals 10 top pieces of advice to bag a few carp in the coming weeks on commercial fisheries.
Whether you decide to fish the pole or waggler with pellets, corn or maggots, there’s a little gem or two here to put into operation when you get on the bank…
Hard or soft balls?
I make up a groundbait ball in three ways. A hard ball moulded with two hands will go straight to the bottom, will carry a lot of particles and is ideal for keeping the fish on the deck.
If you’re aiming to catch off bottom, a ball that’s lightly squeezed with one hand will break apart quickly and put a cloud into the swim.

Feeding groundbait loose in a pole cup is the method to go for in shallow water or in the margins when you don’t want the fish to be concentrated in one tight spot.
Margin feeds
Dead maggots and groundbait are a brilliant margin combo on waters dominated by carp and F1s, but not so good for roach and skimmers. Instead, I use micro pellets and corn.
The micros are used to pull fish into the peg but when I begin fishing the edge I cut them out and feed just corn. Roach love micros and they’re just the right size for them, so feeding more and more will fail to draw carp in and only encourage the roach into the area. Corn means bigger particles that are heavy and will stay put on the bottom in among feeding carp, whereas micros are too light and will get wafted about all over the place.

Snake lakes – where to start?
It makes sense to begin fishing across to the far bank on a snake lake, but I’ve found that a few early carp can actually be caught from down the middle in the deep water before the fish spook a little from bankside activity and drift to the far bank.
I’d fish here from the off but not spend too much time if I wasn’t getting bites. When the indications fade, add a few sections and go to the far bank.
Plumbing up on the waggler
To plumb up accurately on the float I use a large 3SSG locking shot designed for fishing with flat floats. Nip one of these on the hook and you’ve got the weight to cast easily and show the depth up nicely – try it with a big plummet and you’ll have a nightmare!
I make the cast to my desired spot and slowly pull the float back by a foot at a time, making a note of any depth changes. This way I can work out if there is a slope running away from an island or a distinct shelf that causes a radical change in depth.

Topping up
Carp are big fish that eat a lot of bait, so you’ll need to keep the feed going in. This can be done either via a big pole cup or a small pole pot, depending on the fish that are in the swim.
If I am sure that there are only carp present, a small Cad pot trickling in corn or pellets, is ideal on every drop-in, but if a lot of small fish are about, I’ll change to big potting after every couple of carp.
This is because I think the noise of regular feeding actually pulls little fish into the peg, so by only dumping bait in every 10 or 15 minutes, I’m reducing the chances of this happening.
Feed to your bites
The above not only applies to adding more bait when the peg goes quiet, but also relates to how quickly you are getting bites.
If I was only getting the occasional bite but knew that some fish were in the peg then I’ll step up the feed slightly to encourage the carp and F1s to be more confident.
On the flip side, if I was getting too many bites and foul hooking a few fish then this would tell me to ease back on the feed.
We’re only talking here about adding or taking away half-a-dozen micro pellets or a few pieces of corn, but it can make a big difference.

Shallow shotting patterns
It’s almost time to start thinking about fishing shallow but how you shot your rigs should depend on whether you are fishing for carp or F1s. For wary carp a rig with the small shots spread down the line will give the bait a slower fall, giving the fish more time to see the bait and take it.
For F1s, a rig with a small bulk just above the hooklink will convert bites into hooked fish. The solid mass of weight creates a semi-bolt effect and will make a fair bit of noise when slapped on the surface.
Strike hard
When pole fishing on the bottom in around 8ft of water you need a decent strike to set the hook properly, so don’t be afraid of giving it the big ‘un!
Once a carp is hooked, keep the pole-tip low to the water at an angle to prevent the hook pulling and allow the fish to swim off. The worst thing you can do it hold the pole high in the air. This will put too much pressure on the hookhold and also bring the fish up to the surface too quickly, where you won’t be in control.
Balanced kit is essential
Fishing fine is okay but you must balance your tackle. Small hooks and light lines will get you more bites, but your pole elastic needs to be lighter too, in order to prevent the hook pulling or the hooklink breaking.
For general carp work I would fish a size 14 or 16 hook to line of around 6lb breaking strain and a 12 grade Preston Innovations Hollo elastic.
This rule also applies when fishing heavy tackle – using light elastics with heavy line and big hooks will only see the elastic ‘bottom out’ when playing a decent carp and this can cause the elastic to potentially snap.
Cast past the feed
The waggler is a super tactic to search the swim at this time of the year, but don’t be lured into casting right into the middle of the area you’re feeding.
Often, carp will be sat off the back of this feed, picking off particles, so to cash in on this, feed and then cast the waggler a good few metres past this spot.
Allow it to cock and then wind it back into the edge of where the loosefeed has gone in.
You can also do this by casting shorter on to the front edge of the feed zone.
Pole Fishing Tips | How to fit new pole elastic
Puller-bungs have transformed polefishing since they first appeared 10 years or so ago, allowing big fish to be landed on much lighter tackle than previously possible.
The simplest form of puller bung features a hole surrounded by non-stick PTFE material.
With the elastic secured here, the idea is to pull the elastic while playing a fish, tightening it in the process so that bigger fish can be tamed and landed. Fit it easily by following this sequence:
1: Thread a diamond-eye elastic threader through the puller-bung exit point near the base of your pole’s No2 section and out through the section’s thin end.

2: Thread the elastic through the diamond eye and pull the threader back until the elastic emerges from the puller-bung exit point.

3: Thread a small bead up the elastic at the puller-bung exit point end tie a large bulky double overhand knot to secure it.

4: Now use the threader again, this time to pull the other end of the elastic through the pole’s tip section and out of the end like this.

5: Assemble your top-two kit and pre-stretch your elastic 12ins at a time. This will reduce elastic droop once you start fishing.

6: Cut the elastic with 3ins protruding from the tip. Now tie a knot close to the end and attach your chosen connector – this is a popular Dacron version.

7: Once the connector is attached, slide the Dacron to the knot, trim the elastic and slide the plastic part of the connector over the knot.

8: The finished connection is neat and reliable. If the elastic hangs out a bit, remove the connector, trim the elastic and attach again.

Get ready for your spring campaigns with these great tips.
1) Re-spool your reels
With the river season closing, it’s time to start focusing on stillwater venues.
There are a number of things I like to do before heading for the bank, and one of the first is to re-spool with new line.
In my view, line and hooks are the two most important items of tackle. A fault with either will inevitably lead to lost fish, and in specimen fishing that lost fish could be the catch of a lifetime.
I use a line stripper to remove my old line, which is recycled.
I find the best way to load new line to minimise line twist is to put a pencil through the line spool and trap it between my knees. This enables me to apply slight pressure as I wind it on to to my reels. Be careful not to overfill the spool, as doing so leads to tangles, not extra casting distance!

2) Spend time locating spring fish
In spring fish are often tightly shoaled up, leaving large areas of water fishless.
Don’t therefore arrive at a stillwater venue with a set idea of where you are going to fish.
An hour or two spent trying to find your chosen species is a good investment of your time.
Three things are essential if you want to maximise your chances of locating fish – polarised glasses, a peaked cap or hat, and binoculars.
It’s not just the obvious signs of fish – be they under the water, rolling or crashing out – that will pinpoint where the fish are.
Look for bubbles caused by fish rooting on the bottom, disturbed silt, and ‘flat’ areas0 where a fish has turned near the surface.
Even the slightest sign is better than choosing a swim because it just happens to be convenient.
3) Check your tackle bag
If, like me, you spend most of the autumn and winter fishing rivers it’s likely you’ll not have used much of the tackle you use for stillwater fishing for quite some time.
It makes sense to go through it at home before your first session, check everything is in order and make a list of any items that are missing or running low. The last thing you want is to run out of an essential item on the bank.
As well as the obvious, such as hooks, check for things like scissors and baiting needles.
On my first tench trip last year I discovered I had taken my blades out to replace those I’d lost from my river bag.
Chopping worms with the tiny pair of scissors on the mini Swiss Army knife on my key ring was challenging, to say the least!

4) Get inspired by big catches
Few things fire my enthusiasm to catch big fish more than reading about other anglers’ successes.
In my youth I read books by Frank Guttfield, Peter Stone and Jim Gibbinson and I can still recall some of their stories.
More recently Terry Lampard, Paul Garner and Terry Theobald have all made me want to get out in pursuit of specimen fish.
It’s apparent when you read such books that success is rarely instant and even the most successful anglers have lean spells.
Nevertheless, reading tales about big fish captures will be inspirational. Who knows? In a few years’ time it could be you writing a book that fires up the next generation of anglers!

5) Try close in for perch
Many commercial fisheries have a good stock of perch that are unfished for.
These fish generally ignore pellets and other man-made baits, making anglers oblivious to how many stripeys are present.
In many commercial lakes the perch are largely ignored, and there can be some nice surprises in store.
Often these perch are found very close in, especially if there is some cover nearby.
If you can find an overhanging bush or a reed bed, there’s a very good chance that perch won’t be far away, so introduce a little bait close by and cast a worm over the top – there’s a good chance it will be taken by one of these predators sooner rather than later.

6) Reduce resistance for pike
When deadbait fishing for pike it’s imperative fish feel little resistance. Drop-off indicators are perfect for this.

Adjust them so the line stays in the clip despite any drag from the water but will pull free with the minimum of effort when a pike picks up your bait. With an open bail-arm the pike can then take the bait and feel no resistance.
Use a heavy lead and free running rig and whichever way
the pike moves it will take line off the spool. At this point close the bail-arm, allow the line to tighten and, as it does so, strike.
There’s no need to wait, as the bait will be in the pike’s mouth.
Delaying the strike will increase the chances of a pike ejecting the bait or being deeply hooked.
Carp fishing tips | Use the right corn to catch more carp
We’re at that time of year when sweetcorn really comes into its own as a commercial carp bait both for feed and on the hook.

With the carp becoming increasingly active as the water warms, corn is a bait that they will seek out readily for its food value.
But unlike in the depths of winter, when a single yellow grain of sweetcorn can be highly effective when cast around the swim, now you need to feed something too.
However, even with such a seemingly simple offering, you’ll catch more if you use the right type of corn.
Guru’s Adam Rooney is your guide to choosing the right corn…
1) Maize
Maize is a larger, tougher grain than food-grade sweetcorn. I find it is excellent as a single hookbait when casting long distances on big waters, or if the lake I am fishing has an average stamp of much bigger fish.
2) Tackle company corn
Although the most expensive of all the corns, bespoke bait company offerings do bring a number of distinct advantages.
First, the grains are bigger and uniform, as all are graded. This make them perfect of catapulting.
They are generally tougher and more robust, for a better hook hold, and they come pre-flavoured and coloured, so all the work has been done for you.
3) Supermarket
I use two different tinned corns. For hookbaits, it’s Jolly Green Giant, which is often larger than other tinned corns, although this can differ from tin to tin.
For loosefeed, I have found Heinz to be excellent, as the grains are a little smaller. This means the hookbait will stand out well over the top of it.
4) Frozen
If you are looking to prebait an area, or you wish to use a lot of corn, then frozen corn (thawed out, of course) is a cheaper alternative to tinned.
The advantage of frozen corn is that it tends to be softer. In comparative terms, it’s the expander pellet of the corn world.
5) Imitation
Rubber corn is resilient to small nuisance fish and can be cast great distances. It’s also soft, so it feels ‘right’ to the fish. I normally use the buoyant type, popped up off the bottom with a bomb or feeder.
Carp Fishing tips & bait | PVA bags and how to make one for Carp
There’s no doubt that PVA mesh is easier to use than solid PVA bags – but there are some very good reasons why the bags should get your vote.
Probably the most compelling of these is that the aerodynamic shape of a solid bag, with the rig nestled safely inside, casts much further and more accurately than a stick ever could.
There is more to it than that, though, because the nature of a PVA bag means that it changes the way your bait works too.
The bait literally explodes out of a PVA bag. This is caused by the air that is trapped inside the bag erupting upwards as the bag melts, carrying the particles of bait with it.
This explosive effect gives a much faster and wider spread of bait than a normal stick or feeder.
WAFTERS
There’s no point in using an almost neutrally buoyant feed and then plonking a heavy hookbait in the middle of it. Light hookbaits are the answer to not only getting more bites, but ensuring better hookholds too.
Balanced hookbaits that sink slowly and are easy for the carp to suck in are real game-changers. They are also tough enough to use on a bait spike. My general rule is to start with a 10mm bait balanced to a size 12 hook. The gape of the hook should be slightly less than the diameter of the bait to ensure good hookholds, and handily this ensures the bait sinks slowly too.
With the clearer water conditions often encountered at this time of the year I make sure I have a mixture of different coloured wafters with me. Normally I believe a pink or white bait will be the most effective, because it stands out well agains the dark lakebed, but if the fish are being finicky, a change to a darker colour can give them more confidence.
Any flavour in the hookbait will be overpowered by the contents of my PVA bag, so I think it is less important when using this tactic.
MAGGOTS AND CASTERS
Bag fishing is all about making the most of a small amount of bait. I won’t introduce any more at this time of year, relying on accurate recasting to top up the swim.
A well packed bag is about the size of a large hen’s egg, so it’s important to use the best feed you can. Casters and maggots are an integral part of my winter bag mixes. These are normally the leftovers from trips earlier in the season, and I keep them in the freezer until needed.
A handful of bait is all you need to add for a day session. There is no doubt that carp absolutely love these natural baits, and they will keep grubbing around until every one has been picked up.

Using wet ingredients in bags
Most wet ingredients need to be dried to stop them melting PVA bags. The easiest way to do this is to mix them with a small quantity of finely-ground salt crystals. After 10 minutes, sieve off the salt and the baits will not only be dry, but any remaining moisture will be very salty and so will not melt the PVA.
Bulk Bags
You can add a huge range of different ingredients to your bag mix, but the most important thing is to get the consistency right. Ideally, you want a mix that can be packed down tightly, and consisting of small baits.
A tightly-packed PVA bag will not only cast further and more accurately than a loose one, but is much easier to make.
Micro pellets are another useful addition. I like to use tiny 1mm feed pellets, which can be mixed with a little dry groundbait to fill the gaps between the pellets.
Once you have got the fine base of your bag mix right you can then think about adding a small amount of larger baits to the mix – this should be no more than 10 per cent of the volume.
Liquid bags
Although PVA melts very quickly when it comes into contact with water, it is impervious to other liquids, which allows you to really pump up the flavour.
A lot of liquid carp additives will be marked ‘PVA-friendly’. These are a good place to start, as they will be ready diluted to the optimal concentration.
The liquids can be mixed into the dry bag mix, or added to the bag after it has been filled.
This can be a messy job, but I find using a syringe or pipette enables me to get the liquid in with the minimum of mess.

Try adding anything up to a teaspoonful of liquid to your bag to give an instant cloud of flavour around the hookbait.
How to make an explosive PVA bag for carp
By combining micro baits and liquids you can fill your bags with an irresistible mix that won’t feed the carp - in fact it will explode out of the melting bag, covering a dinner plate-sized area immediately and quickly infusing the water with an aroma to attract the carp’s attention.
1) Put a pint of micro pellets into a bait tub.

2) Add a handful of dead maggots or casters to add food value.

3) Put a thin layer of the bag mix into the bag.

4) Place the lead centrally into the partially-filled bag.

5) Almost fill the bag with more bait then place the hookbait on top.

6) Inject about 10ml of liquid into the centre of the bag.

7) Use a piece of PVA tape to tie the bag shut, then trim away any excess.

8) Attach the finished bag to your mainline using a large figure-of-eight loop.
