
Match Fishing Tips | Three winning tactics from Jamie Hughes
It’s easy to think that fishing on commercial carp waters is all about one dominant seasonal tactic.
That could be fishing shallow in warmer weather or chucking out a bomb or feeder when things turn a bit colder – but to catch consistently throughout the year, the successful angler needs to be able to turn their hand to a bit of everything.

Nowhere is that more apparent than on the match scene, when staying one step and one fish ahead of your rivals is essential to consistent success.
Getting your tactics right and making the correct decisions during those five hours of fishing will very often be the difference between a win and a near-miss.
One man who knows better than most about getting this right is the unstoppable Jamie Hughes, who recently booked a place in his third big-money final. The Wirral man has now earned a spot in the Fish O’Mania XXVI, Maver Mega Match This and Golden Reel Angling Championships finals. If he wins the lot, he stands to pocket a projected £180,000!
Qualifying victories have come by fishing a range of methods based around the pole, from shallow tactics for big carp to battling gales for shy-biting F1s.
Now the Matrix/Spotted Fin superstar, already a triple winner of Fish O’Mania, reflects on those wins and what he learned from each match.
Here he shares his top tips for successful fishing on commercials in the next few weeks…

Victory No. 1 | Fish O’Mania XXVI Qualifier
Venue: Tunnel Barn Farm Peg: New Pool 5 Weight: 146-3-0
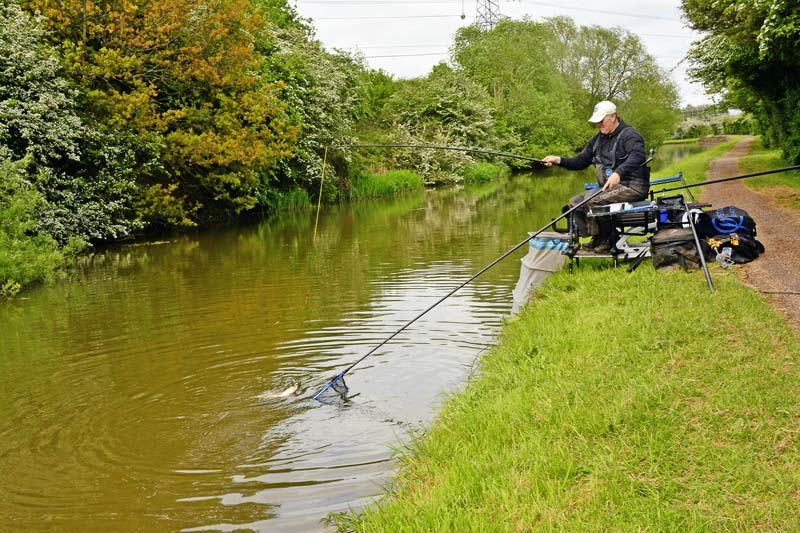
It was blowing a typical March gale for this one, so fishing the long pole was out of the question. That forced me to focus on the margins and going short at 5m. However, the lake is dominated by F1s that you have more of a chance of catching than ‘proper’ carp at short range.
When fishing in such terrible conditions, it is important to keep things simple and comfortable for yourself. Trying to fish long would only waste time and give you bad presentation in the first place. What I noticed during the match was how crucial the feeding was.
Put too much in and the F1s would come up in the water where they’re much harder to catch. It was a case of feeding less often but with a decent hit of bait each time. This put enough feed into the peg to keep the fish there but ensure they stayed firmly on the deck.
The decision to fish hard pellets rather than expanders was important too. I do this a lot because my theory is that every time a fish takes an expander it gets caught so naturally they associate them with danger.
Hard pellets are different, as the fish see lots of them as feed and so aren’t as wary of them.
Top tips
1) Don’t be afraid to use heavy rigs when it is windy. At times the weather means that you simply can’t go lighter. A 4x16 float sounds big, but when there are waves on the lake its stability is an absolute must.
2) Even though you think you might not be feeding a lot, foul-hooking F1s is common. If this happens to me, I first cut back on how regularly I am feeding. Feeding more but less often is the way to go – feed too little infrequently and I just don’t think you’ll get enough fish into the peg to catch consistently.
3) How well you catch in the edge can be governed by the depth. Ideally, 12ins-20ins of water is perfect but even if it’s deeper than this a good weight is still possible. In this instance I’d have an eye on catching shallow, as F1s, in particular will want to come off bottom, especially if you are feeding maggots regularly by hand.
Victory No2 | Golden Reel Qualifier
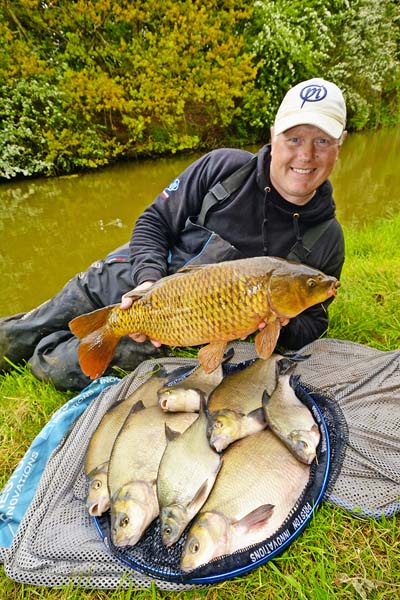
Venue: Woodland View Peg: High Pool 27 Weight: 266-10-0
In contrast to the Fish O’ match, this one was on a warm, still day when we fished in T-shirts and carp were the target. Before the start there were lots of fish cruising about close to the surface all over the lake and, when this happens, I find that they’re not really in the mood to feed.
Dobbing or mugging comes to the fore here. This basically means spotting a fish and dropping a single hookbait in front of it, trying to get the carp to take it. Fishing this way is hard work, but it’s amazing how many fish you can catch if you do it right.
The most important thing I learned from this day is how the colour of your pellet hookbait can make a difference. I began fishing a normal plain-brown 6mm pellet but was only catching one out of every four fish that I saw.
Switching to a much darker pellet did the trick and I then nailed every single one – I presume this was down to the colour of the pellet, which created a silhouette against the sky that carp could see far more easily.
Another difference to normal mugging was that most of my fish took the pellet as it was just reaching the maximum depth of my rig, around 2ft. I think that at times the carp watch the bait fall past them, respond to this movement and follow it down before sucking it in, so fishing very shallow was never going to be as good.
Top tips
1) Be prepared to have a crack at any fish you see! I caught a few on a top kit but then went out to 16m. Have the belief that you can catch cruising fish at short range – mugging is rarely a method that sees you catch all day on one line.
2) Invest in some polarised sunglasses as these make such a difference. They cut out any surface glare, allowing you to see each fish and judge in which direction it is swimming and whether it has seen your bait and is showing an interest in it.
3) I always use a long pole between the pole and float when mugging so the fish won’t be spooked by the pole tip. Around 3ft to 5ft is ideal, and I like to use a light float as well – only around 0.2g with all the shot beneath it to give me a concentration of weight to help swing the bait into position.
Victory No3 | Mega Match this Qualifier
Venue: Tunnel Barn Farm Peg: house Pool 29 Weight: 135-8-0
Although a lot of the lakes at Tunnel Barn are narrow snakes, this peg is actually in open water, and on the House Pool there’s an even mix of carp and F1s. You need to have an eye on catching both, and that meant fishing both shallow and on the bottom.
The match actually went pretty smoothly, starting short before moving out to 14.5m on the bottom with banded hard pellet. Once I started getting line bites or saw the odd swirl, I changed over to a shallow rig and this worked well too.
When fishing shallow, however, a change in weather conditions can kill the fishing stone dead.
Whether it’s air pressure or rain I don’t know, but midway through we had a big thunderstorm and the bites ceased completely! This is when being able to go back and fish on the bottom paid off, and I did this by feeding more heavily than you normally would when fishing shallow.
Top tips
1) By feeding heavily with 4mm pellets I knew that I could catch shallow and that a good percentage of the bait would get to the bottom. I caught 40lb of carp late on by changing to the deck. If I hadn’t been so positive in my feeding, those fish wouldn’t have been there in the first place.
2) When you haven’t got an obvious feature, where do you fish? I like to be well away from where I’m sat but far enough out that I can feed comfortably with a catapult and control the rig. This is why 13m or 14.5m would always be my starting point. Later I could add a pole section to follow the fish out.
3) The bottom of the House Pool is very silty, but I could see the carp bubbling. In this instance a bigger hookbait was needed, something that would stand out on the bottom – and that meant a 6mm or even an 8mm hard pellet.
Match Fishing Tips | Des Shipp's top pellet waggler tips
At long last we’ve had some warm weather. That makes fishing shallow the tactic to be on now.
For many, fishing the long pole is the preferred road to go down, trying to catch carp cruising around near the surface. The trouble with this approach is that in very sunny weather, the fish may not want to venture close to the bank and feed directly under the pole-tip.
The solution is to get the float rod out of the bag and fish a pellet waggler. It’s a very positive, busy method that allows you to fish at different depths and ranges to keep in touch with the carp but far enough out to keep the fish confident and feeding well.
When it’s warm, the first few feet of the water will be the quickest to heat up and the fish know this. They’ll come off bottom and very likely not feed on the deck at all. I love this sort of scenario and will often pick the waggler over the pole to catch consistently.
There are a good few rights and wrongs where the waggler is concerned, however. Get these sorted and I guarantee that you’re on for a brilliant day’s fishing this very exciting and non-stop approach!

Why the waggler works
There are a few positives that the float has over the pole, the first being that you are fishing well out into the lake where the fish will be at their most confident.
There’s no pole being waved over their heads, and any commotion on the bank won’t spook the carp. You can also cast further out, closer in or off to one side in seconds, without having to add pole sections.
The combination of waggler and loosefeed hitting the water makes a serious racket, and this is what attracts the fish and helps to get them feeding. Slapping a pole float on the surface just won’t make the same amount of noise!
The right conditions
Unfortunately, the waggler can be prone to suffering with bad presentation in windy weather, although the good news is that the float shouldn’t actually be in the water for that long.
That said, I’d fancy either calm conditions or the wind blowing over my shoulder for the ideal wind to fish the pellet waggler in.
A stiff wide wind is never as good, but much depends on how quickly you are getting bites. If this is only around 10 seconds then this should be just long enough to keep the waggler where you want it. If bites are taking longer, the float can be pulled offline or across the lake too quickly for the fish to take the bait.
Regular casting
Successful pellet waggler fishing boils down to making noise from the float and pellets hitting the water, and it’s for this reason that you need to cast regularly and not leave the float in the water for too long.
My general approach is to feed and then cast the waggler past the area that I’m feeding, leave it for around 15 seconds, then feed again and wind the float back into this feed and give it another 15 seconds. If nothing happens and conditions allow, I’ll feed again on top of the float and wait another 10 seconds before winding in and recasting.
Different ways of feeding
Although the pellet waggler is a positive method, the feeding doesn’t need to be. I’ll fire in only six or seven 8mm Sonubaits Pro Pellets each time I feed. If I put in much more than that it will force the carp down in the water where I can’t catch them.
Half-a-dozen is enough to make that all-important noise but still keep the fish on the hunt. The only change I’ll make to this is that on occasion I will feed two lots of pellets before casting.
This generally happens only when the fishing is good and I know a lot of carp are in the swim.

Depth choices
How shallow you fish the waggler is dependent on the depth of the lake, so on waters that are say, 10ft deep I’ll fish the float set at 3ft 6ins. This gives me the chance to catch carp on the drop as they swim about and see the pellets falling through the water.
I’ll make changes and come shallower only if I get indications on the float but no bites. This tells me the fish are further up in the water. In this instance, I’ll move the float up the line by a foot.
On lakes with 4ft of depth, I’ll switch to fishing between 12ins and 18ins deep.
Pellet sizes
You have to be able to get your loosefeed to the spot you want it, and this is why 8mm pellets are best. If the wind is over your back you may be able to fire 6mm pellets the right distance but I much prefer 8mm baits, as they also make more noise when landing on the surface.
On the hook, I’ll fish a 6mm pellet. This is a smaller bait that the fish can pick out from the loosefeed. It’s also worth trying something like a light-coloured SonuBaits Band ‘Um (white or orange) as a change bait.
Floats
I’ll always go for a loaded float as it won’t tangle and flies much better than one with big shots around the base.
The Preston Innovations Dura Waggler is a beauty, and between a 4g to 6g loading is ample on most commercial fisheries to reach the distance needed.
I use the dive disc that these wagglers come with fitted to the base as this ensures that the float pops up to the surface immediately upon landing and is ready to show up a quick bite. This also makes a little more noise. In terms of the loading it takes, I add enough brass discs to leave all the orange or yellow tip showing. Bites are positive, so you don’t need to dot the tip right down.

Pick the right rod
Short rods rule for the pellet waggler as you’ll be in and out quicker on the cast and also able to pick up the line much faster on the strike.
The two-piece 11ft Preston Innovations Supera Pellet Waggler model is ideal, and I never have the rod out of my hand except when feeding with the catapult.Sometimes, the carp can almost pull the rod in as soon as the float lands.

Attaching the float
I want to be as efficient as I can when fishing the pellet waggler, and so using a reliable attachment system for the float is key to success.
The Preston Innovations Pellet Waggler Kit has everything you’ll need, with a safe snap link swivel for slotting the float on to and float stops to fix the waggler in place and stop it from sliding down the line when you’re bagging up. I also have a Quick Change Swivel between hooklink and mainline to prevent the line spinning up, which will otherwise happen when winding in many times during a session.

Pellet waggler tackle
My mainline is Preston Innovations Sinking Feeder Mono in 4lb breaking strain. If the carp in the lake are very big I’ll up this to 6lb.
For hooklinks, I’ll happily use Mag Store Hair-Rigs, which are ready-tied hooks with a pellet band already fitted. These use KKM-B eyed hooks and my favourite length of hooklink is the 15ins that they come supplied with. On deeper lakes I may need a longer link to put the bait further down in the water so I will tie my own, still using the KKM-B hook but with 2ft 6ins or 3ft 6ins of Powerline. For a size 16 hook I’ll fish 0.16mm line, upped to 0.19mm for a size 14.
Match fishing tips | Fish at half-depth and catch more carp!
On a typical snake lake peg, fishing tight up to the far bank with a bait presented on the bottom can lead to foul-hooked fish.

It’s annoying, and it does the chances of building your peg up no good at all. Is there a remedy?
Most definitely, and it involves fishing shallow. Shallow in 2ft of water? It may sound daft, but far from being the height of lunacy, it’s a tactic that’s given me 200lb match weights from venues such as the Snake Lake at Essex water Puddledock Farm.
This lake has identical-looking swims with a typical 2ft to 3ft of water tight to the far-bank beds of sedge. Although I use the term ‘shallow’, the truth is that I’m going to be fishing at half-depth and looking to catch carp that I can see moving in the swim.
It’s a little bit like dobbing in open water in many senses, getting into a routine of feeding, keeping your eyes peeled and then laying the rig and bait into the path of a carp. Done right, the elastic will be ripped out of the pole with every fish hooked properly in the mouth!
Hold your horses!
My simple plan for fishing shallow is to identify a couple of areas in the peg with sedge or reed cover and fish these – but not from the word go. It takes around 30 or 40 minutes of feeding to get the fish into the area hunting around for the bait. It is vital that you can see the carp moving in the peg to catch them. If there’s no movement, this means there are no carp off bottom and you’d be better off fishing on the deck.
Swapping lines
Having two spots gives me the option to rest swims when the fish have had enough, but I will pick one as my main fishing area, normally one that offers easier fishing and feeding, combined with more cover.
When the bites tail off here, I’ll change to my second area. The rest can do the swim a power of good, with the fish returning within 10 minutes of the change.
How shallow?
Many fisheries have a rule on how shallow you can fish, so for this approach so you may be limited. However, in 2ft of water, 12ins or a little less is ideal for putting the hookbait into midwater. I find that you rarely catch carp just inches deep unless they are actively slurping at the bait on the surface.
Feeding
Bait and feed is hard 4mm pellets, but far from piling in the bait and waiting for the pole to be yanked over I begin by catapulting in 10-15 pellets each time to make some early noise and get the carp mooching around. Once I see a few moving, I cut back to five pellets each time. If this doesn’t work I’ll cut back further to just one or two. Should this draw a blank then I’ll turn to my last resort of a couple of bigger 6mm pellets to make some splash.

Find some cover
The right sort of peg is crucial and I’d want a peg that offers reeds or beds of sedge to act as cover. This will keep the carp feeling safe with the foliage over their heads and also lets me hide the pole tip away from the fish. Try it in a barren swim with just a bare far bank to fish to and it’s never as good.
Simple rig
The float is a tiny 4x8 MAP SF3 pea-type float taking a few No10 shot underneath. This acts more as a sight bob, as when it goes under, the elastic often follows! Lines are 0.18mm Power Optex main to a hooklink of 0.13mm and a size 18 Kamasan B911 eyed fished with a bait band. Elastic is MAP’s TKS Twin Core in the red grade.

Hide the pole!
This is the most important part of fishing this way. Put the pole over the heads of the fish and they’ll clear off, so I try and use those reeds or sedges to my advantage and hide the pole in among them.
I basically look, and once I see a carp moving right to left I tuck the pole behind where the fish is moving from and lay the rig in front of it. The pole tip is never put over the top of the fish! Sometimes I may even rest the pole on the sedge itself.
Top carp fishing tips | The bread punch
Without doubt one of the most effective methods on small commercial snake lakes when it goes cold is a tactic known as ‘dobbing’ bread... and it’s working right now!
At this time of year you’ll find that carp and F1s will shoal up into sometimes quite large groups and show very little interest in moving far to feed on your baits.
However, if you can ‘dob’ a bait right in front of their noses they will often just suck it in, as it’s an easy meal they don’t have to work very hard for.
The hard part, though, is finding the fish to start but once you do, they’re generally not too difficult to catch due to the large numbers of fish there can be in a shoal.
Punch size
This depends a lot on the size of fish I’m looking to catch. If it’s all carp I might start off on a 10mm punch because I believe a slightly bigger bait is easier for the fish too see. Carp tend to have big mouths so a 10mm piece of punch isn’t that big.
If I’m looking at a mixed bag of carp and F1s then I’ll kick off on an 8mm piece of punch as a good starting middle ground. If I start to miss bites I will quite happily drop down to a 6mm punch. F1s have small mouths so dropping down a punch size can make a big difference in terms of the bite-to-fish ratio.
Once you start fishing and find a few fish the first thing you’ll need to do is work out what depth they are sitting at.
Normally, at the start, I will have a quick plumb up of the areas I want to fish prior to fishing to get an idea of the depth in front of me.

Finding the right depth
Once this is done I mark the depth on my pole and then take 4ins off the depth of the rig by sliding my float down.
This then means when the float settles I’ll be fishing 4ins off the bottom. I always prefer to start off fishing relatively deep as this way I can cover more water as the rig falls through the layers.
Today I’m at Guru Makins and I started 4ins off bottom, eventually finding the fish thanks to a few indications.
Unfortunately the first fish was foul-hooked and so I shallowed up the rig by another 4ins and went back into the same spot.
Sure enough, the next fish was hooked properly and, after a couple more fish from the same area, I felt I’d found the depth they wanted to sit at on the day – sometimes it really is that quick!
If I’d still been getting indications and no proper bites after changing the depth then I would have shallowed up further until I found the fish.
Starting your session the other way around – starting shallow and then going deeper to try to find the fish – doesn’t work, because the deeper rig is the key to helping you spot indications to start with.

The best bait – bread!
I’m often asked why bread is such a good hookbait for dobbing. I think it’s mainly down to colour. The water on most commercials tends to go very clear in the cold, so white bread is very easy for the fish to see.
I think texture is massively important as well. Once bread has been in the water a minute or so it becomes very soft, which makes it easy for a fish to slurp in with minimal effort.
When dobbing bread I get very few instant bites – say, within 10 seconds of putting a new piece of bread on – yet as soon as the bread becomes soft I get that bite.

Fresh is best
Having tried most bread on the market, if I had a choice it would always be Warburtons Extra Thick – the one in the orange bag.
I always try and get the freshest loaf possible, too, because this way it’s softer and extremely rubbery, which helps ensure it stays on the hook long enough for me to get a bite.
I used to mess around microwaving the bread to make it more rubbery, but now I just prefer to get a fresh loaf and use that.
The only time I’d consider microwaving bread would be if I couldn’t find any fresh and had to use a loaf that had dried out a bit.
Avoid the hotspot
Where you start fishing is crucial to success, and there is always a temptation to go straight to the most likely-looking spot for a fast start.
The problem with this is if this spot isn’t straight in front of you then you risk pushing the fish straight out of your swim.
Therefore, I always prefer to start off straight in front of me and then work to the left and right of my area, which I’ve found gives you more goes at the shoal.
What tends to happen is you find a pod of fish and catch a few before bites slow up because the shoal has become spooked and has moved.
It’s really all about finding them again and normally they don’t go far – one metre or two metres at most.

Waggler fishing tips for your local commercial
We all know how deadly the pole is for catching, offering unrivalled accuracy in feeding and hookbait presentation.
For more great tips from top anglers head to this year’s The Big One Show
But, as the water on commercial fisheries begins to clear a little, waving carbon over the heads of the fish can be the worst thing you can possibly do!

Although you’ll still catch on the pole, having a waggler line up your sleeve can keep the bites coming. Such is its effectiveness in November and beyond that you may not even need to pick the pole up at all.
Rod and line allows you to cast around the peg to find the fish and present the bait at a range of depths, yet it’s a criminally under-used approach.
Norfolk matchman Robert Walton knows the value of the ‘wag’, however, and it plays a key part in the Matrix Wensum Valley Angling man’s cold-weather approach on his local Reepham Fisheries. Here’s how he fishes his float-and-maggot approach...
Why use the waggler?
“Fish will back off from the pole line so it is important to have a second line on the go. The waggler offers more versatility in terms of how far out you can fish.
“My pole line would typically be around 13m out. I then have my waggler line at around twice this distance so that I’m keeping both lines well apart. Fishing at this time of year – especially for F1s – is about getting bites regularly.
“Because of the size of the fish, you need to keep something going in the net throughout the day.”
Multiple swims
“I’ll begin on the waggler because this gives me time to prime my pole line and let things settle down. I’ll have two areas to cast to, roughly at angles of 10 o’clock and two o’clock in the swim.
“I’d give this between 45 minutes and an hour before picking a top kit up. Two lines also lets me experiment with my feed.”
Come off bottom
“Don’t think that the fish will always be on the bottom – especially F1s. These fish can come off bottom to get at the loosefeed or sometimes because they simply prefer to be here, and this will be shown by knocks as the bait falls, or by line bites.
“Fishing 1ft off the deck can result in a smaller stamp of fish, but it will keep you catching. The colder the weather is, the more productive fishing off bottom is, so it’s worth bearing that in mind.”.
Waggler rig
“The float is a 4g loaded Matrix insert waggler to a 5lb mainline and an 0.11m hooklink to a size 20 Matrix Carp Bagger hook to fish double maggot (one red and one white). This is set around 2ins overdepth with shotting down the line made up of four No9s set 4ins apart in the bottom half of the rig.”
Feeding
“Around 20 maggots every couple of minutes are catapulted in. By having two lines to go at, I can feed more on one of them to see how fish will react. To give them a bit of a kick, I spray the feed with Marukyu’s Scopex Amino Spray to give them a lovely bit of scent.”

Casting around
“Although I try to land the waggler in the same spot, it does no harm to cast beyond the feed or to either side to see if the fish have backed away. I do this if I’ve waited a while for a bite. My plan is to cast past the feed and wind the float back into the target area. This is where in that opening hour I’d expect to pick up a few carp and F1s. If the response is slow, cast past the feed and leave the float there.”
Use commercial gear to catch big canal fish
Fish a commercial with a bag of pellets and couple of tins of corn and you’ll get a bite every chuck.
But did you know that you can use these baits and the tackle that goes with them to enjoy some great canal action too?
Preston Innovations angler Graham West knows only too well the effectiveness of a commercial approach and this week he shares his secret so that you, too, can get the most from your local ‘cut’.
Swim choice
“Swims that are home to lots of cover are the places to head for at this time of year as the shoals try to seek cover from boat traffic.
“The fish will rarely venture from under these areas so you need to get your tactics right if
you want to draw them to the edge of the snags where they can be caught.
“I will feed two swims of equal depth. One pot of corn and pellets with a handful of fishmeal groundbait on top over each area will be enough to get things going.
“When it comes to topping up, you can either add a small quantity after every fish or a big pot every now and then to reinvigorate things. Try both.
“Banded hard pellets, expanders and corn are all effective hookbaits, with pellets the better option if small fish are proving to be a nuisance.”
Take no prisoners
“Extracting fish from their snaggy home can pose a challenge, but there is a technique to it. The biggest error that people make is striking when they get a bite.
“This creates all sorts of problems, the first being that if you miss the bite your rig all too often gets caught up in the branches.
“Applying pressure with a harsh strike will also cause a big fish to bolt immediately, and you can guess in which direction that fish will head.
“As soon as I get a bite I ship my pole back quickly, without striking. If you are using the right tackle this will lead to the fish being out of the snag before it realises what’s happening, and that significantly increases your chances of landing it.”
Heavy gear
“It’s all well and good getting the bite, but you need to make sure that the fish ends up in the net, and that means fishing really heavy.
“The first thing to do is make sure your pole is up to taking the pressure of heavy elastics, lines and hooks. Elastic is hollow, and rated around No17 or even No19, depending on how snaggy it is. The rig is made up of 0.21mm mainline to a 0.19mm hooklength and a strong size 14 or 16 hook.”


Top Pellet Waggler fishing tips with Rob Wooton
If there’s a tactic that ticks all the right boxes for catching carp shallow in summer then it has to be the pellet waggler. We aksed reigning Maver Match This champion Rob Wooton to give us his best tips for fishing the pellet waggler.
Compared to the pole, the waggler allows you to cast around your swim in search of the fish and feed accurately. It puts a lot less strain on the back and arms than the pole and offerds more of a safety net when playing and landing angry carp than several metres of carbon with elastic inside it.
For the average angler, wielding 13m of pole and trying to feed tightly around the float while lifting and dropping the rig can be a bit of a turn-off, but the waggler does away with all that. Instead, you just cast, feed and repeat until the float buries and a fish is on.
It’s a very robotic way of fishing but a method that rewards the busy angler best. You may make hundreds of casts, many of which won’t result in a bite or a fish, but compared to casting out and leaving the bait sat there, regularly chucking will give you a much better chance of success.
Float choice

“Things have changed when it comes to the type of waggler you fish. The days of relying on a big float to make a splash and pull the carp in are on the wane. The fish on heavily-fished waters are more educated, so you need to employ a little more finesse.
“There is still a place for big pellet wagglers, but increasingly I use lighter, almost traditional, floats. Middy’s Carp Baggin’ Machine Fat Boy floats are straight clear plastic patterns taking just a few grams, and these make far less noise when they hit the surface. This lack of commotion, I am sure, helps catch me more fish and I tend to pick floats with a loading of between 2g and 4g.
“That doesn’t sound a lot, but provided you use a thin and light mainline, you can still cast these floats far enough.
“I’ll change to the bigger wagglers when I want to make some noise or I am planning on casting in and out very quickly. In this instance, the Middy Xtreme S2 floats come out to play in 6g and 8g sizes.”
Rigging up
“I’m not a fan of pellet waggler attachments to lock loaded floats in place. I prefer instead to use Slot Shots on the mainline above a 6ins length of twisted line. This twisted section reduces tangles and the Slot Shots won’t budge, even after repeated casting. I fix two below the float and one above it.”
The right mainline
“As I’ve already mentioned, provided you use a thin and light mainline the lightest of wagglers can be cast a long way, so there’s no point in picking a thick 8lb line.
“Instead, I go for low-diameter Middy M-Tech in 0.16mm or 0.18mm diameter, which is rugged enough for catching 100lb on a repeated basis and casting hundreds of times.
“Hooklink is 0.16mm to a size 16 eyed barbless hook tied using a knotless knot to incorporate a pellet band. I’ll also mention rods – I pick an 11ft model as the perfect all-rounder, but do make sure it has a soft action to prevent bumped fish on the strike.”
Finding the depth
“The depth you fish at varies over the course of a day as the carp can move up and down in the water, so I begin by fishing 2ft deep, altering this based upon two factors. If I am not catching, this tells me to fish deeper as the fish should be down in the water a little. In this situation, I could be fishing 5ft deep.
“If I’m getting lots of indications and foul-hooking fish 2ft deep, going shallower will help so I change the depth to just 12ins.
“I don’t do this by moving the float and the shot about, as this weakens the hold of the shot. Instead, I slip on a different hooklink – I have plenty tied up to fish at 1ft through to 5ft or 6ft if need be.”
Regular casting
“This is the most important part of fishing the pellet waggler. Nine times out of 10, you catch a carp that has taken a bait falling through the water.
“So cast as often as you can, feed as often as you can and be prepared to work at it!
“The noise of the float and bait hitting the water attracts the fish and I wouldn’t leave the waggler in the water any longer than 30 seconds before winding in and casting again.
“The idea is to feed, cast, feed again, wait a few seconds, give the float a twitch by pulling the rod to one side, wait a few more seconds and then wind in and repeat.”
Feeding amounts

“Fewer pellets more regularly is the key here and, as with my wagglers, I also scale down the size of pellet used – 8mm baits are fine for windy days or when I need to fish at range, but generally Dynamite Baits 6mm Swim Stim pellets are perfect.
“I feed half-a-dozen each time, aiming to group them in an area around two metres square to create a catching zone into which I will cast the float.
“Hookbait is always the same as what I’m feeding, so that’s a 6mm Swim Stim hard pellet.”
Strike at everything

“Because carp have wised up, bites won’t be the sail-aways of the olden days! Instead, I’d advise striking at every indication on the float. The strike needs to be a solid upward sweep of the rod and not to the side.
“Keep a tight line to the float – this shouldn’t be too difficult when the float is in the water for only 30 seconds at a time.”
Fish a waggler and catch more island carp
Before the advent of super-long poles and Method feeders, the only way to catch carp when faced with an island in front of you was with the waggler. But even though this float has gone out of fashion a bit in recent years, it’s still hard to beat.
Versatility remains the waggler’s greatest virtue, allowing you to fish at any depth and distance close to or away from the island.
You can also cast around the island, following the fish if they move or trying to land the bait on the nose of any fish you can see.
None of this can be done with a feeder, and if you’ve ever wrestled with 16m or more of pole across to an island, you’ll know what a back-breaking job it is!
Say ‘waggler’, though, and you may think ‘pellet waggler’, short dumpy floats that look like mini pike bungs. Instead, I prefer classic streamlined crystal wagglers with a loading at the base to fish on the bottom with banded pellets.

Why fish the waggler?
F1s can be caught at all sorts of distances, from open water to right across to an island or far bank, but where carp are concerned, my experiences suggest that with an island on offer they won’t tend to stray too far from this feature.
This means that to catch them you need to land the bait inches from the bank. You can’t do this when the island is out of long pole range – with the waggler you can! In fact, the tighter you can get to the island, the more carp you will catch. Land the float a metre away and you will still get bites, but these will normally be from F1s.
Casting around
I don’t clip up, even when fishing up to an island. This allows me to try different areas along the far bank as opposed to casting to the same spot as often. I can then cast to fish I see moving about for an instant bite.
More importantly, though, if a hooked fish charges off I cannot get broken on the line clip!
I aim to get the waggler to land just short of the island with the hookbait plopping beyond it, as tight to the bank as possible.
Perseverance is essential, so I rarely leave the float in the water for more than 20 seconds before reeling in and recasting.
The right float

I like a float that will cast well without making too much of a splash. Drennan’s loaded Pellet Wagglers are ideal as they fly perfectly and don’t submerge too much when they land. In terms of size, it all depends on how far away the island is so this could be a 4g float or as much as a 10g model!
Occasionally the float might dive a little too much, which can scare the fish, so I’ll slip on a plastic ‘dive disc’ which works like a brake.
My only other waggler of choice for hot days when the fish may be sitting just inches deep is a shorter, chunkier hand-made design. These floats don’t look pretty but they work well.
What depth?
It’s rare to find more than a few feet of depth around an island, so fishing shallow gives me no advantage. Instead, I try and set the waggler so that the hookbait just touches the bottom, with no shot down the line on the rig for a natural fall of the bait.
That way, most of my bites happen within seconds of the float hitting the water. Only on windy days will I set the waggler slightly deeper to deal with any tow created. Flicking the
rod-tip sharply to sink the line also helps on windy days.
Feeding

If you are not casting then you need to be feeding at all times. I’ll kick off the swim with several pouches of 6mm or 8mm hard pellets to create a target area to fish over. I then regularly fire in more pellets as often as possible, normally before I cast out, once the float has landed and while I am unhooking a fish in the landing net.
The amounts can be just four or five pellets at a time on hard days or a much bigger pouchful on really good days. Always carry a variety of pellet sizes so that you can tailor them to the day.
For example, if the wind gets up, a 6mm pellet won’t reach so I’ll change to an 8mm.
Steve Ringer's 10 steps for sucess on snake lakes
Find the hidden hotspots
When I arrive at my peg, the first thing I do is plumb the whole swim extensively, just to try and get an accurate picture of what exactly is in front of me.
This doesn’t mean just plumbing the areas I like the look of, it really does mean plumbing all over.
Quite often you will find there are features below the surface that hold fish, but if you don’t plumb the swim properly you’d never be any the wiser they were there.
When I say ‘fish-holding features’ I’m talking about depth variations such as small drops-offs or even holes in the bottom which fish like barbel have scoured out.
Quite often, a barbel hole will be no bigger than 18ins across, yet it will hold lots of fish.
It’s also important to get a picture of whether the bottom is made up of soft silt or gravel, and this is why I use a really heavy plummet.
I always prefer to fish on an area of hard bottom rather than soft, as it makes presenting your bait much easier.

Open new swims
If you do start to catch, then bites dry up, never be afraid to start a new swim in the same depth of water. This way I then have two lines I can rotate in order to keep bites coming.
Once I have two lines, I will look to catch two or three fish off each before moving and repeating the process, therefore keeping my catch rate ticking over that bit longer.
As a guide, a new swim doesn’t have to be miles away – normally 2m is far enough away so that the two swims don’t impact on each other.
Swapping between swims is also a lot easier if both spots are exactly the same depth, as the same rig can then be used!
Start short
Without doubt the most common approach on snake lakes is to start tight across to the far bank – after all it always looks more appealing over there.
By doing this, though, you are potentially missing out on a couple of early fish.
Normally, if you are quiet when tackling up, you can catch a couple of quick fish on a top kit plus one straight in front of you, almost between your nets.
You see, if it’s quiet the fish like to be close to the bank, hence you can often catch a couple straight away before they realise what’s happening and push out to the far bank.
This is only a line I will fish for 15 minutes at the start, but more often than not it will produce a fish within seconds to get your session off to a flyer.
Fish at an angle
Once I’ve exhausted my close-in swim I will work my way out towards the far bank, starting by fishing down the track.
I always like to try and put any other lines at angles of either 10 o’clock or two o’clock, if you imagine the swim as a clock face.
This means when I hook a fish I can steer it away from the baited area and play it straight in front of me without ruining my swim.
There’s nothing worse than hooking a carp and playing it on top of where you are fishing. By setting my swims at angles I can avoid this happening.
Use a longer pole rig
When fishing tight over then more often than not you will only be fishing in inches of water.
In this situation carp can be very spooky, especially if a pole is waving about over their heads.
For this reason I like to fish a longer than usual length of line between pole float and pole-tip.
Instead of fishing with 12ins of line, I will fish with between 24ins and 30ins to help me keep the pole tip high above the water so there is less chance of the fish spooking away from it.
Using a long line can often mean you get a slack line and this can lead to missed bites if you’re not careful.
To combat this I keep a tight line between float and pole-tip by using a string of No9 back shot.
The bottom shot is placed 4ins above the float and the rest are then spaced at 4ins intervals above this.
I miss very few bites when I’m back shotting like this.
Start short
Without doubt the most common approach on snake lakes is to start tight across to the far bank – after all it always looks more appealing over there.
By doing this, though, you are potentially missing out on a couple of early fish.
Normally, if you are quiet when tackling up, you can catch a couple of quick fish on a top kit plus one straight in front of you, almost between your nets.
You see, if it’s quiet the fish like to be close to the bank, hence you can often catch a couple straight away before they realise what’s happening and push out to the far bank.
This is only a line I will fish for 15 minutes at the start, but more often than not it will produce a fish within seconds to get your session off to a flyer.
Give yourself bait options
No matter how well you think you know a venue it’s always important to give yourself a couple of bait options.
Even if you think it’s going to be all about pellets, make sure you have a back-up of something like maggots, which tend to be a safe option on snake lakes.
Venues change from one day to the next, and by having two options instead of one you are giving yourself the ability to switch should the need arise.
Go long and find a gap
When deciding where to fish across I will always look for gaps in the rushes that allow me to get as tight to the far bank as possible.
Carp like to hug the bank provided there is enough depth for them to do so, therefore the tighter I can get to the bank the better, as this makes it easier to catch them.
There’s nothing worse than a far bank full of rushes but nowhere to get in between them. If I have to fish in front of them it’s usually too deep to do so properly, and line bites and foul hookers then become a nightmare.
Use the right floats
In general snake lakes are quite shallow, so light floats are the order of the day. As a guide, I like KC Carpa Ape floats for fishing across and in the edges and Mick Wilkinson Steadies for down the track in the deeper water.
Sizes are depth-dependant, but if it’s 4ft-5ft in the track I will look at either a 4x10 or 4x12. For across and down the edges Apes in 0.2g are the norm.
Feed carefully
If I’m in doubt about how to feed a swim I’ll always opt for a little and often approach – you can put bait in but you can’t take it out again!
If I start by feeding little and often I can always up my feeding if the need arises. However, if I start by dump potting lots of bait and it isn’t right there is no way back.
The other plus with little and often feeding is that it’s a great way of pulling fish, as both the noise of bait hitting the surface and falling through the water will attract fish into the swim.
Finish down the edge
As I’ve mentioned, I always like to start my session by fishing short and then moving out as the day progresses,
Then, late on in the day, I work my way back again to finish in the edges.
The reason for this is that I start short to catch quickly, then move across as the fish get pushed out by angling pressure.
Once the fish get used to what’s going on and start to move back in I will simply follow them.
The margins are very much the place to be in the last hour of any session.
How to catch commercial carp shallow
Summer is all but here, and that means shallow fishing becomes a key part of every angler’s armoury.

Even on the narrowest of snake lakes, catching up in the water proves itself to be a winner time and time again.
Wirral fishery owner Steve Openshaw has a record as good as any when it comes to this style of fishing, mainly at Partridge Lakes for F1s.
The Lingmere boss, who recently qualified for the Fish O’Mania Final, does a few things different to the norm when it comes to bagging up shallow on casters…
Multiple rigs
“Several top kits are set up to search the depths and these fall into two categories – positive and negative.

“I’ll begin fishing shallow down the middle and try to identify what depth the fish are feeding at. This could be 3ft, 2ft or even a foot deep, but using one rig and sliding the float about wastes time, in my opinion.
“By having a top kit ready to go at a certain depth I simply pick it up and I’m ready to go. To kick off the session I use the negative rig, which features strung-out
No11 shot for a slow fall of the bait. This way I can see where I am getting bites or indications and make changes accordingly.
“When the fish arrive in numbers and I’m getting bites quickly, I swap over to the positive rig that has a bulk of shot as opposed to strung.
“Hookbait is a single caster nicked on to the hook – I’ve not got the patience to fiddle around with bait bands!”
Search the depths
“I won’t begin a session fishing shallow. It takes a good 45 minutes to an hour for fish to find the feed and come shallow. Rarely do you see them swirl, and you could be forgiven for thinking there wasn’t a carp or an F1 in the peg when the truth is they’re most likely to be sat a foot under the surface.
“I begin fishing at 2ft deep and look for indications and bites. If nothing happens it’s likely to be too early to catch here, so I’ll go back to fishing elsewhere in the peg. Knocks on the float or bites mean there are some fish to play with – my job is to find them.
“The first change I make is to go shallower at a foot deep. If this draws a blank I’ll change to the 3ft rig, as the fish may be deeper.
“Basically, if I’m getting indications but not hooking fish I need to change to a different depth until I do hook them!”
Distance to fish
“Most snake lakes are around 14m wide with 5ft to 7ft of water down the middle, so it makes sense to fish this deeper area as there’s more water to draw fish up from.
“This should be around five or six joints of pole out, which not only makes catching quicker but also the feeding. You can fire casters with a good degree of accuracy to this range.
“I’d also have this shallow line set off at an angle down the peg, depending on what the wind is doing. I like to have the swim downwind as this improves presentation and accuracy of feeding.”
Tackle to use
“The negative rig uses an RW F1 Slim float in 4x8 or 4x10 sizes with 0.14mm mainline, a 0.12mm hooklink and a size 18 Guru LWG hook. For the bagging rig lines and hooks are the same, but the float is a 4x8 MAP SF2. I use Orange F1 Hydro for both.
“I slip a piece of float silicone on to the bristle of the bagging rig float. This stops the float eye pulling out when I’m catching well, and prevents tangles.
“I use a very short line between the float and pole so I can hit more bites.”
Picking the right feeder for fishing with Jamie Hughes
Feeder fishing has become all the rage in recent years, with more people than ever choosing to watch the tip fly round instead of reacting to the float shooting under.
As a result of this boom, the variety of feeders that can be found in your local tackle shop has rocketed, leading to confusion when picking which is best for the job in hand.
Jamie Hughes relies on four different types of feeder for his action, and this week he reveals the deadly quartet and when to turn to each.
Maggot feeder
“If you want to fish for silvers on the feeder then this is the ultimate tool. Simply fill the feeder with maggots, chuck out and wait for them to escape slowly.
“You can moderate how quickly the maggots escape, piercing more holes in the feeder if you want a fast release when the fish are feeding well or using masking task to cover a few of them when the action is slow.
“I will start off using a hooklength around 2ft long, with a size 18 hook at the business end. If I am missing bites I will shorten my hooklength by 6ins, as these are likely to be line bites as the fish gorge close to the feeder itself, but if I can’t get any action I will extend the hooklength by 6ins.”

Cage feeder
“This is a great feeder for introducing lots of bait, as it will release the contents quickly.
“Packing it with groundbait is the best attack, especially when fishing for bream, although dampened micro pellets can be used in it if you are fishing for carp.
“When bream fishing I start the session with a large cage feeder, cast it out fully loaded and then leave it for 20 seconds before twitching it to release the contents and winding in.
“I then repeat that process several times to get down a big bed of bait for the shoal to sit over.
“For the fishing itself I will switch to a smaller feeder so that less commotion is caused.”
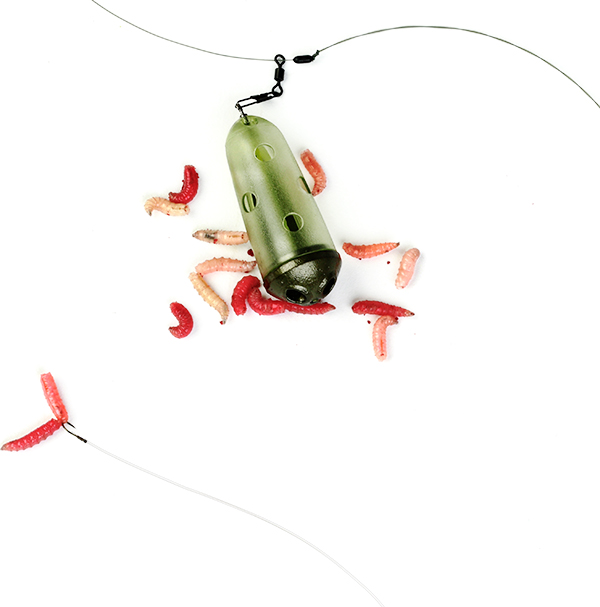
Pellet feeder

“This is a brilliant feeder for when carp and F1s are my primary target.
“If I am chucking a fair distance then I am confident that the bait packed inside will still be there when it reaches the final destination – that is really important.
“I also believe that a pellet feeder releases the bait at a slow pace. This is ideal for days when you are having to wait for bites as opposed to bagging one every chuck.
“Tuck a bright hookbait such as a Bag‘em Matchbaits Tuffit inside with the dampened micro pellet loosefeed and the rod tip will soon arch round.”
Method feeder

“Without doubt the Method feeder is the one I use the most. It has helped me win a lot of matches over the years.
“Groundbait or dampened 2mm micro pellets can be moulded around the frame and will crumble off once they reach the bottom.
“The fish will dive in and attack the ball of bait and will suck up your hookbait at the same time.
“Use a 4ins hooklength so that within a split-second of them attacking the feeder, they inhale the hookbait and then feel the weight of the feeder.
“The fish will now bolt and hook itself against the feeder. It is a deadly tactic that will catch you an awful lot of fish.”
8 Great feeder fishing tips to help you catch more
Looking for some big fish action on the feeder this weekend? Then you may want to take a look at these top feeder fishing tips from Steve Ringer, as he shows you how to catch more carp on the feeder for when you are out on the bank next.
1) Big hooks mean big fish!

On venues such as Boddington the carp’s average size is 7lb-9lb. It’s not so much the size of the fish that’s important here as the size of their mouths!
An 8lb carp has a huge mouth, and this is worth keeping in mind when making your hook selection. When rules allow I like to use a size 10 QM1 hook. That might sound big in a match situation, but if you compare a size 10 to an 8lb carp’s mouth it suddenly doesn’t seem that big at all!
In the cold, every bite needs to count and I’ve found that using a size 10 gives me an improved bite to fish landed ratio.
It’s also worth pointing out that QM1s are razor-sharp, something which I believe is important when we are talking about making sure a carp doesn’t suck the hookbait in and then blow it straight back out again without getting hooked!

2) Use heavier feeders
More often than not big-water carping is all about distance fishing, so picking the correct weight of feeder is extremely important.
I tend to stick to three types – large 45g and 55g feeders and 42g, which are classed as medium size.
If conditions are perfect I’ll kick off by using a 45g, large feeder. I prefer a big feeder on big venues as I just feel it increases my chances of a carp finding it!
As the session progresses you’ll frequently find you need to go that little bit further out as fish can back off, and this is when I switch to the 55g, large feeder to help me reach the extra distance.
For extreme range I actually drop down a feeder size! Believe it or not, I use the 42g, medium feeder when I need to go really long, as the slightly smaller body size outcasts its bigger rivals.
I will add that for all my long-range, big-water feeder fishing I go for a Hybrid feeder rather than a Method, as I believe it protects the bait a lot better on impact.

3) Gear up to go longer
As far as distance goes at Boddington, quite often I might have to fish in excess of 100m to get to where the fish are, especially if they push out as the match progresses.
With this in mind, I always like to have both a 13ft and 14ft Tournament SLR rods set up.
The idea here is that I start the match on the 13ft rod, but if the fishing is hard and I’m chasing the fish I’ll switch to the 14-footer.
I reckon the 14ft rod gives me another 10m-15m casting range. That might not seem like a lot, but it can make the difference between getting more fish and not.

4) Boost your attraction levels
Giving my pellets a flavour boost can be a real edge, particularly when the water is coloured, as it gives carp more chance of finding my bait.
I use Goo for this and it’s very much a case of ‘less being more’ – a blob no bigger than a pea is plenty. Once added, use the nozzle on the bottle to spread it on to the pellets.
For a quick release I put it on the outside of the pellets, whereas for a slower release I half-fill the feeder, put the Goo on, then seal it in with a second layer of pellets. This is great when you’re waiting longer for bites.
My go-to flavours are Pineapple and Caramel, and I opt for the Power Smoke versions.These are thicker in consistency and stick to pellets better than the thinner Bait Smokes.
5) Swell your micros

One of the questions I’m asked the most on social media at this time of year is whether to use groundbait or pellets on the Method or Hybrid feeder.
My answer is simple – unless you have prior information that says groundbait is best on the venue then, as far as I’m concerned, pellets are without doubt the better option.
Given the choice, I will always use 2mm Ringers Method Micros. These I prepare the night before, and then tweak them again in the morning.
By damping them the night before, I find they swell up a little bit more, which I prefer when targeting big fish.
6) Use low-diameter mono

It's wrong to imagine that to cast further you need to be using heavier lines of 8lb and above.
Lower diameter lines are much more effective, and I use either 4lb or 5lb low-diameter Guru Pulse as my mainline.
If I try to cast to extreme range with 4lb or 5lb mono there’s a good chance I’m going to crack off, so I incorporate a shockleader of 10lb Tournament ST.
I cast off this 10lb leader but I still have the benefit of 4lb or 5lb mono once the leader leaves the rod rings.
As to leader length, when the feeder is in the casting position I like to have 4-6 turns of the leader still on the reel.
To join the mainline to the shockleader I tie an overhand loop in the mainline and then a double tucked half blood knot to attach the leader.
The knots are then trimmed tight so there is minimal friction through the rings.
7) Big bright baits are vital

Hookbait choice is all about using what you’re confident in, and right now that’s 10mm and 12mm wafters.
These may seem like big baits, but bear in mind I am targeting big carp by match standards as opposed to F1s and skimmers.
What I love about wafters is that they just sink under the weight of the hook and give me a very light hookbait that flies up inside a carp’s mouth when sucked in.
This means it’s very hard for a carp to get away with spitting out the hook and bait once they’ve been sucked in.
Colour is entirely down to personal preference, but if I had to pick just one then without doubt it would be an orange wafter – it’s been brilliant so far this winter!
8) Be prepared to move

Location is key when it comes to catching carp in the cold.
I always start by clipping up, so if I get a bite or indication I can get back to the same spot again stright away. Normally, where there’s one carp there will be others nearby.
If I don’t get a bite or an indication I will never have two casts to the same spot.
This might mean taking the clip off and going further out, or keeping the clip on and just casting to the left or right of where I had originally caught, in a bid to find the fish again.
When it’s cold, carp don’t tend to come to bait, so it’s all about trying to find them.