
Pike fishing tips - Dai Gribble's top five deadbaits

Smelt
If I could use only one bait for pike it would be smelt. They are incredibly versatile and can be used with every method. They have an unusual smell that is a little like cucumber, but pike love them. Their pale colour makes for a very visible bait that’s ideal for drifting or popping up above weed. They are tough so can be cast long distances and used for wobbling and trolling.
Mackerel
Whether it be a small ‘Joey’ mackerel fished whole or half a larger mackerel, they make outstanding baits. I’m sure one of the main reasons for this is that they are very oily, which draws pike to them from a long way away, even in coloured water. Mackerel are quite dense and streamlined, making them the best choice if you need to cast a bait a long way.
Sardines
Like mackerel they are very oily and I reckon pike prefer them to any other sea bait. There is one major drawback – they are extremely soft. This is not an issue when they are frozen but once they thaw out they are prone to flying off the hooks. However, at short range, by hooking sardines with the top hook in the gill plates they can withstand a much firmer cast.
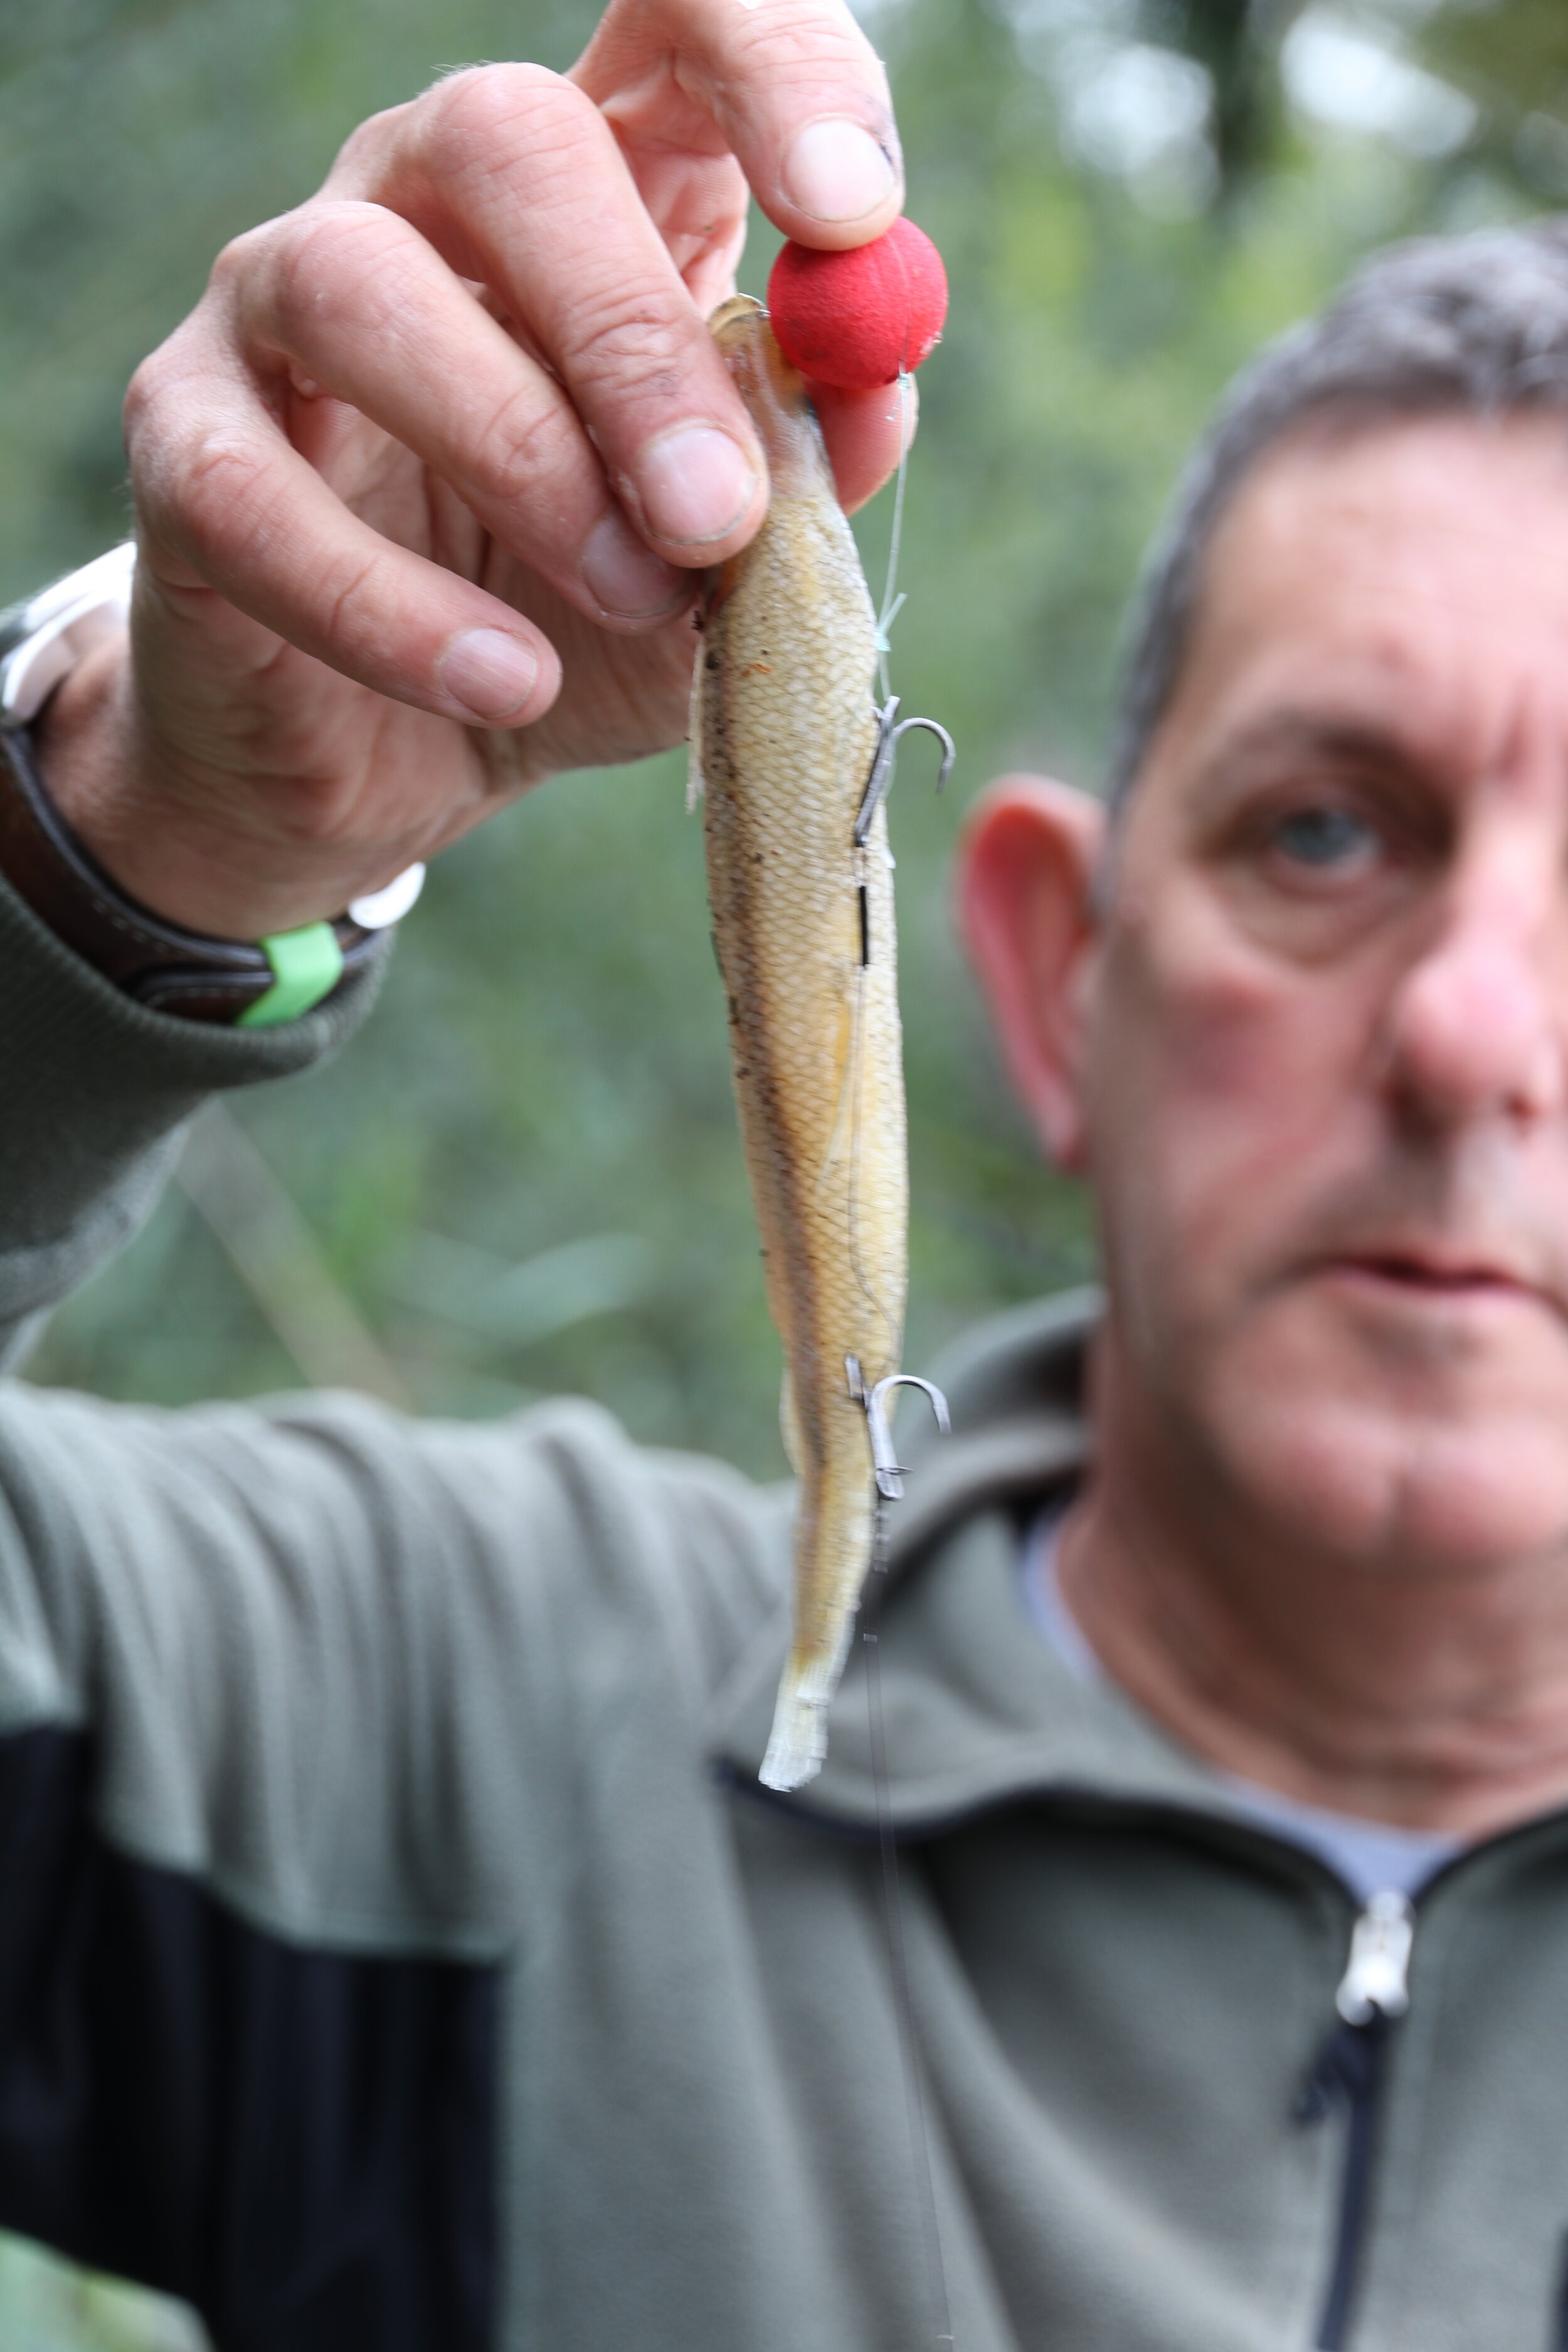
Roach
Pike are used to eating roach as part of their natural diet. On occasions pike will show a marked preference for roach over sea baits and for this reason I usually start a session with one rod baited with a roach. Often roach deadbaits have the swim bladder intact, making them perfect for popping up – just add shot to the trace to set how far up they will sit.

Lamprey
On some waters lampreys outfish every other bait, and on others they rarely produce a run. No other deadbait comes close to them in terms of the amount of blood they exude, and I like to slit the gills with a sharp knife to maximise the amount of blood leaking out. It is worth doing this every cast as it is amazing how much pike-attracting blood there is in a relatively small bait, even when it has been in the water for hours.
Commercial fishing tips | Bomb out a maggot feeder in the cold with Dan Hull
Think feeder for carp on commercial fisheries and most anglers will instantly reach for the Method... and who can blame them?
The effectiveness of this type of feeder is well known, and it works superbly in winter for putting a hookbait just inches away from a small dollop of feed.
Are you missing a trick, though, by automatically choosing the Method? As the water cools, the appetite of carp and F1s for pellets diminishes and maggots begin to play more of a part in our plans, especially when fishing the pole – so why should the same not apply to feeder fishing?
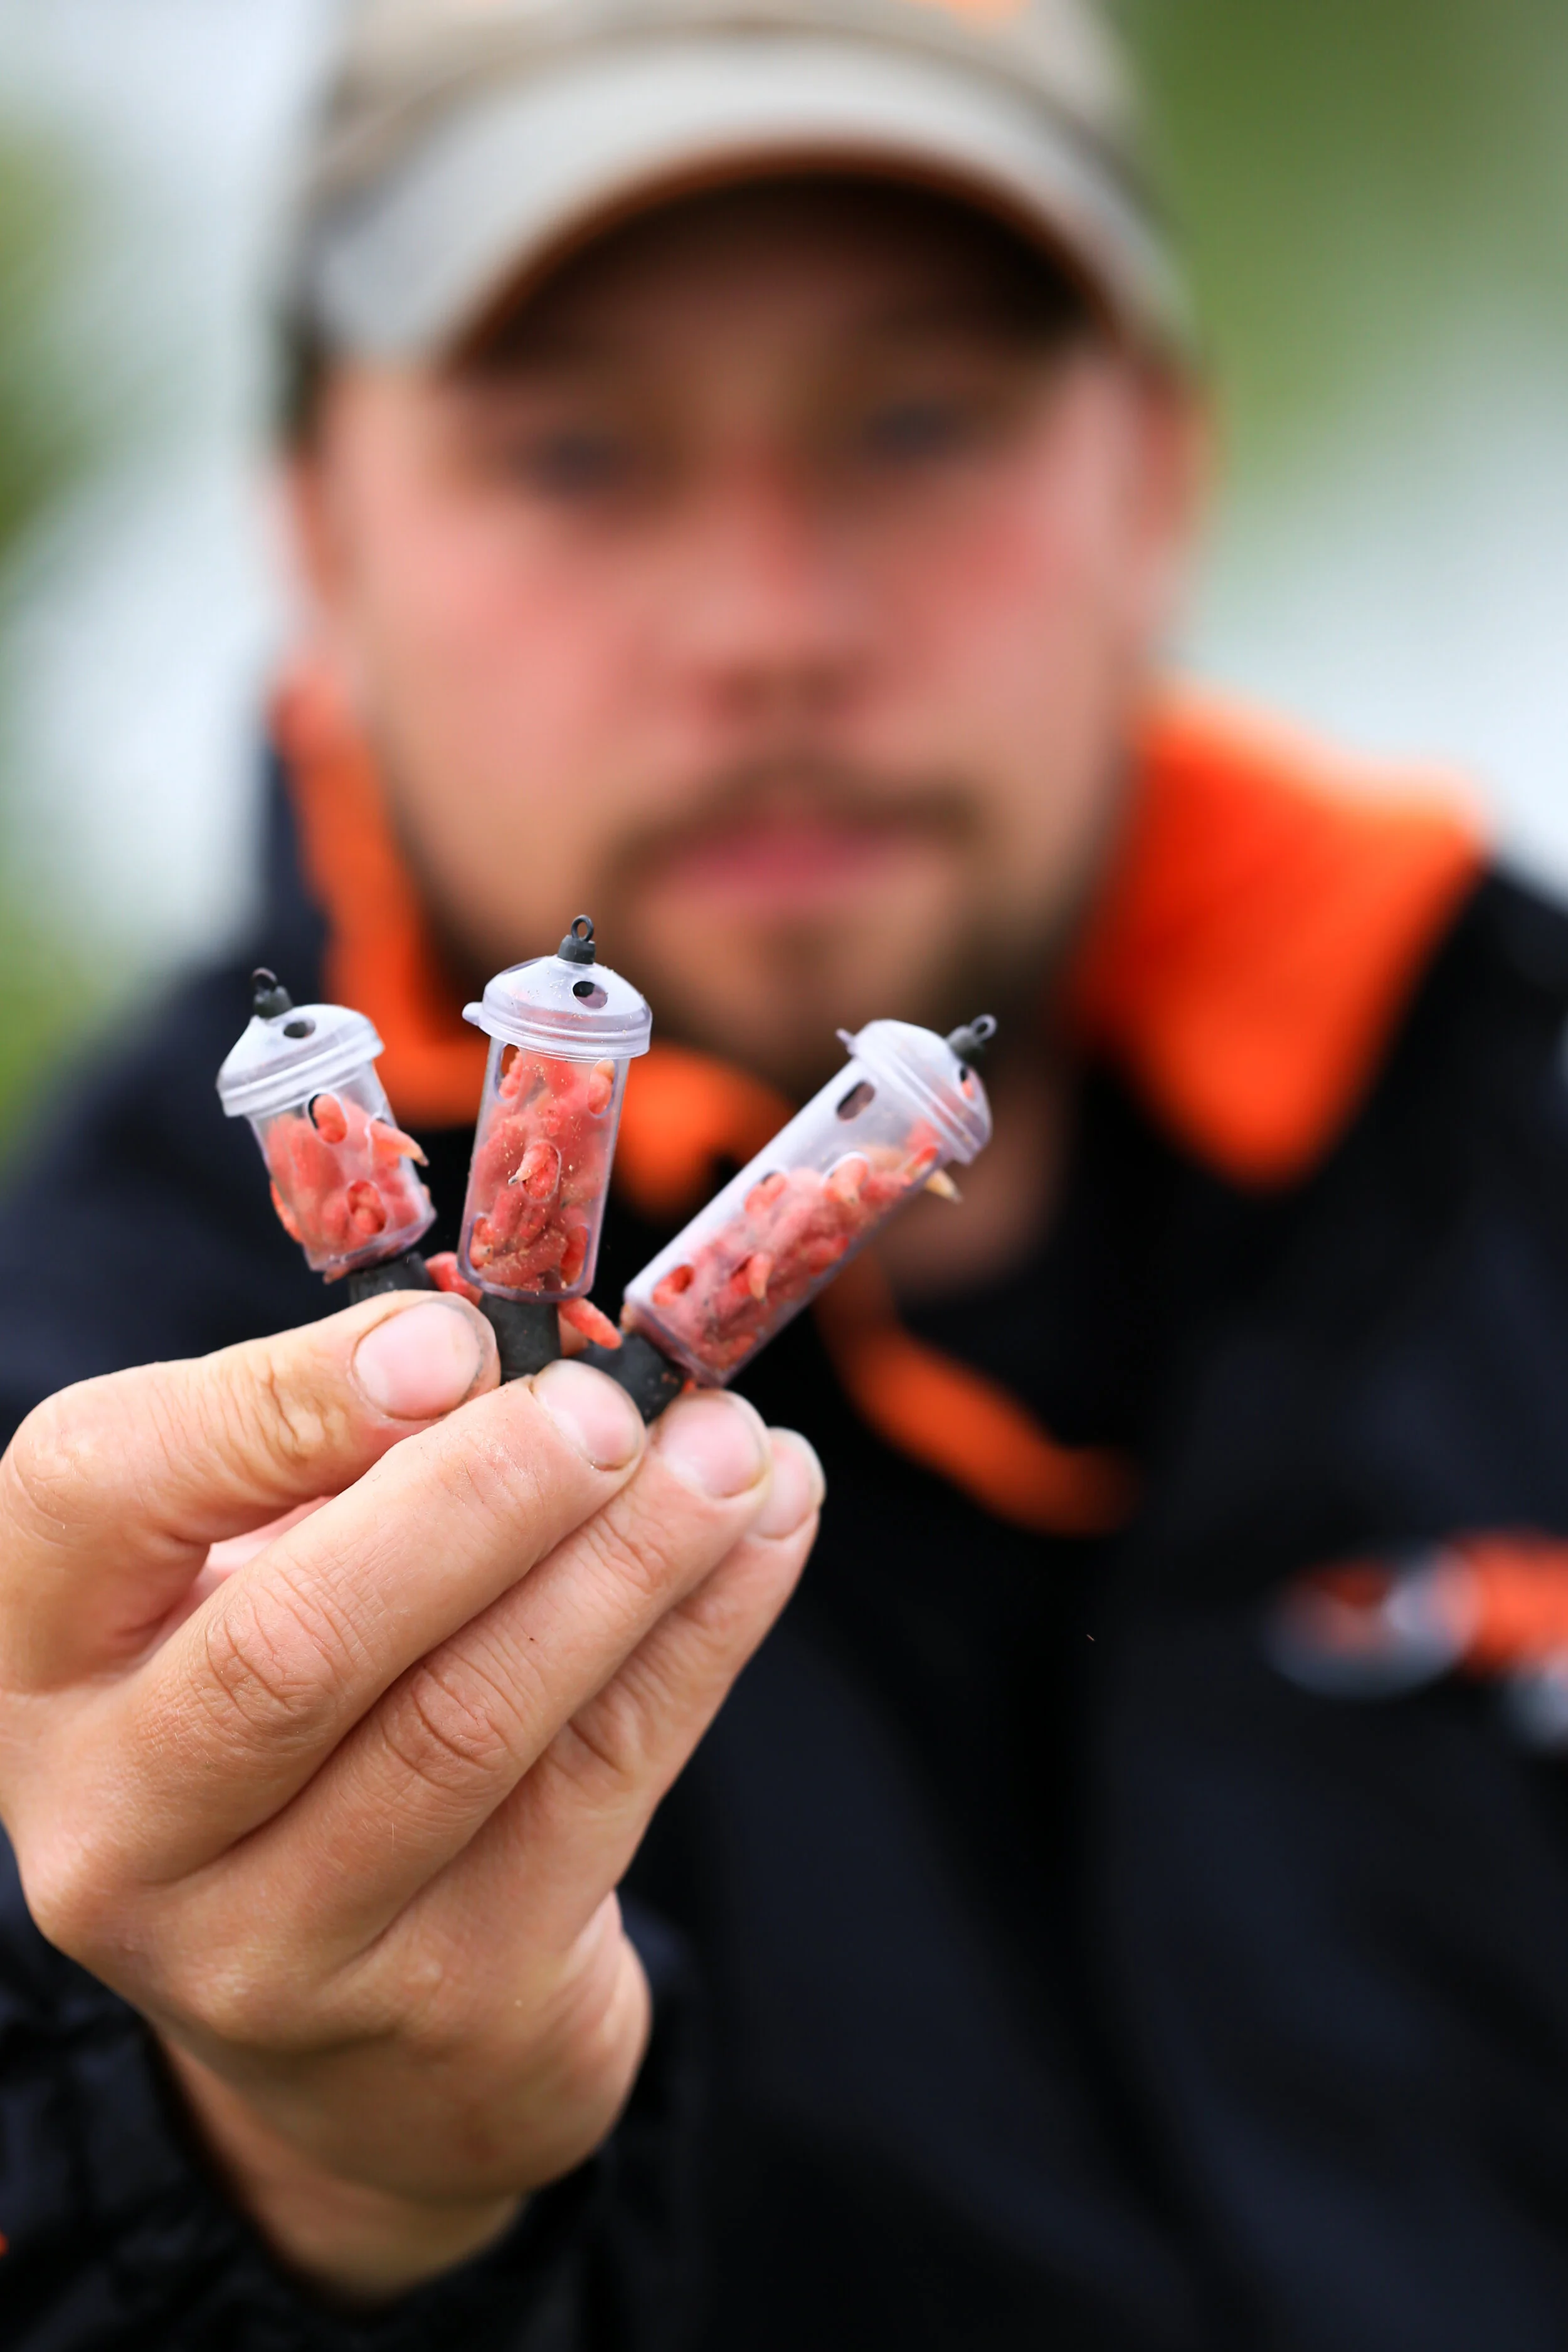
To introduce maggots through a feeder there really is only one choice... the maggot feeder. This is better-known for catching chub and roach on rivers, but the maggot feeder can be devastating for commercial carp when they’re not interested in larger helpings of feed.
Maggots are the ultimate trigger bait to get fish feeding, and are so often what we turn to for getting a bite when all else fails. They also catch everything that swims and so aren’t as selective as pellets. This is handy on cold days, when anything gracing the landing net is more than welcome.

Feeder choices
Classic-style maggot feeders aren’t really designed for longer casts on commercial carp waters so you’re better off picking up a newer design that is more streamlined and will cast a long way with ease.
I use a Middy Carp Bomb Feeders, which has a loading in the base and a slimline shape to hel with consistent, accurate casts. My ploy is to begin with a bigger feeder to get bait into the peg but then scale down to a smaller model once I begin to get bites. This will give the carp just enough freebies to keep them in the swim without filling them up.
Not just maggots!
I don’t put only maggots in the feeder. In addition there are fluoro pinkies in the mix to give the fish something a bit different and to also provide me with an alternative hookbait if I’m struggling for a bite.
The ratio is 60:40 red maggots to pinkies, with single maggot or double pinkie my main hookbait – although double maggot will come into play if the fishing is good.
Have more options
It’s convenient to have just one line to keep fishing and building up all day, but this limits your chances of catching well – if I were fishing the pole I’d have two or three spots to feed and fish, so I don’t see why it should be any different on the feeder.
That means a line on a long cast of say 40m and then a second one at around 20m, depending on the depth of the lake you are fishing. So long as these two lines put you in the maximum depth on the lake, you’re in business.

Pack the feeder
Maggots will soon wriggle out of a feeder, so I take a bit more time to fully pack them in on each cast to stop this happening.
They’ll have no problem getting out once the feeder hits bottom and provided you are using a small Carp Bomb Feeder, there’s no need to worry about introducing too much feed.
Accuracy is vital so you don’t end up with a spread of bait over too wide an area. ‘Keep things tight’ is the motto here, so if the feeder doesn’t land where you want it to, wind in and cast again.
Bite times
The fish will tell you how long to leave the feeder in before casting again, but as the water cools this time will lengthen, and up to a 20-minute wait might be needed.
That’s as long as I would wait, but I would begin by casting every 10 minutes to keep a reasonably regular amount of maggots going in. Then, when I begin catching, I can change this according to how fast I am getting an indication.
Tackle bits and bobs
Although my lines are reasonably strong, made up of 0.20mm M-Tech Carp Commercial mainline to a hooklink of 0.16mm Lo-Viz, the hook is very small to suit fishing with single maggots.
A size 20 KM-4 is small but very strong, and will land big carp easily while getting you more bites in clearing water.
When it comes to hooklink length, this too varies. On some days the fish will sit well off the feed or follow the bait down as it falls before taking it, meaning a long link is better.
On others they’ll be on the feeder immediately with a fast bite, which is where a short link catches better.


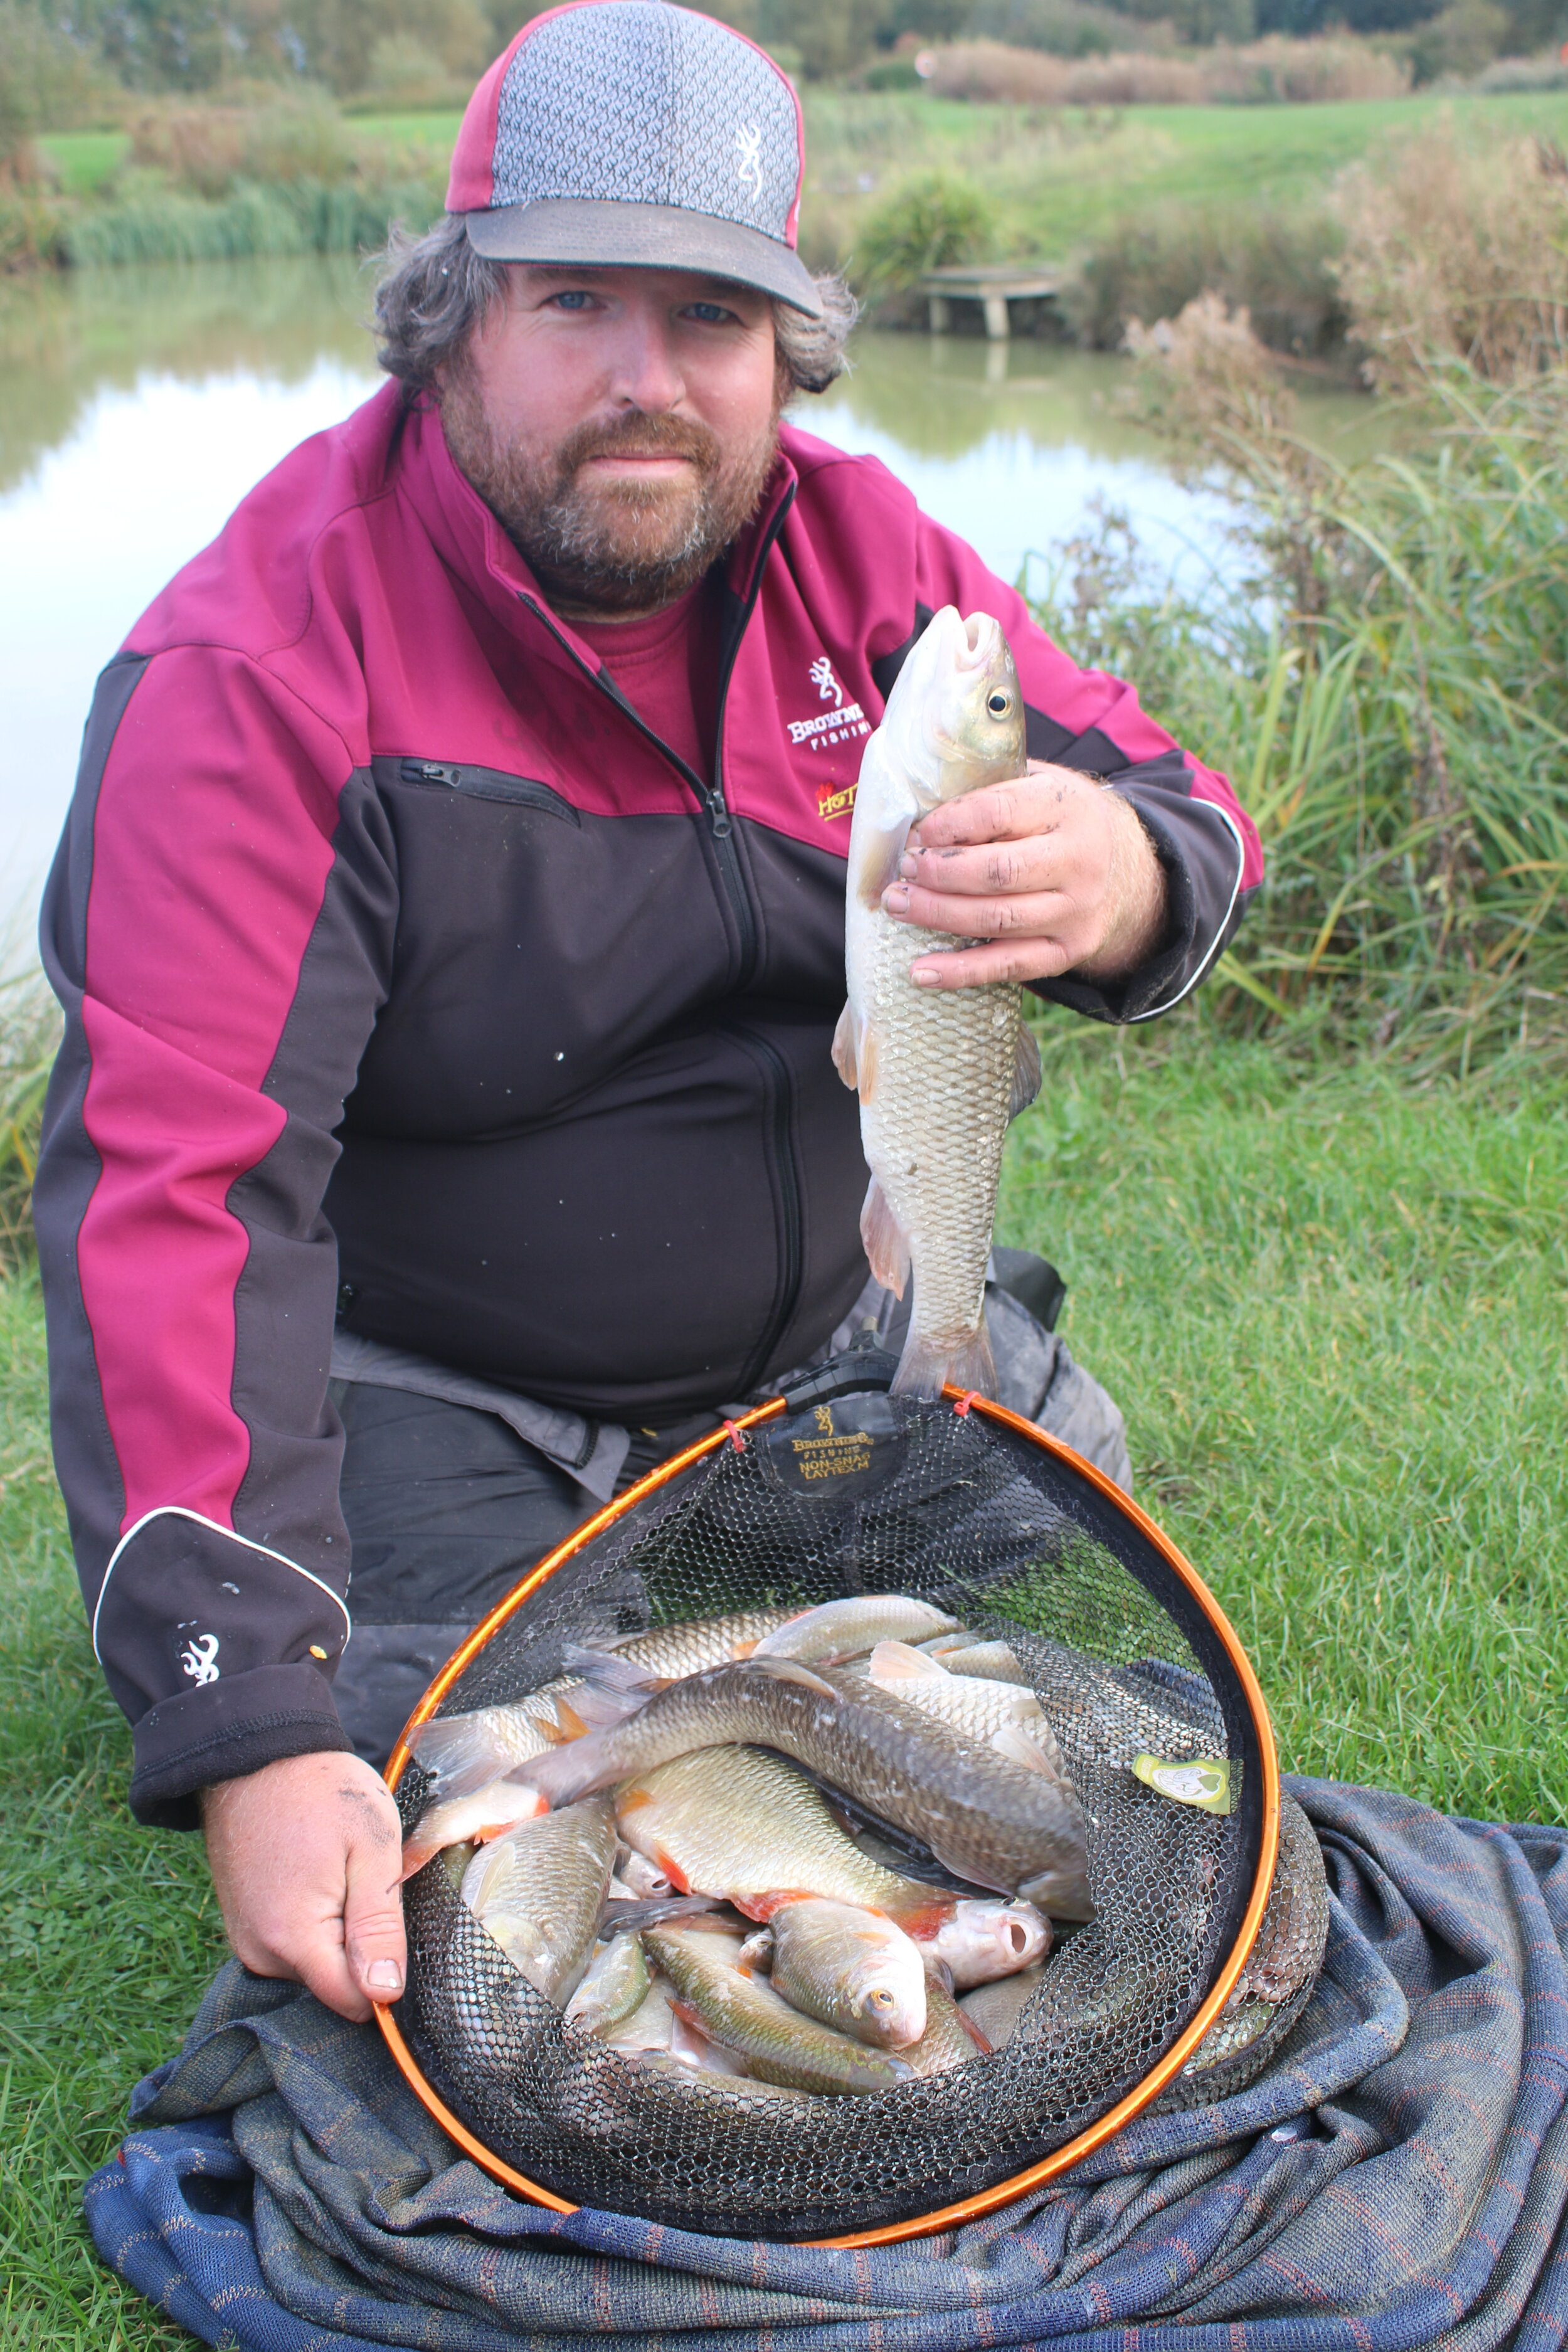
River Fishing Tips | How to improve your river catches on the float!
Now is the perfect time to catch a bumper bag of roach and dace, and you can be sure fish in many rivers the length and breadth of the country will be feeding well in readiness for the lean times they know are coming.
And there’s no more enjoyable way to catch them than with a stick or a Bolo float.
Both really come into their own when there’s a bit of pace on the river, but I fish them in different areas of the venue.
I’ll choose a stick float for close-in work – no more than around three rodlengths out – and a Bolo for further out.
I’ll start on the Bolo while I priming the stick float line for later in the session.
The Bolo is shotted simply, with an olivette at two-thirds depth and a couple of No8 droppers between this and the hook.

No feed to start with
When I begin fishing the Bolo, I don’t feed anything on this line – I simply run the float through to give me an indication as to what kind of mood the fish are in.
If the float instantly buries, it generally means I’m in for a good day. However, if I run it through a few times without a touch, this tells me that the fish are in a less obliging mood, telling me I shouldn’t feed very heavily.
If I catch instantly, I’ll then give them some feed on this line, initially several catapult pouches full of hemp followed by regular maggot loosefeed.
I’ll look to stay on the Bolo for an hour or so while also feeding the closer stick float line with maggots and hempseed. This is where I’ll expect to catch roach later.

On to the stick
A stick float taking around six No4 shot is ideal in many swims, shotted with No6s equally spaced between float and hook, apart from the two bottom shot which are smaller No8s.
The presentation offered by this stick set-up is much better than you can get with a Bolo and perfect for big, wary roach, which should be feeding after being fed loosefeed for an hour or more.
On the stick, I’ll start by easing the float through so that the hookbait is just tripping bottom, but be prepared to change depth a few inches up or down if bites slow. You can also slow down the rate at which your float travels through the swim for a different presentation.
Big roach love a hookbait presented slower than the current.

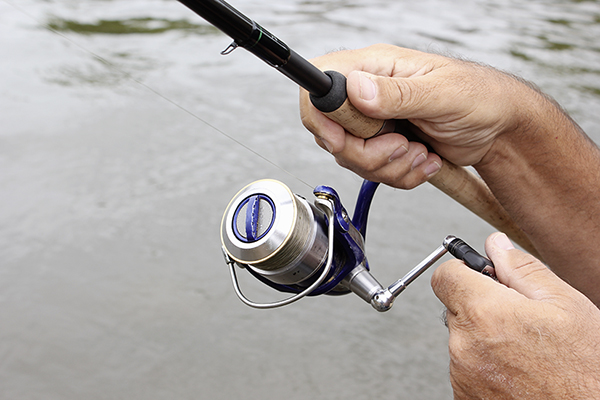
stay in control
It’s important to control the passage of your float through the swim, and the easiest way to do this is to fish with your reel’s
bail-arm open and let line peel from the spool as the current pulls the float through.
To slow it, dab your middle finger on the front of the spool to prevent line leaving. You can also try actually ‘feeding’ line out with the fingers of your other hand.
20 Carp fishing tips to try right now!
With carp fishing being as popular as it is, it can sometimes be a struggle to head to a water full of confidence that you may actually catch a carp, especially on heavily fished waters. However to help you in your quest for a big carp while fishing, we have decided to come up with 20 carp fishing tips to help give you an added edge over the angler in the next swim. Check out our list of carp tips below and let us know what carp fishing tip best suits you!
Freezer or shelf-life?
Both types of boilie work well when carp fishing but ultimately it comes down to personal preference. Freezer baits contain few preservatives and so are ‘fresher’ but won’t keep once defrosted making these best for one or two sessions at best. Shelf-lifes can be kept in the resealable bag for ages but aren’t as fresh. However, they remain effective for longer than freezer baits and so are a better choice for the occasional carper.
Carp fishing line
Old-fashioned mono reel line is supple and forgiving, but there are two other options that have somewhat niche uses.
Braid is no good for fishing for carp at distance but at close range and in snags it is brutal stuff that won’t break, while fluorocarbon is almost invisible underwater and sinks well, ending up pinned to the lakebed. This makes it very useful in gin-clear water or on hard-fished venues.

Choose the right hook for carp
Carp hooks do various jobs. For surface fishing or when using pop-ups, go for a wide gape hook. For fishing a bottom bait, little can beat a long shank pattern.
Curved shank hooks are brilliant for wary carp that may otherwise eject another pattern as they pick it up. So think about the fishing you are going to do before choosing your hooks.

Carry different boilies
Of all the sizes available, 14mm and 16mm boilies are the most popular – but carp see a lot of them and can associate them with danger.
The way round this is to scale down to a 10mm bait, either as a single or double offering. At the opposite end of the scale, a bigger 18mm or 20mm hookbait will give them something different, and a real mouthful.
See more carp fishing bait here:

First locate your carp
Where will the carp be when you arrive at the lake? Several factors have to be taken into consideration.
A good starting point is the north-east corner of a lake. This will get the sun and also avoid the worst of any colder winds. Reeds and weeds are fish-holding spots, and a noticeable drop-off in depth offers an area where carp can move up and down in the water.
Check out 20 of the best carp fishing runs waters
Check the lakebed
Every lake is different when it comes to what’s on the bottom. It could be gravel, sand, silt or mud and all substrates have their pros and cons. Cast a lead around the peg with braided mainline and slowly wind it back, feeling for different sensations as it comes back.
Tremors and taps on the rod-tip will indicate gravel, whereas silt will feel like pulling the lead through cotton wool as it sticks in the muck. A smooth retrieve spells a sandy bottom.
Perfect your rods
Carp fishing rods are sold with varying actions and it can be hard to know which one to pick. A rod with a fast action makes a great casting tool but can lead to hook-pulls at the net... a through-actioned rod struggles to send leads a long way. The happy medium is a middle-to-tip-actioned rod that will let you throw a long way but be soft enough to ensure that fish don’t come off.

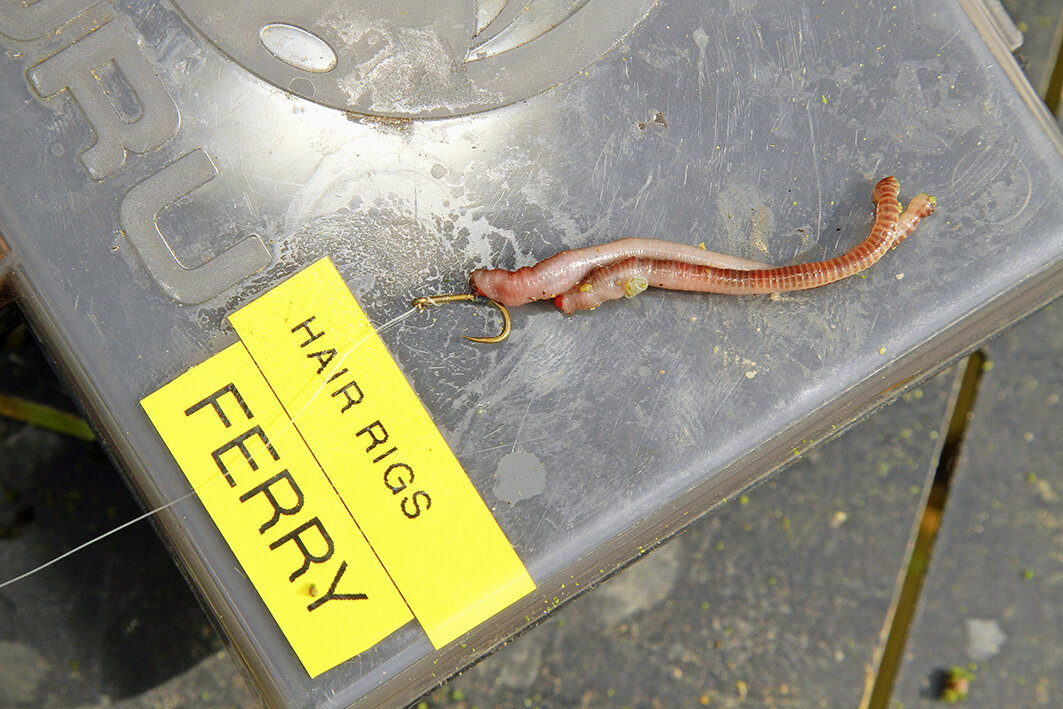
Switch to fakes
Carp of all sizes love maggots, but so do small fish. If your water responds to a maggot attack, don’t use live ones on the hook as these will be smashed by roach and bream. Instead, carry a pack of fake rubber maggots and thread four or five of these on to a hair rig. They look just like the real thing and won’t be shredded by nuisance fish.
Change boilie shape
Sometimes a round boilie won’t catch, but something as simple as altering its shape will get a take. Take a boilie and carve the edges off to create a square or irregularly-shaped bait. Better still, invest in a tub of barrel-shaped dumbell boilies.
Cast to the horizon
You need to choose a rod with the correct action in the first place. Balance and rhythm are the human element to casting further, and that means having a strong footing to cast off. When casting, have one hand (the one holding the rod and reel) pushing forwards while the second hand lower down the handle pulls back. This creates the whipping motion and the leverage needed to power the lead out.

Tip a pop-up
Adding a few maggots to the hook turns a standard pop-up boilie into something a little bit different that may just grab the attention of a carp or two on hard days. To do this, thread the pop-up on to the hair and then nick on the maggots before sliding the boilie down.
Wash out your baits
Changing how your bait looks on the lakebed can go a long way to producing a fish. A common trick is to ‘wash out’ a boilie.
This means fading its natural colour by leaving it soaking in water for a few days. The result is a pale bait that looks as though it has been on the bottom a long while and is safe.
Know your leads
A standard pear-shaped lead will work for most carp fishing situations but not all.
Pears are fine for all-round work when casting up to 80 yards but to go longer, an elongated distance lead will help you hit the mark. A flattened pear leads comes into play in silt or on lakebeds covered in debris. It will sit on top of the muck rather than sink into it.
Try Zig bugs
Surface fishing provides exciting carp sport in summer, and Chum mixers or floating pellets are normally the go-to baits for many carpers.
However, Nash Zig Bugs have really made an impression over recent years. These represent insects that carp will see on the surface throughout the year.

Deposit your feed
PVA bags for depositing feed around the rig come in mesh or solid versions. Solid bags will cast a long way with the lead buried inside and the feed packed tightly to produce a streamlined missile. Mesh comes into play for fishing as a stick of feed that breaks down quickly and forces the particles out through the holes almost immediately. It can’t be cast that far, and so is better for shorter chucks.

Tighten the clutch
Don’t fish with the clutch set too light. This will let a carp power off rather than come off the hook, but you won’t be able to exert any pressure.
Instead, fish with a tighter clutch. This will immediately give you the upper hand and stop that first run – from then on you can slacken the clutch or even use the reel’s backwind facility if preferred to a degree that suits you and the swim you are fishing in.

Feed crushed pellets
When floater fishing, instead of firing in 8mm floating pellets from the bag, grind some up and break others into halves or quarters.
When fed, this range of bait sizes will see some float and some sink while releasing smaller particles into the water. This can work well when the fish have shied away from whole pellets.
Strip some braid
Braid hooklinks lack stretch but will sink and stay on the bottom. If you want the best of both worlds, try coated braid with the outer coating stripped off – these are supple but still sink.
Make use of the power of particles
Too many anglers think that boilies and pellets are all they need on the bait front. That’s true to an extent, but it can get expensive when baiting up in bulk. Particles are perfect for prebaiting or for piling in as a large hit at the start of a session and because they are relatively small, they keep fish grubbing around in the swim for longer. Parti-Blend is a super mix of seeds and pulses that covers all bases, while hemp, maize, sweetcorn and maple peas mixed together make another knockout feed.

Get zig depth right
How far do you set the hookbait to be off bottom when fishing a zig rig? Start with the bait at around three-quarters depth and then move it up or down by a foot at a time every hour or so until you get an indication.

Chuck a single out
In the winter months carp fishing can be quite hard going with the species starting to switch off from feeding on large amounts of food. This is why it’s a good time to change tactics and cast out a single boilie on a rig of your choice towards showing fish or spots that you believe will deliver. This is one of the best ways to get a quick bite in cold conditions.
HOW TO PRESENT YOUR BAIT OVER WEED
One of the biggest questions that gets sent into the Angling Times office is how do I present a bait over weed when carp fishing? Well we have the answer for you and that is PVA bags they are a life saver in situations when you can’t guarantee that your bait will be well presented on the bottom. A PVA bag will protect your hookbait all the way to the bottom and ensure that it is well presented for when the carp come sniffing over it. Another positive to this method is that you know that you’ve got a nice pile of bait surrounding your boilie to help entice the carp over.
Top roach fishing tips and rigs
Ask any all-round angler and they’ll tell you there are few better sights in fishing than a big roach.
I’ve caught a few of these in my time, but nothing can ever prepare you for the awesome sight of a ‘two’ or even a three-pounder coming over the front of your landing net.
Most of us grow up catching small roach but when they grow to specimen proportions they’re almost like a different species altogether.
As with most big-fish angling, locating the fish you want to catch is paramount.
Fortunately for the roach angler they have a habit of rolling at dusk and dawn. At dawn, in particular, they will often roll while it is nearer to dark than light, but as long as the water is calm you can generally see the ripples they make, even if you cannot see the actual fish.
Quite often their rolling activity only lasts for a few minutes so it pays to be looking at the water as soon as dawn starts to break.
Although roach are more likely to show themselves at dawn and dusk, they can be caught throughout the day in winter.
I have found that a short burst of feeding activity can occur at any time and it pays to be organised so you can take advantage of any such purple patches.
Make sure you have spare hooklinks set up and scales and camera to hand so that you can maximise your chances when the roach switch on.
Generally, the colder the weather, the shorter the feeding spell. While overcast conditions are generally best in the winter months, I am sure roach will feed at some point in the day regardless of the weather, so don’t be put off if the conditions appear to be less than ideal.
Over the years I’ve used many rigs for roach but I’ve found one to be head and shoulders above all the rest at putting a specimen fish on the bank – a simple heli rig.
Here’s how to fish it…

A) MAINLINE
Casting heavy feeders puts quite a lot of stress on the mainline so I like to use a robust line such as Korum Xpert Reel Line or Gardner hydroFLO in 6lb breaking strain.
B) HELI SET-UP
The great thing about fishing these days is that there’s so much gear that’s ready to use from the pack. I’m a huge fan of the Korum Ready Heli Kit that allows me to set up my heli rig in seconds.
The kit is slid straight on to the mainline and comprises two rig stops and beads either side of a rotating quick-change link which I use to attach my hooklink to. This is covered with an anti-tangle sleeve to help kick the hooklink away from the mainline.
C) DISTANCE
By moving the rig stops up or down the line the distance between the hooklink and the feeder can be varied.
I start with it about 6ins away, and if bites are not forthcoming I will move it further away on one rod and closer on the other.
On some days the fish will show a distinct preference for one or the other but on other days it appears to make little or no difference.
D) SHORT HOOKLINK
This rig works best with short hooklinks of no more than 3ins.
Over the years I’ve tried many different lines and have found Preston Reflo to be the best.
I generally start with 0.13mm Reflo (4lb 12oz) as I have found this to be a good compromise between fine presentation and strength.
On occasion I will drop to 0.11mm Reflo, particularly in clear, shallow water and in bright, sunny conditions.
I used to tie my own hooklinks but nowadays I use Preston PR 355 hooks to nylon, in size 16 and 18, using a loop tyer to shorten the line to just 3ins.
It is then a simple matter of threading on a rig sleeve and attaching the hooklink to the quick-change bead.
E) FEEDER LINK
My swimfeeder is attached via an Avid Quick Change link tied to the end of the mainline.
I like to use a quick change clip for two reasons – it enables me to change the feeder easily and the feeder can be removed at the end of the session, which makes it easier to pack the rods away still set up.
F) HOOKBAITS
My number one choice is maggots. I like to use a mixture of red and white maggots and invariably start of with one of each on a size 16 hook.
If bites are not forthcoming I will try just red or white maggots and in really cold weather it’s even worth trying a single maggot on a size 18.
I never go below a size 18 as big roach are strong fighters that jag around a lot and I feel that a smaller hook increases the likelihood of a hook pull.
I’d rather hook fewer fish but have a better chance of landing them.
G) FEEDING
In many waters, big roach are thin on the ground so it is important not to overfeed them, or you can ruin your chances of a bite.
I usually only introduce bait in the swimfeeder and am wary of recasting too often and putting a lot of bait into my swim.
I want any roach present to pick up my hookbaits rather than fill up on free offerings, so typically I’ll only recast every two hours or so.
The beauty of this rig is that it very rarely tangles ,so you can be almost certain it is fishing effectively for that length of time.
H) FEEDER SIZE
The rig is best fished with a fairly heavy feeder to maximise the self-hooking properties of the rig and I use 50g Preston Quickload feeders in both medium and large sizes.
Roach fishing tips
Always use soft rods
Big roach are finicky feeders. My favoured rig incorporates fine hooks and lines, so it needs to be used with a soft rod to prevent line breakages and hook pulls.
I like a rod with a soft tip and a test curve of 1.25lb or less. Currently I am using Korum 1.25lb Neoteric rods which have a lovely soft tip but can still cast a feeder well over 50 yards.
Fish with tight lines
The bolt effect of the rig is enhanced by the use of heavy bobbins that keep the line tight.
Some bites can be very vicious so I like to use reels with a freespool system.
Alternatively, you can slacken the drag off on your reel to ensure a big roach does not break the hooklink on the take.
Playing roach safely
Big roach fight really well on light tackle with a distinctive jagging style. Play them with ‘soft hands’ and take your time. If you try to bully them they are far more likely to come off.
Experiment
This rig makes it easy to make changes, be they to the hooklink, hook size, distance from the feeder, maggots colour, the number of maggots, even the size of feeder. Give it a go and ring the changes to bring a big roach to your net soon.
For more great tips from top anglers head to this year’s The Big One Show
Dean Macey's top 10 carp fishing tips
Now's the perfect time to catch your personal best carp! And who better than The Big Fish Off’s Dean Macey to help you put a carpy bend in your rod this week? Here are his 10 top tips to spring carp success…
Be vigilant
First thing I would say is that I use my eyes. The fish are very active this time of year and will put themselves on show, so you should be able to find them.
Being cold-blooded, they will be looking for warmer water to get their metabolism running at full summer rate – nine times out of 10, when you find a shoal of fish, they will be there just to warm up. For fish-spotting, polarised glasses are essential.
Follow the sun and stay mobile

To find carp first thing in the morning the west bank will receive the morning sun and the fish are likely to be there – be prepared to move with the sun during the day, as the fish will likely follow it. Cut down your gear and travel light to keep you mobile.
Target areas
The shallow water of margins or near islands will be the warmest parts of the lake. I’d also say “follow a fresh wind” as often the fish will follow it too.
That said, on some venues they can be found on the back of it – particularly if it’s a cold wind.
Zigs can be deadly

Zig fishing can be deadly in the spring, and my favourite bait is black foam – however, don’t be afraid to chop and change colours. A good example of this was during my latest session.
I could see the carp swimming over my zigs, but I wasn’t getting any bites. A quick change to yellow led me to four or five fish.
I know people play around a lot with colours, but the bottom line is to use what you have confidence in – my favourite colours are white, pink and yellow.
Keep it simple and effective
Use a rig that you have full confidence in. I like a small inline lead and a supple braided hooklink. I can cast it virtually anywhere and it will be presented correctly, regardless of the bottom it’s lying over. I tend to use the lightest lead I can get away with – a 2oz square pear is ideal. It’s mega-simple, with good hooking properties, so why haven’t I seen any other anglers use this rig?
Don’t ignore the less obvious

On smaller venues especially, don’t ignore the neglected swims and quiet corners. On a quick day session I love fishing these areas, putting rigs where others can’t – whether this is up against an island or into an under-fished margin.
My baiting approach

This time of year I use 10mm baits a heck of a lot. On my latest session I out-fished everyone by feeding smaller baits little and often – everyone else just piled in a kilo of normal-sized boilies but I took a matchman’s approach, feeding five or six small boilies every few minutes – carp will respond to the splash.
I may well use a kilo over the course of the day, but never all at once – I’m fishing for one bite at a time. You don’t need a lot of bait to catch them. Hi-attract baits and small bait packages are best.
Hookbaits

Over the last five or six years I’ve been using hookbaits enhanced in some way. A favourite is a 12mm Mainline wafter glugged in Supa Sweet zig liquid. I really think a hi-attract hookbait catches me more fish, especially on commercials.
Whether or not colour makes a difference in the murky water I don’t know, but I do know that carp can definitely taste the bait – so why cast out a bland hookbait?
Floater fishing
I will always fish to opportunities, which sometimes means the surface. I will always use 6mm baits to get carp feeding.
Again I like to use a hi-attract hookbait, and pink is my favourite. Something that’s transformed my fishing is the Rasberry Plume Goo – I’ll add this to my hookbaits and loosefeed.
To add it to my floaters, I treat the neat liquid like orange squash, diluting it in the bottom of a bucket with some water. I then add my floaters before shaking the bucket like a madman to get them covered – this little edge can turn five fish into 50 fish. I don’t think I could go surface fishing without it!
Floater rigs
I like to use a braided mainline for instant contact, but a good floating mono is absolutely fine.
If you’re using a cigar-type controller I’d say you’ll need at least a 5ft hooklength – however, you can shorten this on my preferred bolt rig-type float. I go for around 3ft and don’t strike at bites. I wait for the controller to slide away as a fish hooks itself.
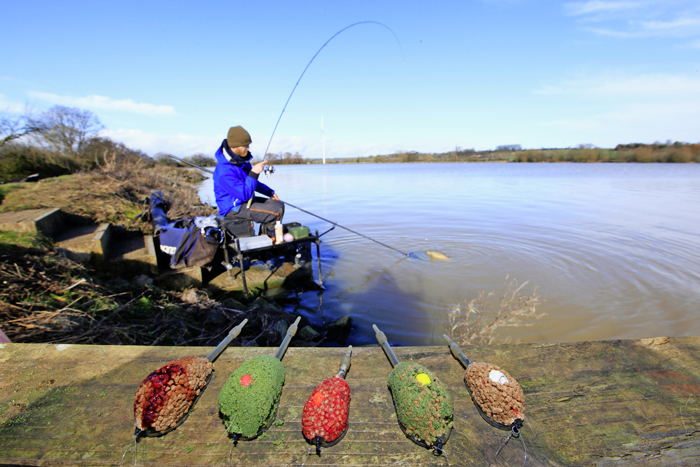
Bag up on silverfish and bream by visiting your local reservoir!
The UK is home to dozens of giant reservoirs where you will struggle to see the far bank due to the sheer size of the venue.
While there is no doubt that the prospect of fishing such a huge expanse of water is daunting, the sheer numbers of fish they often hold means they are well worth your attention. But just how do you go about locating the shoals in a fishery of that size and then persuading them to feed? England star and Preston Innovations-backed angler Lee Kerry has all the answers…

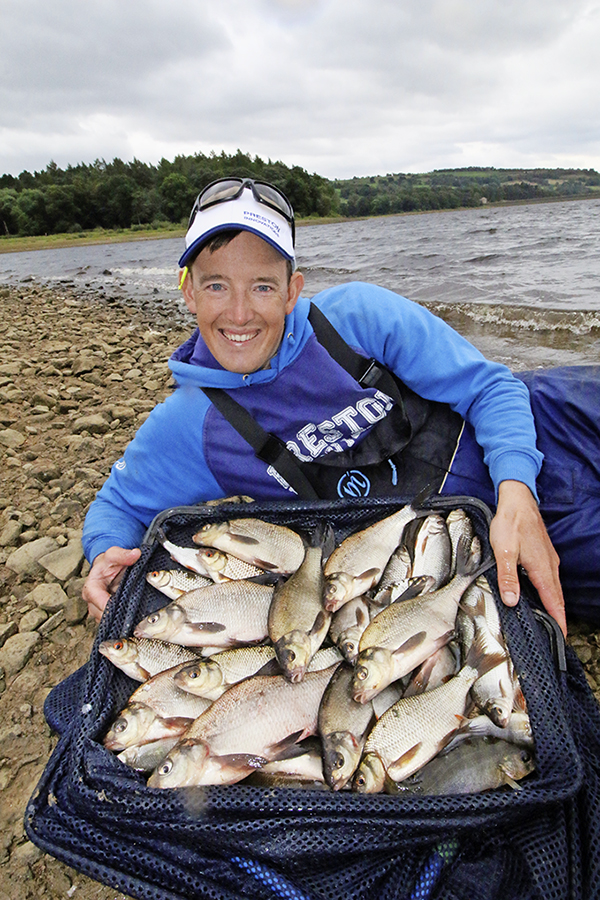
Target species
“If you are looking to get away from carp and F1s then a big reservoir could be right up your street. Roach, bream and skimmers often feature heavily on waters like this, and they can be anything from small hand-sized fish to lumps that would easily smash your personal best!
“Look in Angling Times to check match results and see which species is dominating, or speak to local anglers and tackle shops to help gauge the situation.”
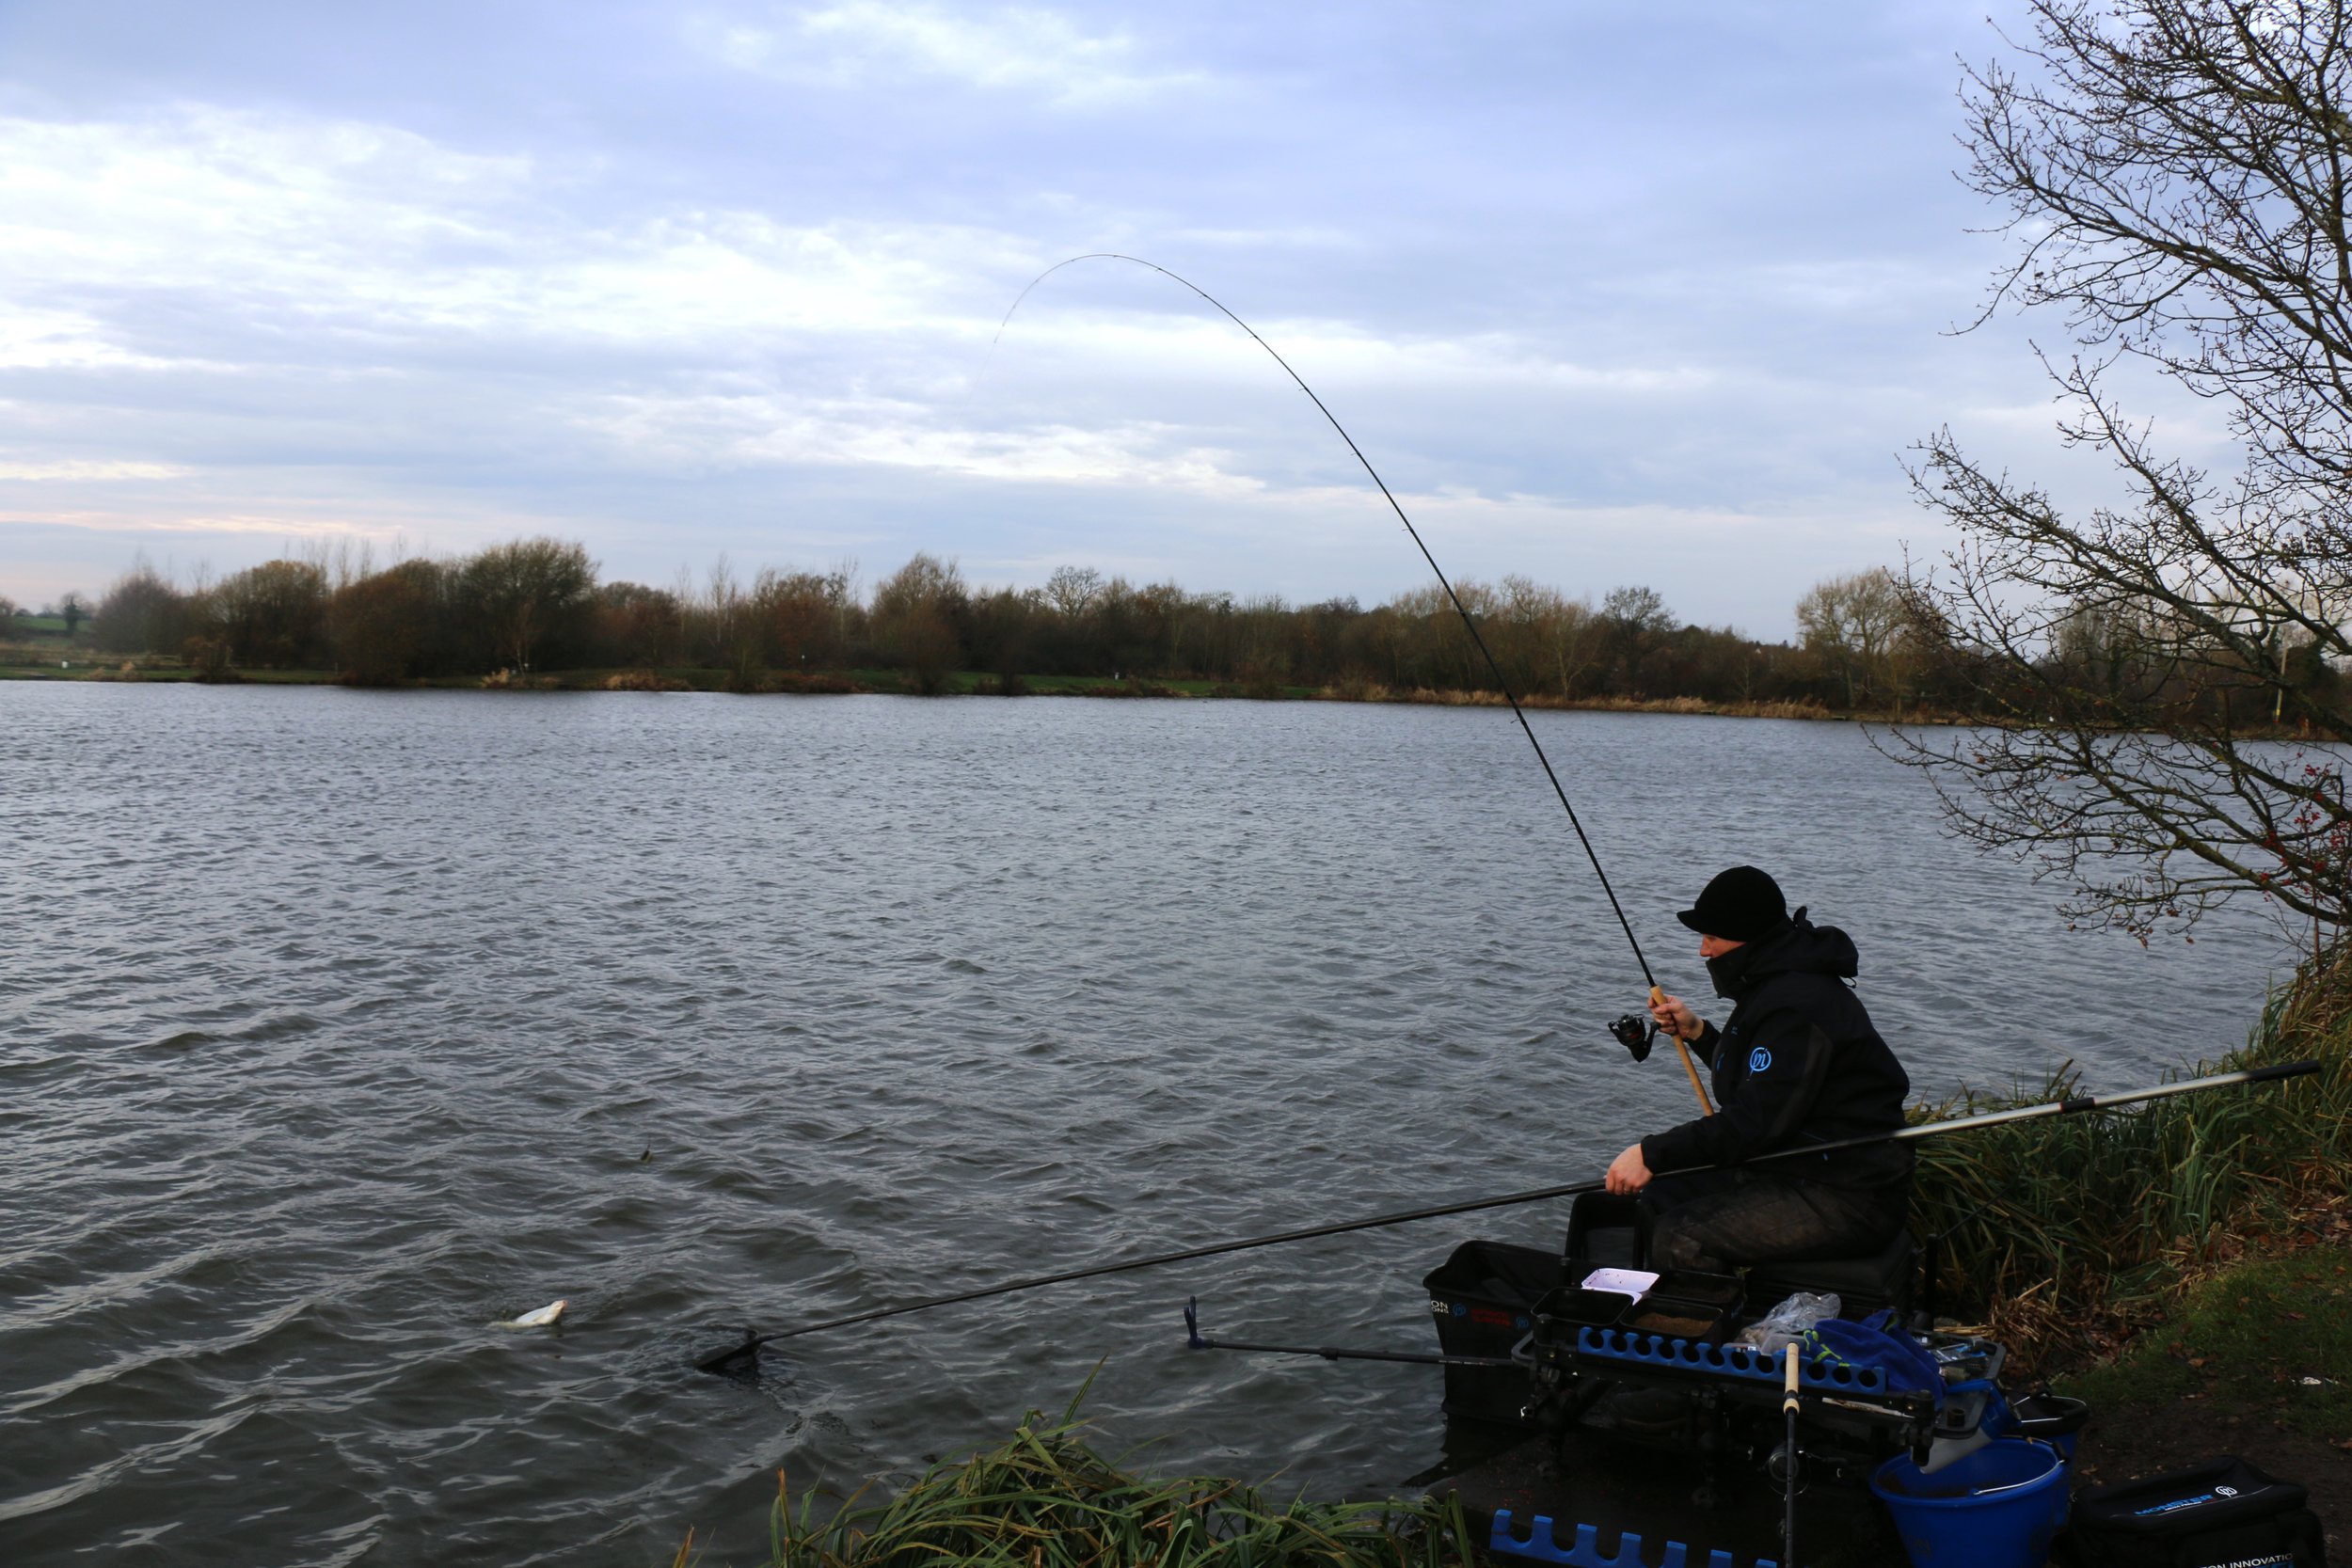
Tactics
“The biggest shoals are likely to be well away from the bank, so a feeder approach is often best on big reservoirs. If it’s bream you are looking to catch, a simple groundbait feeder will often outscore anything else.
“Some anglers might think that for bream you need to put in a lot of bait immediately, but this isn’t the case. I prefer to build a feeder line up gradually, casting every few minutes with a small or medium-sized feeder. There’s no need to use light tackle because a lot of the fish won’t have been caught before.
“I’ll often have a 2ft-long hooklength of 0.13mm Preston Innovations Powerline and a size 16 hook. Thick lines are stiffer and lead to fewer tangles.”

Bait
“A dark groundbait is always best for bream and skimmers, as I believe they spook a lot more readily over a light bed of feed.
“My favourite mix is Sonubaits F1 Dark, as it has a strong sweet smell and is packed with fishmeal that skimmers can’t get enough of. I will also add some finely chopped worms and a few casters to the mix to keep the fish grubbing around. “It’s a matter of trial and error when it comes to hookbait – maggots, pinkies or even a worm can all have their day.”
Search the swim
“If bites don’t come quickly, it can be tempting to pile a lot more bait in to gain a response, but it is often better to explore your peg a little. Casting just 10 yards further could put you in deeper water, and that is where the fish could be held up. It may take a short while to find the shoals but if you’re on pegs that have form, you’ll never be far away from a hungry shoal.”


8 Great feeder fishing tips to help you catch more
Looking for some big fish action on the feeder this weekend? Then you may want to take a look at these top feeder fishing tips from Steve Ringer, as he shows you how to catch more carp on the feeder for when you are out on the bank next.
1) Big hooks mean big fish!

On venues such as Boddington the carp’s average size is 7lb-9lb. It’s not so much the size of the fish that’s important here as the size of their mouths!
An 8lb carp has a huge mouth, and this is worth keeping in mind when making your hook selection. When rules allow I like to use a size 10 QM1 hook. That might sound big in a match situation, but if you compare a size 10 to an 8lb carp’s mouth it suddenly doesn’t seem that big at all!
In the cold, every bite needs to count and I’ve found that using a size 10 gives me an improved bite to fish landed ratio.
It’s also worth pointing out that QM1s are razor-sharp, something which I believe is important when we are talking about making sure a carp doesn’t suck the hookbait in and then blow it straight back out again without getting hooked!

2) Use heavier feeders
More often than not big-water carping is all about distance fishing, so picking the correct weight of feeder is extremely important.
I tend to stick to three types – large 45g and 55g feeders and 42g, which are classed as medium size.
If conditions are perfect I’ll kick off by using a 45g, large feeder. I prefer a big feeder on big venues as I just feel it increases my chances of a carp finding it!
As the session progresses you’ll frequently find you need to go that little bit further out as fish can back off, and this is when I switch to the 55g, large feeder to help me reach the extra distance.
For extreme range I actually drop down a feeder size! Believe it or not, I use the 42g, medium feeder when I need to go really long, as the slightly smaller body size outcasts its bigger rivals.
I will add that for all my long-range, big-water feeder fishing I go for a Hybrid feeder rather than a Method, as I believe it protects the bait a lot better on impact.

3) Gear up to go longer
As far as distance goes at Boddington, quite often I might have to fish in excess of 100m to get to where the fish are, especially if they push out as the match progresses.
With this in mind, I always like to have both a 13ft and 14ft Tournament SLR rods set up.
The idea here is that I start the match on the 13ft rod, but if the fishing is hard and I’m chasing the fish I’ll switch to the 14-footer.
I reckon the 14ft rod gives me another 10m-15m casting range. That might not seem like a lot, but it can make the difference between getting more fish and not.

4) Boost your attraction levels
Giving my pellets a flavour boost can be a real edge, particularly when the water is coloured, as it gives carp more chance of finding my bait.
I use Goo for this and it’s very much a case of ‘less being more’ – a blob no bigger than a pea is plenty. Once added, use the nozzle on the bottle to spread it on to the pellets.
For a quick release I put it on the outside of the pellets, whereas for a slower release I half-fill the feeder, put the Goo on, then seal it in with a second layer of pellets. This is great when you’re waiting longer for bites.
My go-to flavours are Pineapple and Caramel, and I opt for the Power Smoke versions.These are thicker in consistency and stick to pellets better than the thinner Bait Smokes.
5) Swell your micros

One of the questions I’m asked the most on social media at this time of year is whether to use groundbait or pellets on the Method or Hybrid feeder.
My answer is simple – unless you have prior information that says groundbait is best on the venue then, as far as I’m concerned, pellets are without doubt the better option.
Given the choice, I will always use 2mm Ringers Method Micros. These I prepare the night before, and then tweak them again in the morning.
By damping them the night before, I find they swell up a little bit more, which I prefer when targeting big fish.
6) Use low-diameter mono

It's wrong to imagine that to cast further you need to be using heavier lines of 8lb and above.
Lower diameter lines are much more effective, and I use either 4lb or 5lb low-diameter Guru Pulse as my mainline.
If I try to cast to extreme range with 4lb or 5lb mono there’s a good chance I’m going to crack off, so I incorporate a shockleader of 10lb Tournament ST.
I cast off this 10lb leader but I still have the benefit of 4lb or 5lb mono once the leader leaves the rod rings.
As to leader length, when the feeder is in the casting position I like to have 4-6 turns of the leader still on the reel.
To join the mainline to the shockleader I tie an overhand loop in the mainline and then a double tucked half blood knot to attach the leader.
The knots are then trimmed tight so there is minimal friction through the rings.
7) Big bright baits are vital

Hookbait choice is all about using what you’re confident in, and right now that’s 10mm and 12mm wafters.
These may seem like big baits, but bear in mind I am targeting big carp by match standards as opposed to F1s and skimmers.
What I love about wafters is that they just sink under the weight of the hook and give me a very light hookbait that flies up inside a carp’s mouth when sucked in.
This means it’s very hard for a carp to get away with spitting out the hook and bait once they’ve been sucked in.
Colour is entirely down to personal preference, but if I had to pick just one then without doubt it would be an orange wafter – it’s been brilliant so far this winter!
8) Be prepared to move

Location is key when it comes to catching carp in the cold.
I always start by clipping up, so if I get a bite or indication I can get back to the same spot again stright away. Normally, where there’s one carp there will be others nearby.
If I don’t get a bite or an indication I will never have two casts to the same spot.
This might mean taking the clip off and going further out, or keeping the clip on and just casting to the left or right of where I had originally caught, in a bid to find the fish again.
When it’s cold, carp don’t tend to come to bait, so it’s all about trying to find them.
Top 10 tips to catching on a river in winter.
After a long spell of relatively mild weather, we’ve suddenly been plunged into winter! Air and water temperatures have dropped dramatically over the past couple of weeks, and river fishing has become a lot harder as a result.
The good news is that it won’t take the fish long to get used to the lower water temperatures, but it will be important to keep a check on both levels and temperature in order to get the best results between now and when the season closes. We've asked river maestro Dave Harrell to give us his top 10 ways to catch on a river in winter.
1) FLOATING LINES

One of the biggest mistakes anglers make when floatfishing on rivers with flow is to use a sinking line. It’s a recipe for disaster, as you won’t be able to control you line properly.
I use my own Pro Float lines. These are perfect for river fishing as they float really well and allow you to get maximum control over your float.
There’s 300m on a spool so you can fill most modern day reels with one shot – alternatively, you can fill up to three reels with 100m on each if you use backing.
A big tip I can give you with reel lines is to get into the habit of reversing the lines on to a different spool after a month or two. This will result in the line on the top being ‘new’ again.
I often get asked how often reel lines should be changed, and while there are no hard and fast rules, I tend to change mine, or reverse them, every couple of months or so.

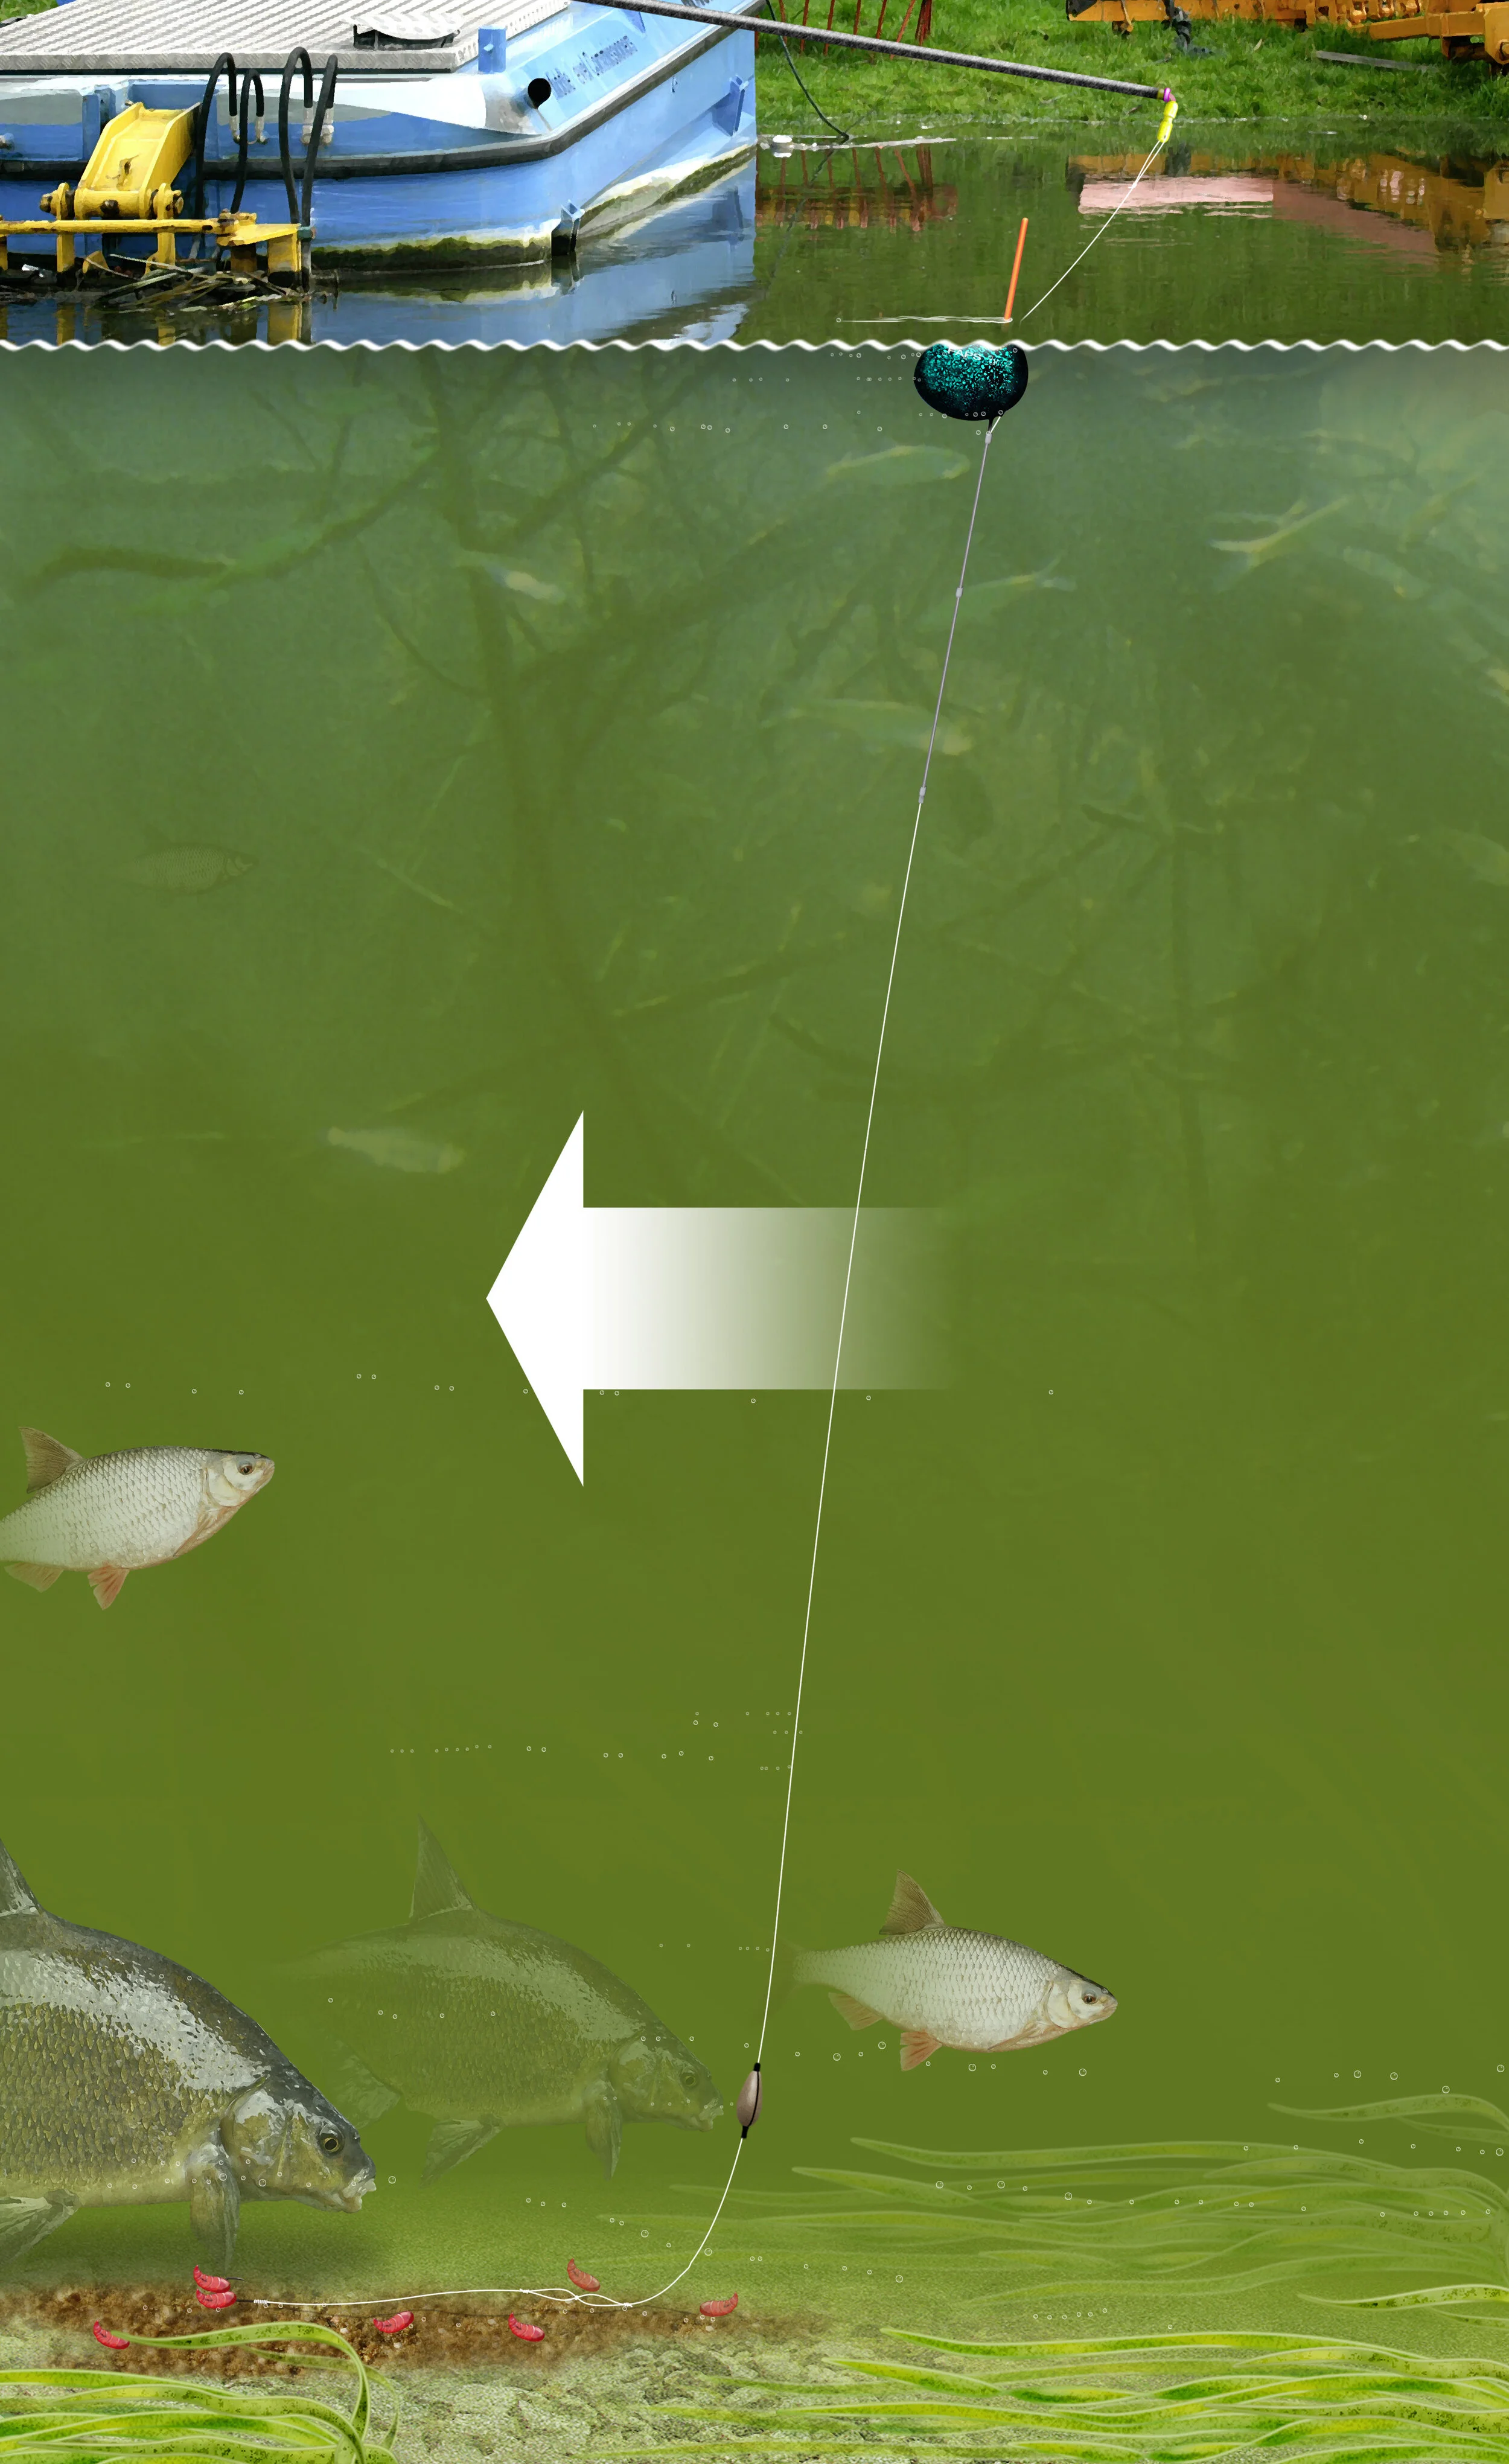
2) FISH THE ‘CREASE’
In cold weather the ‘crease’ of a river – the area where the slow water close in meets the faster water further out – will be a haven for big roach! On some days you can get good catches by fishing this side of the crease when bites are hard to come by past it. Always experiment in both areas.
3) FLOAT SIZES

My old Shakespeare captain Ken Giles once explained to me about the importance of ‘bossing the river’ with float gear, and it’s one of best things I ever learnt. Too many anglers use floats, especially wagglers, which are much too small.
Make sure you can cast to where you need to be EASILY and then you will be able to beat elements like wind and flow.

4) SLOW IT DOWN
When you’re using rigs attached top and bottom it’s often useful to slow everything down by feeding the line off the reel with your fingers.
Try to do this without moving or jerking the float and you will eventually slow down the hookbait and make it much more appealing to fish than just letting it whizz through.

5) FISH OVERDEPTH
Wagglers are great floats for fishing at distance but they can be difficult to control, especially when there is a downstream wind.
You can overcome these conditions by using thick-topped Truncheon wagglers and putting extra depth on the rig. The thick tops of these floats are really buoyant and will pull the hookbait along the bottom without the float constantly dragging under.

6) FEEDING
In cold water don’t go mad with the feed but don’t stop altogether or fish won’t respond. Start with around 10 maggots every cast then feed to response.
Sometimes, just three or four maggots every run through is enough. When you consider that there are around 3,000 maggots in a pint you won’t need much feed for a whole session.

7) CASTING
When you’re fishing wagglers at distance, always cast the rig downstream. Imagine a clock face and cast to the one o’clock or two o’clock position.
This will put your rig in the right position to get perfect control and enable you to beat the current. If you cast directly in front you will be constantly fighting a bow as the line pulls in front of the float.
8) BACKWIND RIGS
Once you’ve mastered this technique you will definitely catch more fish on days when you are faced with considerable depth and flow.
Use a rig between 4g and 6g. Once it’s in the flow, engage the bail-arm and slowly wind the handle backwards. This is a great method for Bolo and Avon floats.
9) BLOCKS OF TIME
Give yourself five or 10-minute blocks of time fishing at a certain depth. This might be six inches on or off the depth, or more subtle 1ins-2ins changes.
Eventually you will find the ideal depth the fish want to feed at, and hopefully you can then cash in for the remainder of the session!
10) DON’T GIVE UP!
Over the next few weeks, the best time of day to catch fish will be during the last two hours, so don’t worry if you’re not catching from the off. Keep feeding lightly and be prepared for the best action as the light starts to fade.


How to sink your line in a winter blast
There’s nothing worse in winter than a nasty wind skimming across the surface of a lake. Not only can it freeze you to the bone, but it can play havoc with rig presentation into the bargain.
That’s why sinking the line correctly is so important. What many people don’t realise is that this applies to feeder or bomb fishing just as much as it does to the waggler. Getting the line under the surface without moving the rig too much is an essential skill to learn, improving your presentation and leading to you hitting more bites. Here’s how to do it…
Bomb and feeder
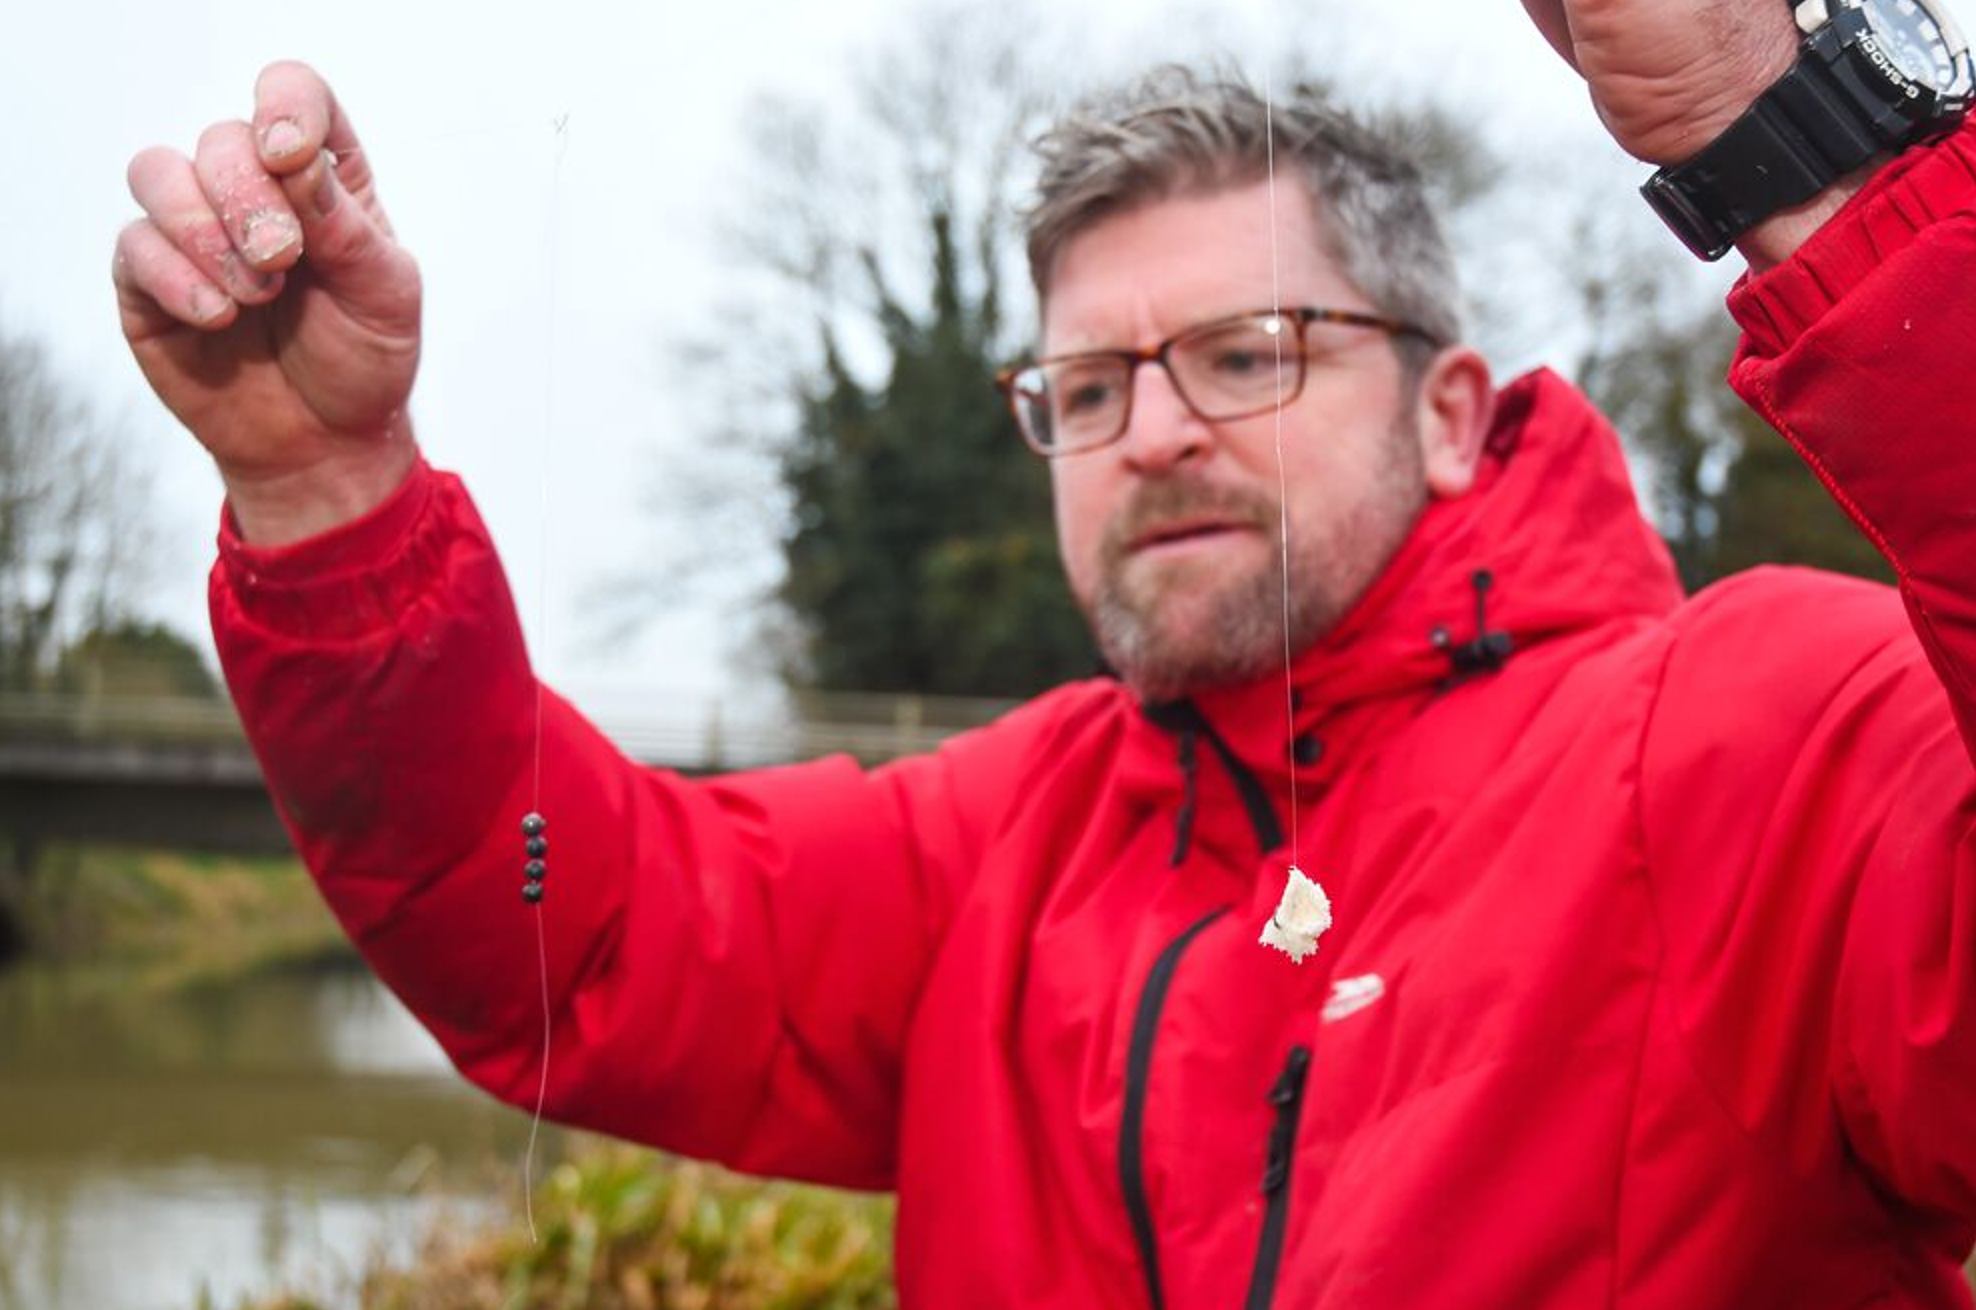
After casting out, the best way to sink the line is to ease the rod down in front of you and hold a few feet of the tip under the surface.
Take up the position shown in the picture above, holding the line gently between your reel and the first rod ring with your spare hand. What will then happen is that two ‘Vs’ will form, one at the rod-tip and the second out in the lake where the feeder is.
As more line sinks, these two ‘Vs’ will get closer together until they meet and the line is fully sunk.
Take your time while doing this and don’t be tempted to pull the rod to help the line sink, as this will only run the risk of moving the feeder and spreading bait around!
Waggler
Start by overcasting the rig by about five yards. Then wind the float back to your fishing spot with a foot or so of the rod-tip under water at all times – this will begin to sink some of the line, but not all of it.
Now flick the rod sharply upwards in a controlled manner – this will be enough to sink any remaining line on the surface. You usually only have to do this once to get it all under the surface.
How to perfect your expander pellets
As winter starts to bite, commercial water carp and F1s become harder to tempt.
Gone are the heady days of summer when a banded hard pellet was the way to catch them.
Now, you’ll have much more success by using a prepared expander pellet.
These air-filled pellets are hard straight from the bag, but with just a little effort you can produce the perfect, hookable winter pellet. Here’s how to do it…

1) Fill a pellet pump between one-third and half full of water and add a handful of your chosen expanders. Note that these will initially float.

2) Pop the lid on and pump away until all the pellets sink. This happens when the vacuum you create sucks the air out of the pellets, replacing it with water.

3) Leave the pellets in the water for a minute, then release the pressure by squeezing the valve or unscrewing the pump lid and pour the pellets on to a sieve.

4) Tip the pellets, plus a little water, into the corner of a soft plastic bag and secure with a knot. Put the bag in the fridge overnight. Your bait will be perfect by the morning.
Catching F1's when the water cools with Des Shipp
Maggots or pellets for F1s in winter? It’s a question I’m often asked on my coaching days and it isn’t an easy one to answer.

I’ve enjoyed some great results fishing and feeding maggots, even when there’s ice on the water.
However, maggots are no good if your swim is full of tiny roach, so then pellets will be my first choice.
Pellets are more selective and you wait a lot longer for a bite, but you’ll bypass the little fish and know that when the float buries, it’ll be an F1 or a decent skimmer. So what exactly is my approach with pellets?
New line for pellet
You’ll struggle to turn a maggot line into a pellet one – instead start a new line a few metres away and feed just pellets. This always seems to work better than trying to catch off one line that’s already full of tiny silver fish.

Feeding
For both baits, I begin by introducing eight or nine dampened 4mm pellets every drop in a small pot. I also have a catapult to hand in case I want to begin firing in bait to make noise the F1s will come to investigate.

Band on the hook
If the small silvers are feeding, a soft expander pellet will simply be ragged off the hook, so that means using a hard 4mm pellet hookbait.
I fish this in a small pellet band, slipping the hook through the band and then slotting the pellet into place.
Two rigs for one job
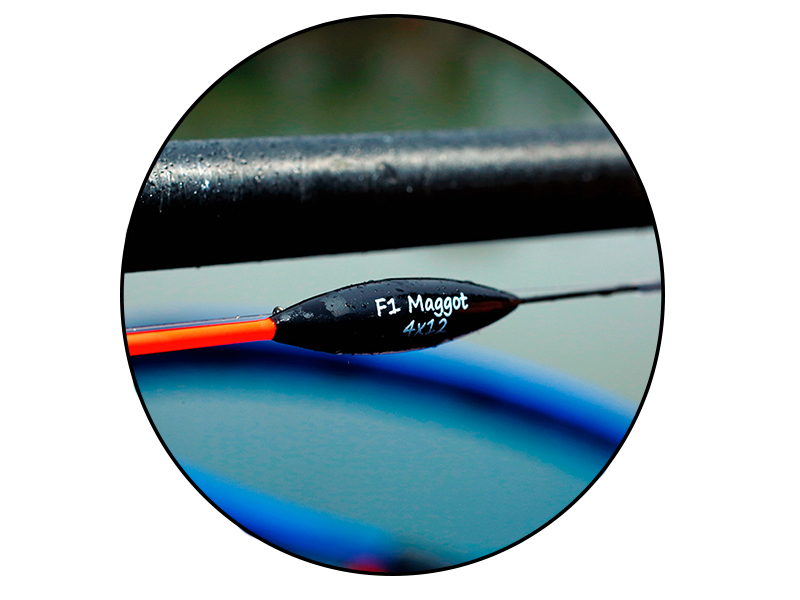
My favourite float is a 4x12 F1 Maggot, which is light enough to give the pellet a slow fall through the swim.
I’m convinced that F1s and skimmers in winter sit a foot off bottom and watch it fall the final few feet before taking it.
Line is 0.13mm Powerline to a hooklink of 0.10mm or 0.12mm, and a size 18 PR434 hook with Preston Innovations 9h original Hollo elastic. I set the rig to fish slightly overdepth, plumbing up so just the float body is above the surface, being sure to dot the float down well and lift at every dip.
Lowering it in
Slowly lower the rig in rather be in a rush to get the float cocked. I’ll lay the bottom half of the rig in, then lay the upper half of the rig complete with float in the opposite direction over the top.
The pellet sinks naturally, giving the fish time to pick it out and take it. A strung bulk is ideal for this, in the bottom third of the rig.
6 ways to catch in the cold

1) Stand out from the crowd
When the first cold-snap hits, fish in commercials can suddenly switch off until the temperature stabilises.
During this time, getting fish to feed can be tricky, but making your bait stand out is a big edge. Of course, too big a portion of food can be off-putting, so small, visible and potent is the key.
A brilliant way to achieve this is to use crushed bright-coloured boilies in a PVA bag. Some ground-down yellow Pineapple Mainline Baits portions dampened with sweet Cell Sticky Syrup creates a strong-smelling, brightly coloured little area of attraction on the bottom, with your hookbait right next to it. Carp passing by won’t be able to resist such a vivid little trap.

2) Pin it to the deck
A short fluorocarbon leader at the terminal end of your winter leger rig can make a big difference in cold and clear water when wise fish are the target. Fluorocarbon is almost invisible in water, and also very heavy, so it’s bound to lay hard on the bottom.
When fish move over your rig, they won’t bump into the usual line protruding off the bottom and spook out of the swim. A leader of just three or four feet of 0.30mm fluorocarbon will do the trick perfectly. Simply loop-to-loop connect the leader to the mainline, with your chosen leger or feeder rig tied on the fluorocarbon as normal.

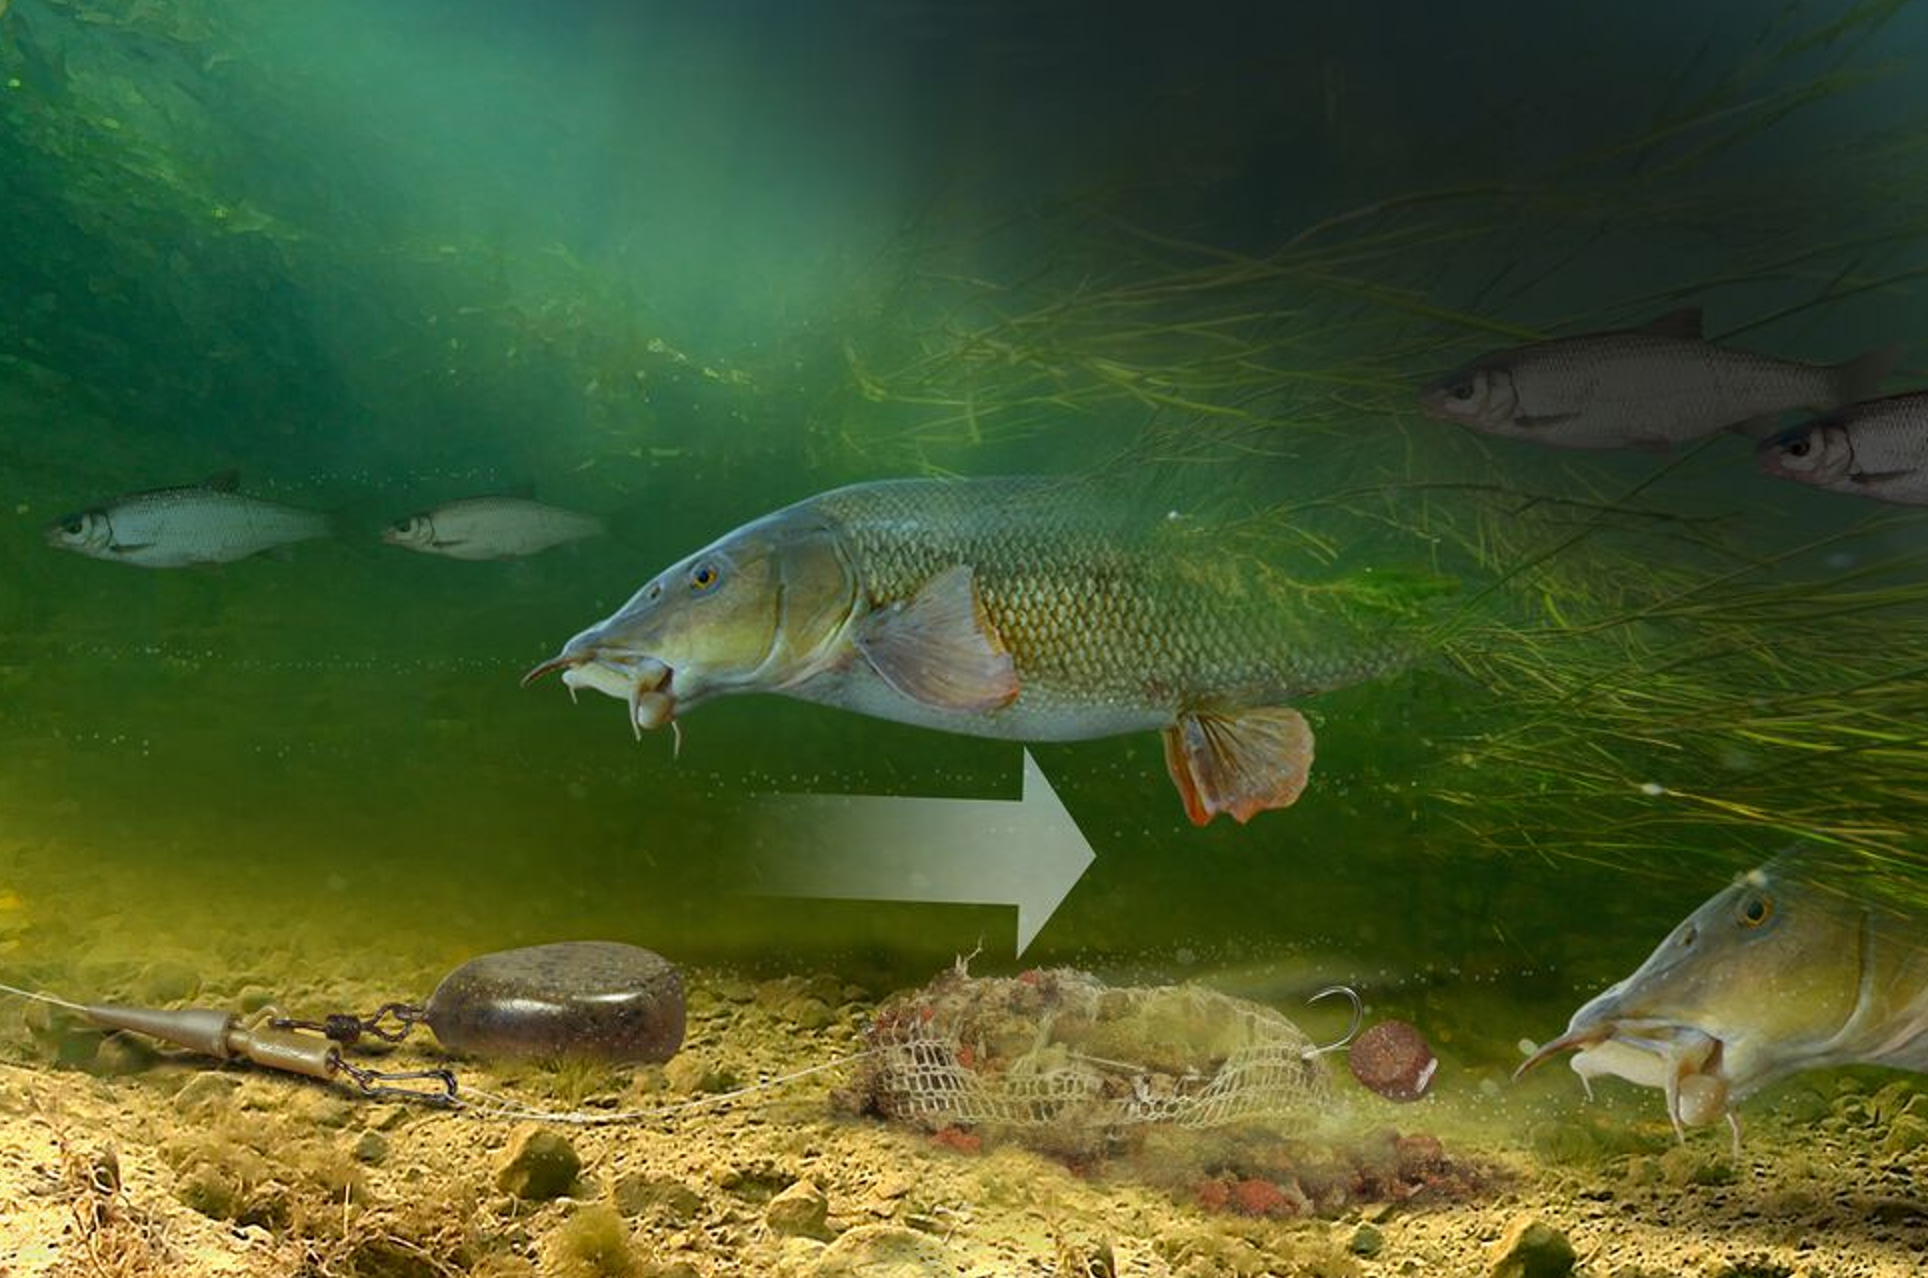
3) Move to natural baits
After a summer of eating typical commercial baits, thinking outside the box in terms of hookbaits is another way to fool winter commercial fish. Presenting multiple maggots in a bait band when legering is a lethal little trick for big carp!
This is a hookbait that big fish on commercials rarely see, and is often unusual enough to tempt them into picking it up.
You will also find that fish take natural baits confidently, so if you’re only getting a few pulls in a session you can be sure that a switch to a soft, natural bait will bring more positive bites.

4) Read the signs
Just because you’re legering doesn’t mean that you can’t read the swim properly. Slow-moving winter fish often give themselves away by causing line bites, which can be small, slow movements on the tip.
These aren’t always like the big, steady liners you get in the summer, so it’s vital to have your rod correctly set with front and back rests so you can ‘read’ the tip positioned just off the water.
If you find yourself sitting for long spells with no indications, it’s worth casting around to try and fish the fish.
If you’re getting liners but not proper bites, the shoal is likely to be closer to you, so dropping shorter may just catch you those extra fish.

5) Use lighter bombs
In cold water, fish can be very spooky, so staying as quiet as possible on the bank and when casting will stop them spooking away from you.
A lighter, smaller and more discreet bomb or feeder can make all the difference, cast and feathered into the swim as quietly as possible.
A tiny 10g lead makes just a small ‘plop’ on entering the water. Smaller leads are also less visible on the bottom and won’t frighten the fish.
If you’re casting regularly to try and find the fish, think mini and light!

6) take care with your feed…
Giving the fish the right amount of bait is essential. The difference between feeding 100 pellets and 50 pellets can make all the difference between a good and a bad day’s fishing.
Finding the right amount of feed to place in a PVA bag, or the right size of Pellet Cone to use, is most important.
If you were fishing the pole, you’d be happy to change between a large and a small pole pot, so why should it be different on rod and line?
Measure out your feed amounts and, if you’re not getting bites, ring the changes to try and discover what the fish want on any given day.
How to catch fish on the mini method feeder
There are some really annoying swims in fishing. You know the ones – swims where there’s a really fishy-looking far bank or island that’s just too far away for pole fishing.
In some cases you can opt for a long line on the pole and flick the rig out into the right spot, but on windy days you can forget that as it’s a recipe for broken sections and tangles in the vegetation.

For me it’s far better to fish a feeder and just recently I’ve been using some really tiny – £1 coin-sized – Mini Method feeders from Guru.
Crashing a big feeder into shallow water is definitely a big ‘no-no’ and so a mini feeder is perfect. Not only do you get to fish the right areas, but you can deliver a small mouthful of feed.
While it can be used for longer chucks, for me these mini feeders are at their best when fished at 17m-25m, and are perfect for those awkward casts which can’t be reached on the pole.
Provided you feather the rig during the cast any disturbance it creates is minimal, and you can also get your rod low and out of the wind.
To prove just how good this tactic is I headed out with Angling Times photographer Lloyd Rogers just as the tail-end of Hurricane Ophelia was raging across the country – not the time to be waving around 16m of carbon pole…
It’s got to be pellets!
While you can use groundbait or pellets on the mini Method, for me, it’s all about pellets.
Carp love pellets and, in my opinion, they are a much safer option than using groundbait as this can be a bit ‘Marmite’ to the fish on some days.
The type of pellets you use is down to personal preference but today on Meadowlands’ Warren Pool I’m using the 2mm fishery pellets, which are basically a good quality coarse pellet.
Just to give them a little boost and make them stand out from everyone else’s baits I like to give them a squirt of Ringers Chocolate Orange liquid.
Pellet prep depends on the type of pellets, but I like to cover the pellets with cold water for 45 seconds, then drain and leave to stand for at least 30 minutes when they should be ready to use.
Beware though, the pellets will dry out during your session so it’s important to keep adding water to them throughout the day to keep them at their best.
weight is important

The feeders I use come in one mini size but in two weights – 20g and 30g – and the one I use depends on the situation I’m faced with.
Today it’s roughly a 21m cast tight to the bushes on the far bank and I’ve found there’s no real slope coming away from the bank, so for this reason I’ve opted for the 20g feeder as it will make less disturbance on the cast and still stay in place in the swim.
Had there been a big slope, however, I would have opted for the 30g feeder so that once it hit the bottom there was no danger of it moving. The feeders I use are elasticated and the elastic choice depends on fish size. While I always like to stick to the short, X-safe stems due to the feeder size, I will vary the elastic.
For example, if the average carp is 5lb-plus I’ll use the heavy black elastic but, if I’m targeting F1s and small carp, I opt for the white light elastic.
Bearing in mind the size of fish on Warren Pool is 5lb-plus, my hooklength is 4ins of 0.17mm N-Gauge line and the hook is a size 14 QM1.
Wafters are winners
As far as hookbaits go it will come as no surprise that it’s all about using wafters.
Quite simply I just don’t think there is a better hookbait option, hence I now use them for nearly all my Method or Hybrid feeder work.
It’s really important when using wafters on the Mini Method that you drop down the size of the baits, and I’ve found 6mm wafters are the perfect match for the small feeder.
Of course, wafters are semi -buoyant and so a size 14 QM1 just sinks a 6mm wafter, leaving you with the ultimate in critically-balanced hookbaits to fool even the wariest of carp.
Regarding colour, if the water is clear then I will look to start off on a light, bright colour such as yellow or even white.
If your lake is holding a bit of colour, a fluoro pink or even a pellet-coloured wafter are better.

Where to cast
When faced with a swim like I am today which looks like a jungle, I always look for a slight cutback where I can get the feeder close in to the bank.
The fish tend to like being under cover so the closer I can get to the bank the better. Instead of fishing on the front of the tree line, I’ve found a small gap that probably enables me to get a good 2m closer to the bank than would normally be the case.
In an ideal world, I like a swim with several of these cut-outs so if bites dry up in one I can then switch to the other. This isn’t always possible, but when it is I will always look at it.
Keep it slack
One of the most important parts of using the Method feeder is making sure that once it hits the bottom it doesn’t move.
When fishing at such short range I like to fish as slack a line as possible as this helps to minimise the chances of the feeder moving should a fish bump into the line.
Bites can still easily be seen because, invariably, a take is signalled by the rod tip heading for the water or, on occasion, a drop-back as the fish picks up the feeder and runs towards you.
Even with a slack tip, a drop-back is easily distinguished as the line falls back towards you from the point it hits the water.
HOW TO LOAD THE MINI FEEDER

1) Start by adding a pinch of pellets to the base of the mould and then put the hookbait on top.

2) Next, fill the mould with pellets covering the hookbait in the process. Once the mould is full, place the feeder on the top and apply firm pressure when pushing the feeder into the mould.

3) Finally, to release the feeder you can either tap the base of the mould or squeeze the sides. All I then like to do is to give the pellets on the feeder a squeeze prior to casting so they stay on when it hits the water.
How to attach an elastic connector
hich type of connector you use for your pole fishing is very much down to individual choice, as there are several methods at your disposal, all of which work perfectly well.
I’ve tried the lot down the years but cannot see past a Dacron connector for ease of use, neatness and how direct it leaves the line to the connector itself.
A crow’s foot-style of connection is okay but can wear the elastic down behind the knot over time and potentially lead to it breaking, while a standard Stonfo connector works well with light elastic but is murder to use with thicker carp or hollow elastics.
The Dacron can do the lot, from thin No3 solid elastic for roach all the way up to 20-plus grade elastic for big carp. I’ve never had them let me down in all the years I’ve used them.
Dacron connectors are also graded to suit the elastic size you’re using – harder to learn is how to attach them to the elastic safely, but with practice it takes seconds and is 100 per cent safe.
Here’s how – it starts with a tight overhand knot in the elastic...

Open the connector’s braid loop and lay the pole elastic over the top like this. The overhand knot in the elastic is under my thumb.

With the elastic trapped, fold the Dacron braid loop fully over the bell-shaped stopper cone, as shown here.

Holding the elastic, pull the cone away so that the Dacron braid tightens. This is the anchor point for the system.

Wet the elastic with your finger and slide the Dacron braid hard up against the tiny knot you created earlier and pull fully tight.

Push the cone-shaped buffer bead back down the Dacron until it sits snugly over the knot. Perfect!
8 Tips to help you catch more fish
With winter just around the corner, many lakes and commercials are starting to undergo a transformation that can make the fishing a lot harder than usual however you can overcome these challenges by taking a look at these 8 great fishing tips from Steve Ringer.
1) Pick the right bait colour for water clarity

Many anglers don’t realise how important this really is but I know it catches me more fish.
Right now the colour is dropping out of our stillwaters and when it comes to bait colours and water clarity in autumn and winter then I always tend to stick to the following rule – the clearer the water the brighter the bait you need to use.
If the water is clear then bright baits such as sweetcorn really come into their own for carp.
Equally, just adding a bit of colour to a relatively dull bait can make a big difference – when fishing for F1s in the cold I will always opt for a red and a white maggot as opposed to two reds.
I really believe that in the cold carp like to feed on sight provided the water clarity allows this, hence bright baits will always produce more bites.
If the water is coloured then scent comes more into equation so baits such as pellets both soft and hard really come to the fore.

2) Keep it simple with hooks
A lot of anglers are confused when it comes to knowing which hooks to use and end up carrying far too many patterns.
I like to keep things nice and simple. For most of my fishing on UK stillwaters I stick to three main patterns…
- Super LWG – a strong, light, wide-gape hook and without doubt the most versatile pattern in my box. If I include the eyed version there really isn’t a bait I can’t fish with a super LWG. From maggots to hard pellets, this hook covers it all. Strength wise it’s also more than capable of dealing with carp as well as being a good silver fish hook when bagging.
- QM1 – I use these when fishing the feeder or bomb and hair-rigging my baits. Due to the unique shape, once a fish is hooked it rarely comes off. A top hook for rod and line work.
- F1 Pellet – this is a fine-wire, ultra-sharp, strong hook that’s ideal for pole work in the winter with baits such as corn, pellets and maggots.

3) Altering shotting patterns will get you more bites
Regular readers of this column will know that I’m massive fan of a strung-out bulk of shot on my pole rigs, as shown on the left.
It’s such a versatile set-up. Take F1 fishing as an example. When fishing maggots or even pinkies I always like a slow falling hookbait so I will fish a loosely-strung bulk with the bottom shot set 5ins from the hook and the rest of the droppers spaced at 1.5ins intervals above this.
When fishing with pellets however, I’ve found you need a more positive approach to get the bait down quicker and so will adapt my strung bulk so it’s tighter together. The bottom shot is still 5ins from the hook, only this time the rest of the droppers will be spaced at just 0.5ins intervals.

4) Where you position your pole pot is crucial…
Small things can make all the difference and one of the biggest mistakes I see a lot of anglers make when pole potting is an incorrect pot position.
Their pole pot is positioned 6-8ins back from the tip of the pole which means every time they feed they are short of their float. Your pole pot should always be as close to the tip of the pole as possible. When targeting F1s in particular this can make a huge difference to your catch rate.
Guru pole pots HERE
5) Go longer later
If you watch me fishing you might not spot that I don’t always fish in exactly the same spot throughout my match, but it’s something I do that I believe makes a big difference.
A little trick I use a lot when feeder fishing is to fish past my feed area in the last hour of my match, once bites have died off.
What tends to happen is that due to the disturbance of the feeder going in and fish getting caught a few fish will sit off the back of the feed picking up any loose offerings that land there.
These fish can then be picked off in that crucial last hour just by taking the clip off and going one to two metres further.
It’s amazing how often this approach works and I’ve lost count of the number of times I’ve gone an hour without an indication only to add a couple of metres and get two fish in two casts. Had I not made this change I have no doubt I wouldn’t have caught these fish.

6) Get a stopwatch!
When feeder or bomb fishing in the cold one bit of kit I simply wouldn’t be without is a stopwatch as I always time both my casts and bites as this makes my fishing a lot more efficient and effective.
I might start off with 10-minute casts and then if I don’t get any bites in that time I will lengthen this to 20 minutes.
Once I start to get bites though, every time the tip goes round I will make a note of how long the feeder or bomb has been in the water.
Normally, once I’ve had three or four bites I’ll start to see a pattern emerge, and I might find all my bites are coming between 11 and 12 minutes for instance.
I can then start to use this to my advantage as in if this is the bite time there is no point leaving the feeder/bomb out for any longer than this.
So to sum up, using a stopwatch just makes me that little bit more efficient at my peg which in turn I believe leads to more fish in my net!

7) why it’s so important to use back shots
Perhaps one of the best bits of advice I have ever been given was from Alan Scotthorne regarding the use of back shot.
Instead of using a single shot just above the float as most anglers would, Alan was using a string of small shot above the float, normally No9s. Presentation was so much better, even in a crosswind.
A string of back shot makes you stay tight on the float which means you hit more bites – simple as that!
I like to have the first shot three to four inches above the float and then the rest of the back shots at 3ins intervals above this. If it’s really windy I will put the shots closer together.

8) how you feed from a pot is crucial
Once the water gets cold and clear I believe that bait falling through it attracts fish, even when fed in very small amounts.
It’s important to choose the right lid when pole potting and I prefer one that allows me to sprinkle bait into the swim on a regular basis.
When feeding maggots I might use the medium Guru pole pot and three-quarters fill it with maggots. It allows me to feed six or seven times over the top of the float without having to waste time shipping back in to refill the pot every time.


How to plumb the depth correctly when fishing

BY TOMMY PICKERING, FORMER WORLD CHAMPION
At this time of year, finding the correct depth to fish at is very important – being as little as an inch overdepth or off bottom can produce only a handful of bites, whereas the angler who is bang on the money will catch more.
Plumbing accurately not only ensures that your bait is on the bottom, but also lets you know of any changes in contour to the swim such as shelves or deeper holes, which can be a magnet to fish.
Using a plummet properly will also highlight what the bottom of the lake is made up of – silt, gravel or mud. This will go a long way towards helping you decide your tactics on the day.
Plummet size
For pole fishing there’s only one size of plummet you’ll need, and that’s a heavy one! I use around 30g for enough weight to let me feel when the plummet has hit the bottom. Too light and you won’t get the feel and a true reading.
A heavy plummet will also sink into any silt or mud and you’ll know this when you lift the pole – the plummet will ‘stick’ slightly before being freed.
Accuracy at all times
Having reference points when plumbing the depth is vital, so you know that you are fishing the right spot. Don’t rush things – time spent plumbing up means more fish in the long run.
I will pick something such as a far-bank tree as a marker to line the pole up against. To ensure the distance is correct, hold the pole as you would when fishing.
Plumb around
Although the name of the game is to find the depth in one spot, it does no harm to drop in a foot or so either side of this area or just past it. There can be a change in depth just inches away from your starting point and this change, especially if it is deeper, can be home to more fish on harder days.
On the waggler
Finding the depth on the waggler is different to the pole because you won’t have the pole directly above the float. It is still possible to get a very accurate reading, but I don’t use a standard large plummet.
Instead, I pinch a large SSG or double SSG shot on the hook and cast out, allowing up to 20 or 30 seconds for the angle of the line from rod to float to be taken into account. I then add an inch at a time to the depth until I can see the float tip and then begin to work backwards by a centimetre at a time until I have dead depth.
The fishing tactics which won the £70,000 Maver Match This final
Matchman Rob Wootton has scooped £70,000 thanks to a last-gasp carp he landed in the Maver Match This Final at Yorkshire’s Hayfield Lakes.

The Leicester angler claimed competition fishing’s biggest prize in the most dramatic fashion, netting the valuable fish seconds after the final whistle, after crucially hooking into it just before the all-out.
The fish helped him to a total weight of 42.175 kilos, just two kilos ahead of runner-up Chris Cameron.
But for Dynamite Baits man Rob, there were no fancy rigs and secret baits involved. Instead he relied on simple bomb and pellet tactics for his bumper payday, after catching a few early carp on the pole and later on a Method feeder.
“I wanted to select the carp and avoid the skimmers and small fish in the venue, so large hard pellets were the automatic choice for me,” he said. “I started the match on the 6m pole line, and although I caught a couple of decent fish early using an 8mm pellet on a band and feeding 6mms, the fish soon backed off.”
With anglers nearby fishing the long pole and struggling, Rob decided to go straight out to a line at about 25m where he’d been loosefeeding 8mm pellets.
It was here that he caught most of his fish, with a few also falling to a Method feeder fished to the island 65m away. He said:
“Feeding is really important on the bomb and it seemed the best tactic on the day was to cast out and immediately catapult about eight 8mm pellets over the top of the rig, three times in succession. This kept the fish on the bottom.”
Here exclusively are the three rigs that won Rob Wootton that £70,000 prize pot...
THE RIG

HOOK
Not risking hook pulls in such a big match, Rob’s was a size 12 QM1. The pellet on the band was almost touching the bend of the hook.
HOOKBAIT
This was an 8mm light-coloured Skrettings pellet.
HOOKLENGTH
A 12ins hooklength of 0.18mm Guru N-Gauge was Rob’s choice. It’s long enough to keep the bait away from the lead and short enough to give a bolt effect.
BOMB
A 20g Guru Cube was perfect for a short 25m chuck. A lighter lead may have struggled to achieve a bolt effect in the deep, towing water of Hayfield.
QUICK CHANGE BEAD
The simplest and easiest way to connect both lines. The 6lb mainline is tied to the back of the Stonfo part of the bead, with the hooklink clipping into the front.

How to start kayak fishing

It's exciting, it’s good for your health and it’s relatively inexpensive. If you’ve not yet tried kayak fishing, there’s never been a better time to get afloat.
WHAT ARE THE BENEFITS?
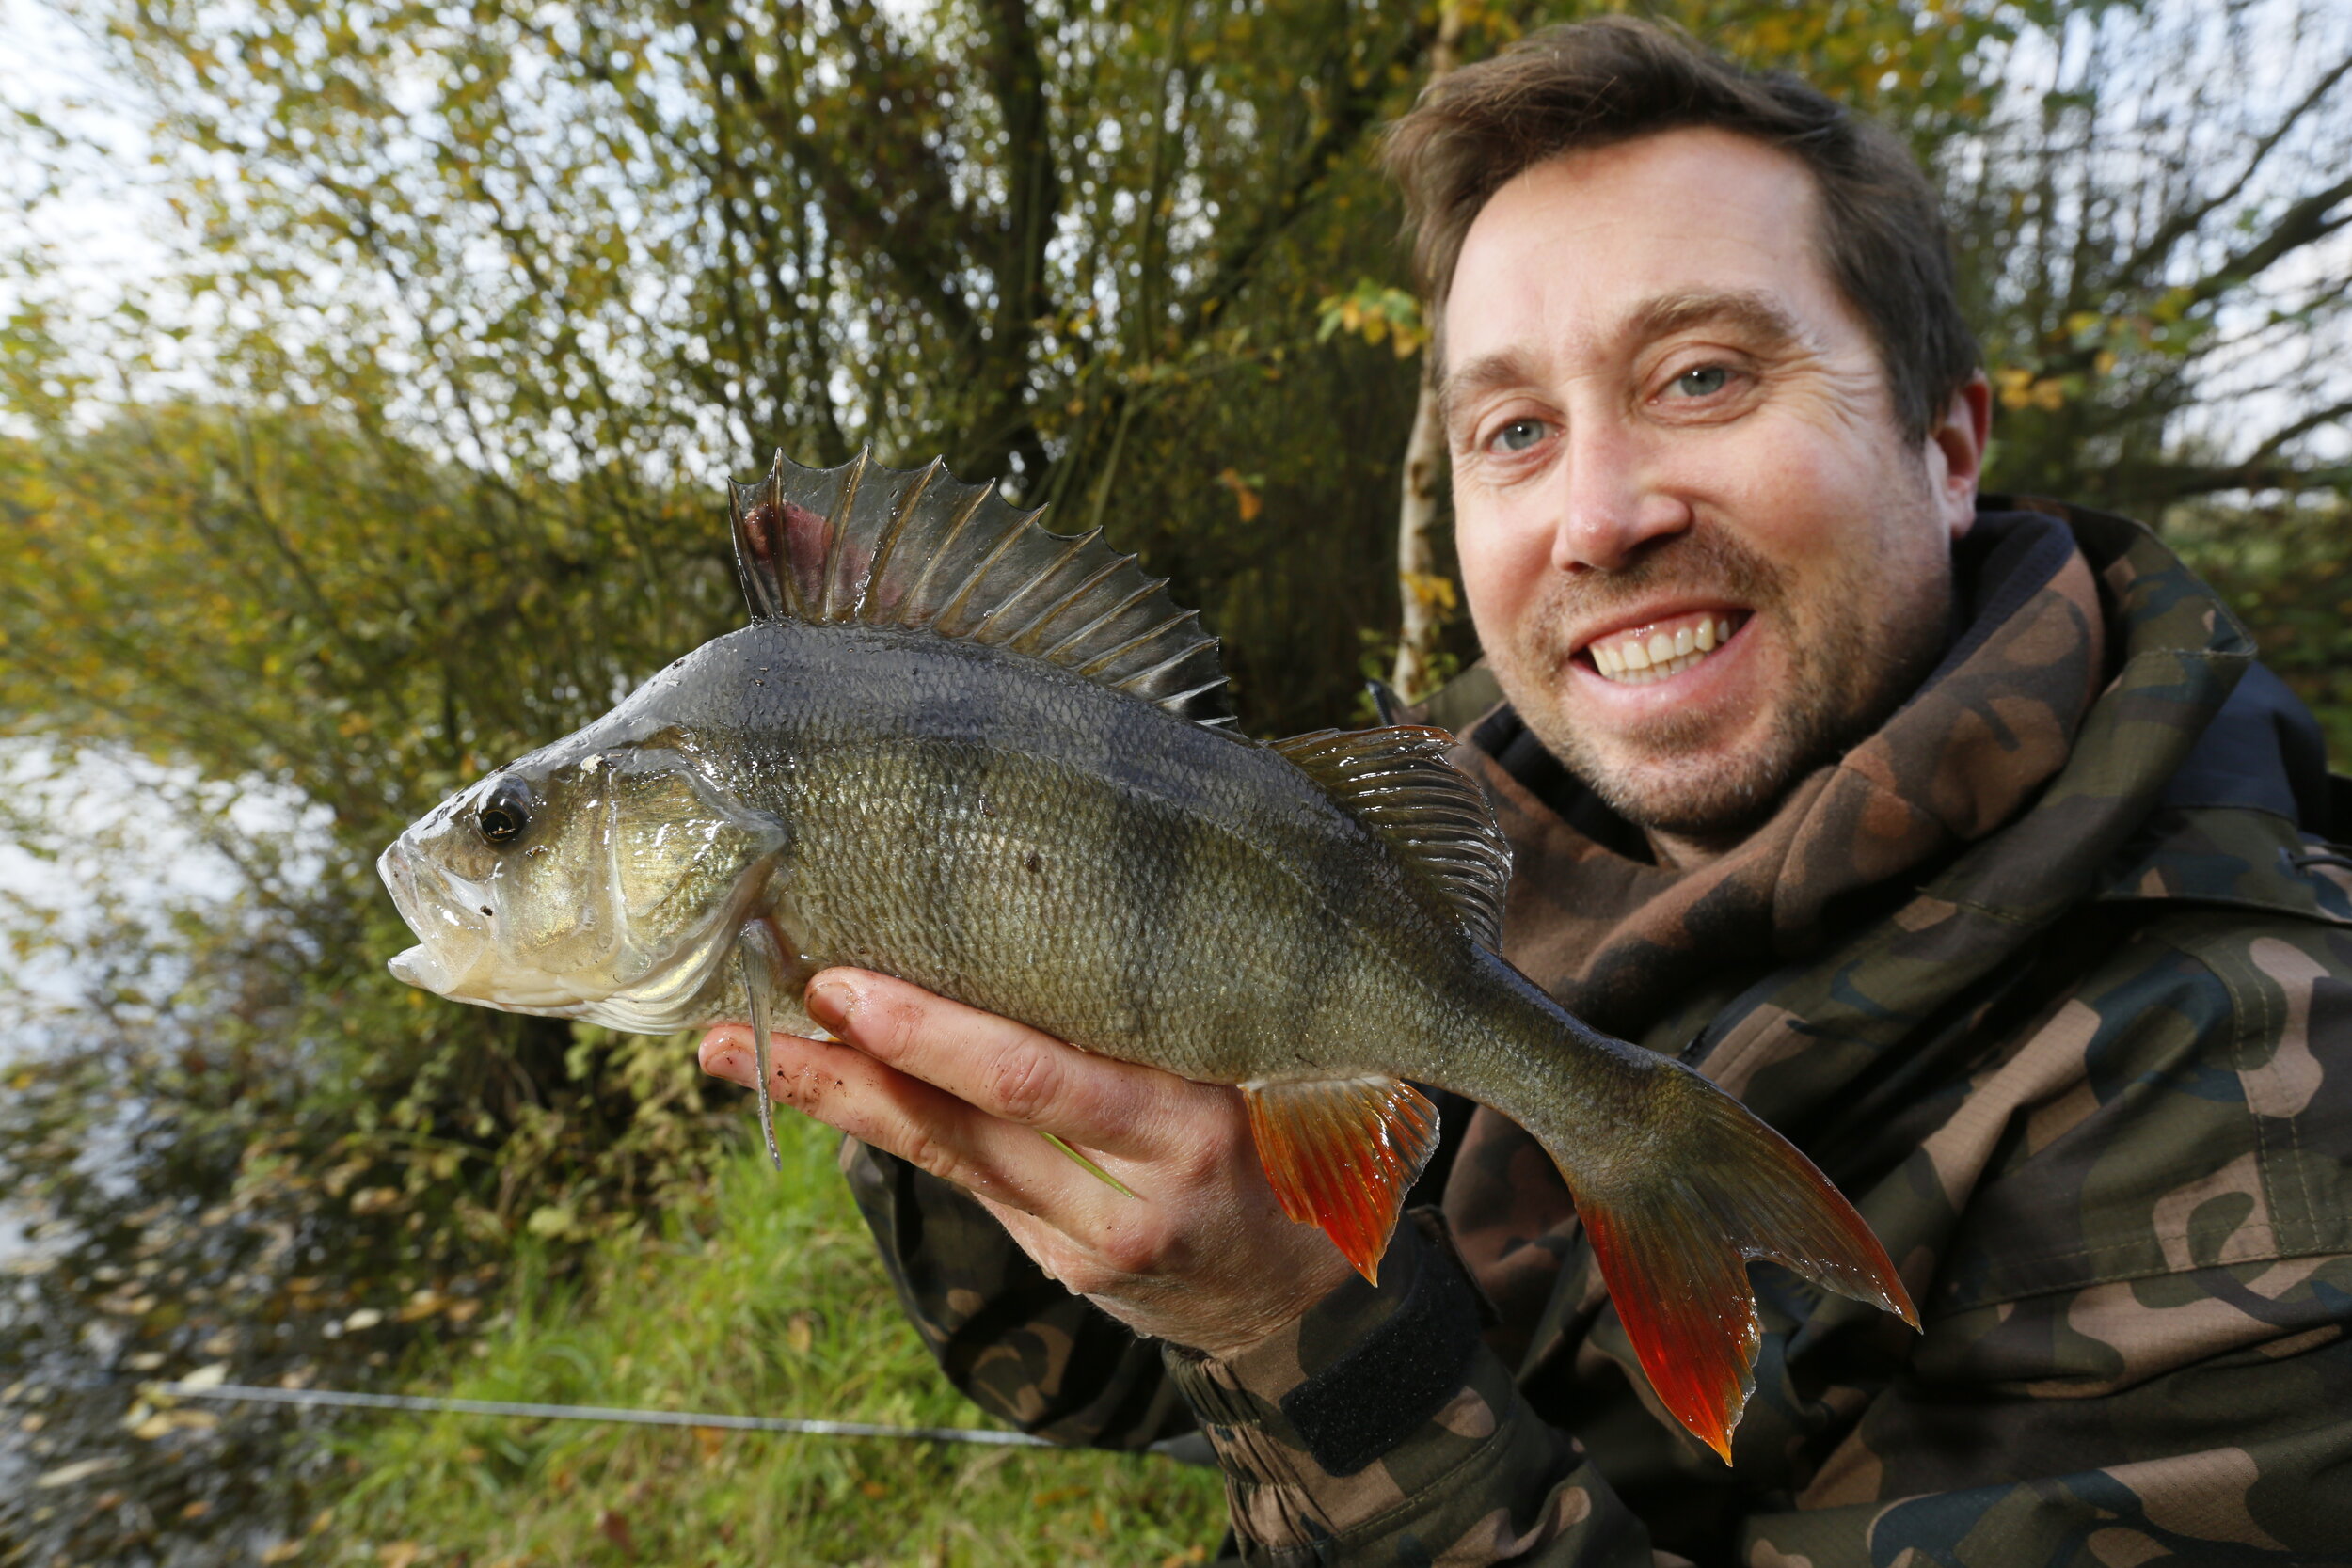
Being aboard a kayak allows you to reach areas unavailable from the shore – great when lure fishing, for example, as you can get really close to the features where fish such as perch hide out. You’ll also benefit from being active, keeping you warm in winter and healthy too.
WHERE CAN I TRY IT?

You can kayak fish on any venue you wish but you must first get permission to access your chosen venue from the controlling club or landowner. You may also need a navigation licence on some rivers and canals, for example, the Thames.
Kayaks really come into their own on large stillwaters and rivers where you can reach areas previously inaccessible by foot, and where the fish may be out of casting range.
It’s also worth checking where you can launch it on the venue before setting out. Try to avoid areas where matches are taking place, and always be courteous to other anglers.
HOW MUCH DOES IT COST?
Kayak fishing isn’t as expensive as you’d expect. A fishing kayak will set you back as little as £300 or as much as £2,000 – it’s up to you.
If you are planning on just coarse fishing, a lightweight, budget kayak is all you will need. Most kayaks come with a paddle and seat, so you will only need to purchase an anchor and buoyancy aid. Finally you will need to consider transporting it to your venue. Most anglers use a roof rack with strapping to hold it down.
How to get more bites when fishing

Take a look at this new take on an old method from Steve Ringer that is guaranteed to get you more bites when fishing on your next match. Steve has managed to give his fishing that extra edge in the last few weeks by fishing this new method as it has allowed him to faster carp bites on the feeder take a look at this devastating new method and let us know what you think!
The straight lead and pellet has long been a deadly combination, but recently I’ve had a great run of results by feeding as if I was on the bomb, but fishing a huge, pellet-packed Hybrid feeder instead!
This way I have been getting much quicker bites. I can only think this is down to the carp finding the bait that bit quicker, as there’s a lot more to home in than just a single hookbait.
The other secret to this tactic has been to fish right on top of my loosefeed.
In the past I have caught lots of carp just off the back of the feed but just lately they have been bang on the loosefed pellets. Putting my feeder in the right place has made all the difference.
Here’s how to do it…

Feeding your swim
I like to feed as far out as I possibly can. If I can feed past those around me this gives me my own bit of water out of which to pull fish.
The next thing to consider is that I want the carp to stay on the bottom. The way I feed the swim has to reflect this.
Instead of feeding little and often, as I would normally do, I have had a lot more success by what I call ‘double pouching’. As the name suggests, this involves feeding two big pouchfuls of bait one after the other.
My theory is that the carp are tuned into noise. They hear the first pouchful of pellets hitting the water and then, when the second lot hit, they follow them down to the bottom where the feeder is.
Feeding double pouchfuls also means you’re putting a lot of bait in. This helps to keep the fish on the bottom, which is obviously where you need them when you’re fishing the feeder.
One key element when fishing in this manner is to keep feeding. I’ll fire out a double pouchful over the feeder every two minutes to try and draw more and more carp into the swim.
Accuracy is crucial
A little trick I use to ensure my feeder is right in among my loosefed pellets is to feed first and then cast right on top of the loose offerings.
I like to clip my loaded feeder on so it’s ready to cast, feed twice in quick succession, and cast right into the rings the loosefed pellets have made.
I’m not a fan of casting and leaving the feeder out for ages, as most bites will come within two minutes when the carp are really having it. There’s no point sitting waiting for the tip to go round.
Fish a slack line
I like to fish a slack line with virtually no bend in the quivertip. This helps to reduce line bites, which lessens the chance of spooking fish out of the swim.
When a fish bumps into the mainline there’s every chance it will leave the swim, especially if that line is bowstring-taut.
Don’t worry about fishing slack and not spotting bites. When you get a fish the rod will bend in half!
Of course, if you get a drop-back bite, which is unlikely at such short range, you can still tell. The line falls totally slack between the tip and where it meets the water.
My Hybrid rig for big fish

My set-up couldn’t be much simpler. For waters like Barston and Boddington, feeder choice is the large, 28g Hybrid – I’m targeting decent-sized carp, and what better way to do it than with a big feeder?
The only change I make to the feeder is to remove the inline stem and replace it with the long, X-Safe stem loaded with black elastic.
I feel I lose fewer fish when using elastic, and when the hooked carp are 8lb-10lb this can make a huge difference to my final weight.
Moving down, the hooklength is 4ins of 0.19mm N-Gauge and the hook is a size 10 QM1.
Just recently I have been using size 10s for all my big-carp work and I haven’t found anything not to like about them. It might look like a big hook, but if you look at the size of an 8lb carp’s mouth then it suddenly begins to seem somewhat small by comparison!
Washed out hookbaits

It will be no surprise to anyone reading this to find that hookbaits are all about my favourite 10mm Wafters. The two colours I favour are the trusty orange and the washed-out yellow.
Over the last two years I’ve caught more carp on the Chocolate Orange Wafter than any other bait, so I’d be silly not to have it in my armoury.
However, when fishing the Hybrid feeder over loosefed pellets I have to admit if I had to choose just one colour it would be washed-out yellow.
Once in the water, this shade of Wafter actually looks very much like a loosefed pellet, and I think that’s why it has caught me so many carp on this tactic.