
Tench feeder rig
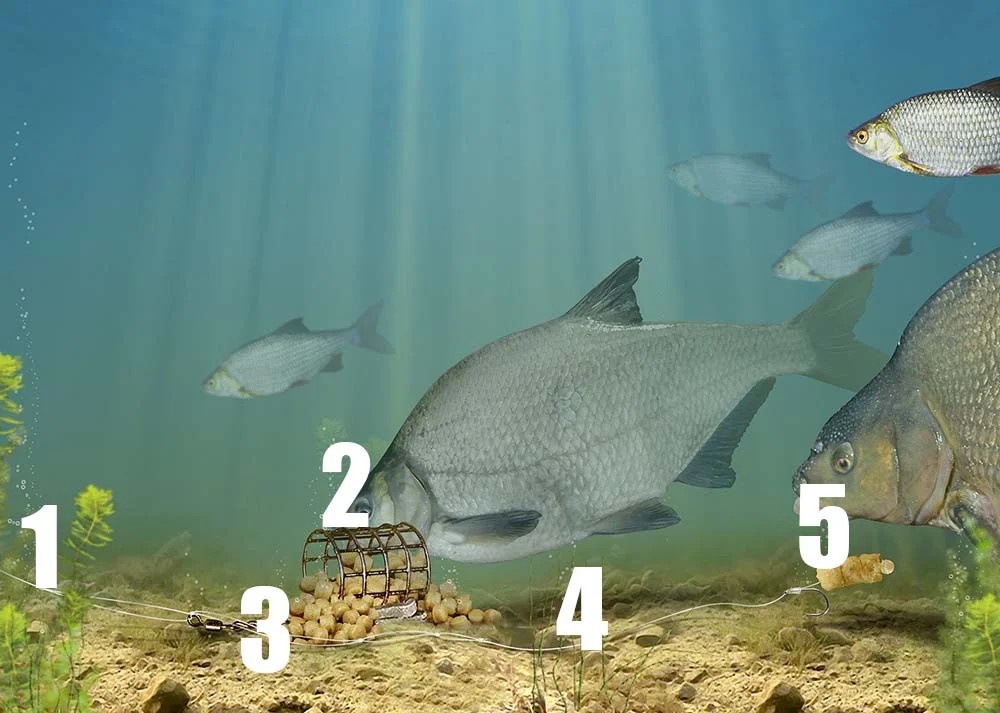
When going after tench there are many tactics that can be used, for instance when you are on a larger gravel pit it is a feeder approach that often scores. This is thanks to its characteristic of placing bait close to the hookbait even when fishing towards distant gravel bars and other features.
While the feeder is brilliant for tench, it often has to be rigged-up with a short hooklength stopped close to the feeder to prove successful for tench. This is because tench tend to sift through food and detritus while hardly moving. Use a long hooklength and the hookbait is likely to be expelled before a bite is registered!
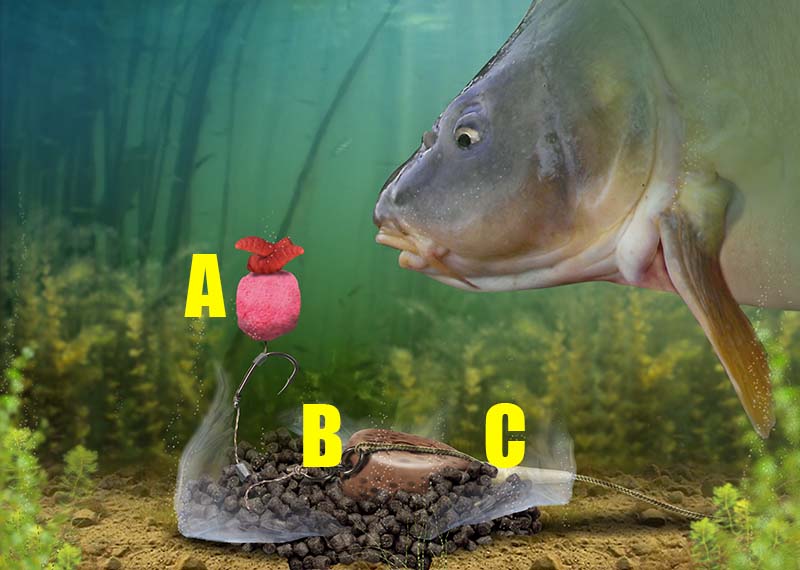
Maggots, casters and worms are all brilliant tench baits because they mimic the fish’s natural diet, and this rig can be used with all three of these baits. To make the hookbait stand out, it pays to pop-up the bait. This can be easily achieved using a slither of rig foam attached to the hair, with the bait fished on the hook. Follow the steps below to learn how to tie this brilliant rig...

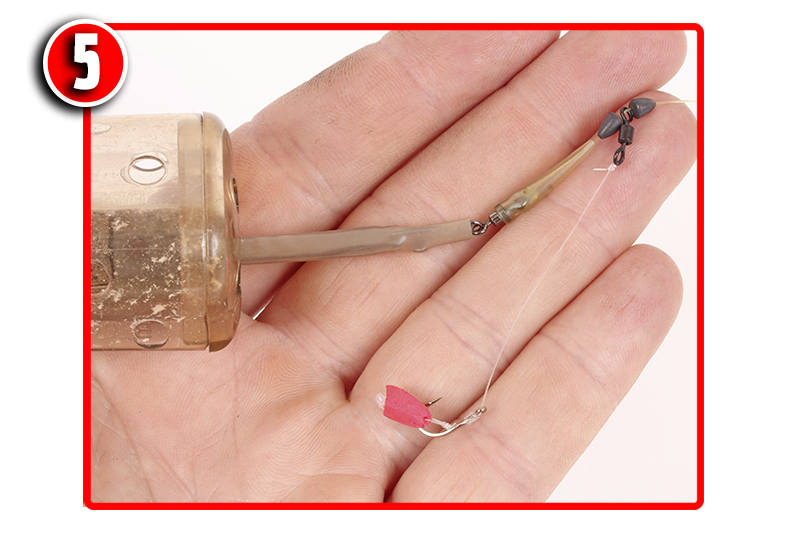
Tie a size 10 forged hook to a short length of 8lb fluorocarbon using a knotless knot and attach a slither of red rig foam to the hair

At the other end of the hooklength attach a mini swivel using a four-turn grinner knot. The hooklength should be around 4in long
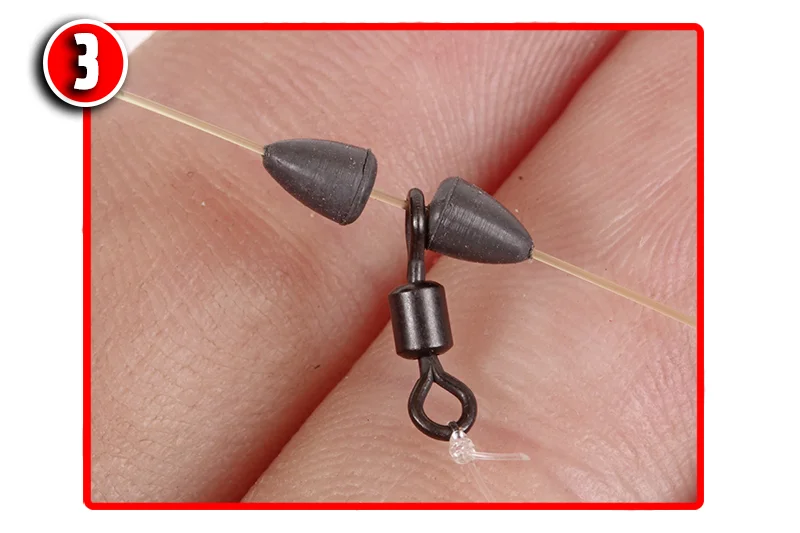
Slide a medium-sized Clinger on to the mainline, followed by the hooklength swivel and then another Clinger

Slide a mini rig sleeve on to the mainline and then tie on a medium-sized Oval feeder
Adjust the Clingers so the hooklength is fixed just above the feeder


How to tie the ronnie rig!
Gardner tackle's Lewis Rhead walks us through the rig of the moment and how to tie it...
There are rigs and then there is the "Ronnie rig". Some rigs stand the test of time and work year after year. Others are more transient in nature, their tangible benefits are the figment of a twisted mind, and they don’t offer any real advantage in terms of catching carp or being easy to tie!
This one, however, is very special. It’s a rig that’s been used successfully on the quiet for a few years now, being deployed as a tool pivotal in catching some phenomenal big carp from a number of waters. But now the word is out and everyone want's to know how to tie this amazing rig

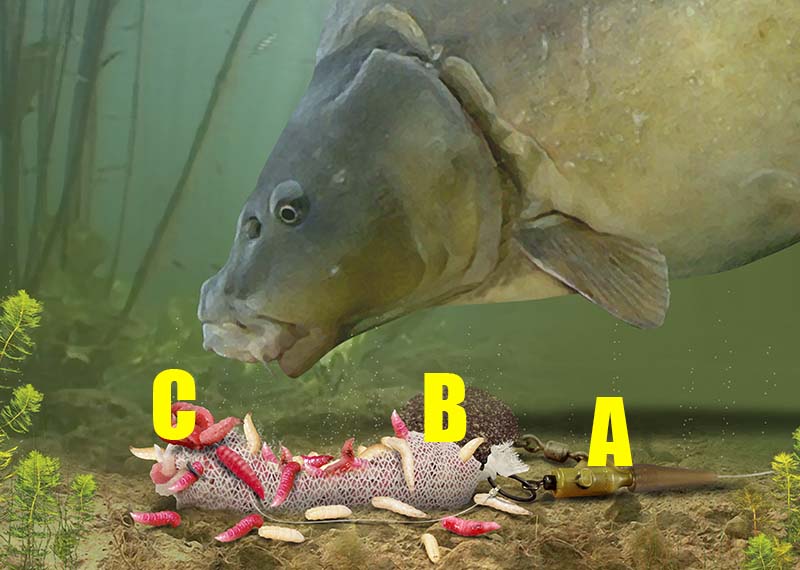
The Ronnie rig is easy to tie and offers the benefits of a super-consistent low pop-up presentation, fished the height of a hook and a swivel of off the lakebed, but without the issues of a naked hook eye that has the potential to snag in landing-net meshes (one of the main problems associated with the original 360-style rigs).
It offers all the advantages and awesome rig mechanics of the hinged stiff rig, but without the need to trying to fish it low to the lakebed, which isn’t the optimum arrangement. When it’s tied right, those of us that have used it extensively have pure unadulterated confidence in it because hook-pulls are almost non-existent. I can’t remember pulling out of a single fish with the Ronnie rig.
Luckily, it’s amazingly simple to construct thanks to the use of a size 12 Covert Kwik-Lok Flexi Ring Swivel mounted on the eye of the hook. That, combined with a Gardner Mugga hook, offers a highly aggressive, fast-reacting presentation that is ruthless in the extreme!
It’s also extremely versatile. I always have a number of pre-prepared hook sections ready to go, and I tailor the hooklink material to suit the lakebed or the lead arrangement.
That could mean a lead clip with a long, supple, skinned hooklink such as Ultra Skin in silt, or a helicopter-style arrangement and a Subterfuge fluorocarbon boom on clean sand and gravel.
Personally, I think balancing it like a hinged stiff rig works best – so the hookbait is slow to sink. Why? If you overbalance the hook by moulding putty around the shrink tube, the hook has a tendency to lie over further and this inhibits it from twisting and turning as quickly as it could (the same drawback you get with a hinged stiff rig).
Realistically, mounting the swivel through the eye means you need to use a ‘nice’ sized hook, and the size 4 Mugga or Continental Mugga are both perfect. You know, some rigs work with some hooks better than others, and this is the one. The Mugga’s curved swept shank and 20-degree inturned eye complement and enhance the mechanics, lining up the shrink tube naturally in a way that gives maximum ‘twistiness’.
Variants of some rigs come and go, but the Ronnie rig is one that I know will stand the test of time. Like all presentations, it isn’t the panacea of all things riggy, but what it is is the best low pop-up rig that I have used.
Now it's time to show you how to tie this amazing rig so you can go out and use it for yourself!
How to tie
Step 1)

Start by cutting a 1cm length of large Covert shrink tubing.
Step 2)
You then position the shrink tubing on the hook shank.
Step 3)

Attach the hook to a size 12 Kwik Lok Flexi Ring swivel.
Step 4)

The crook will distort slightly as it is opened up.
Step 5)

So once the hook eye is in place squeeze the crook closed with pliers.
Step 6)

Now bring the shrink tubing back down the hook to this position.
Step 7)

Carefully shrink the tubing down using the steam from a kettle.
Step 8)

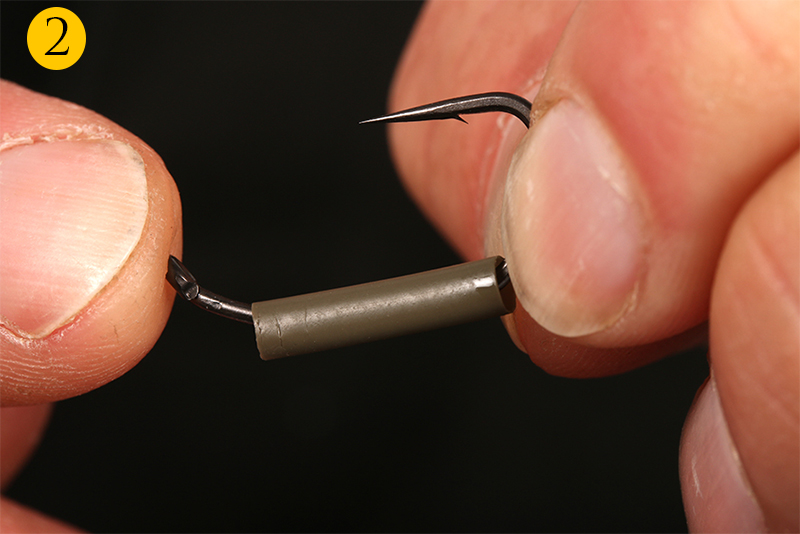
Now you can slide a size 20 Target Swivel on to the hook.
Step 9)

Follow this with a hook stop to keep the swivel in place
Step 10)

Position the hook stop opposite the barb as shown here.
Step 11)

Attach your pop-up hookbait with some bait floss.
Step 12)

Mould some tungsten putty around the shrink tube to balance the bait.
Tommy Pickering | How to make my simple groundbait feeder rig!
This is my favourite set-up for all my open end feeder fishing. It’s a very simple rig for wire cage and plastic frames, and the stiff boom which is tied in the end of the mainline means tangles are kept to a minimum.
As it’s free running it’s completely safe, too. Use it for bream, tench, roach, perch and even carp. All you need is your reel line, your feeder with a swivel eye or snap link attached, a packet of No8 Preston Stotz weights and your chosen hooklength.

Try this simple and tangle-free feeder set up.
Step 1.

Take the mainline or shockleader between thumb and first finger of both hands and twist in opposite directions to twizzle it together.
Step 2.

Ensure that the length of the twizzled line is longer than that of the feeder and link, to stop the two tangling when you cast the finished rig.
Step 3.

Bring the twisted line back over itself to form an overhand loop knot. Pass the end through itself twice and pull to tighten the knot properly.
Step 4.

You’re now left with a twisted section of line of around 6ins long, called a boom. Trim the tag end to reduce line spin when reeling in.
Step 5.

Now slide the swivel eye of the snap link attached to your feeder on to the twisted line and over the knot of the stiff boom.
Step 6.
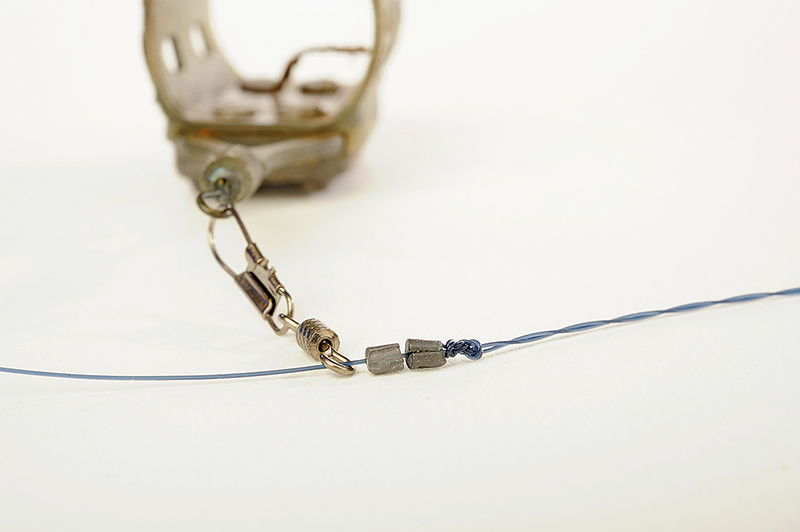
Attach two No8 Stotz to the mainline just above the twisted section, with the feeder above. These butt against the knot and stop the feeder too.
Step 7.

Time to add your hooklength, which you will probably have already tied. Push the hooklength loop over the end of the twisted boom.
Step 8.

Put the hook itself through the end loop in the twisted boom. Then pull the whole hooklength through with it as it goes through.
Step 9.

The loop-to-loop forms like this - you may need to flick the hooklength over its own loop knot to achieve this perfect connection. Pull tight.