
Top 5 pole rigs that you need to try!
No matter where you choose to fish this month, you can guarantee that your target species will come close to the bank in search of food now that the temperatures have risen sharply.
When this happens, the pole is an unbeatable item of tackle but the sort of rig you use with it will dictate whether you get just a few bites or have a session that you won’t forget in a hurry.
Paying careful attention to your terminal tackle and bait choices is vital if you want to make the most of your time on the bank, as is getting the subtle details such asshotting and float patterns spot on.
We reveal the five most deadly spring pole rigs that are almost certain to help you and your friends put more fish in the net.
The Worm Rig

GOOD FOR: Putting together big mixed bags of quality bream and tench on stillwaters.
TACKLE: Use a rugby ball-shaped float with 5lb mainline, a 4lb hooklength and size 14 or 16 hook.
HOOKBAIT: Half or a full worm will appeal to both species at this time of year.
The Maggot Rig
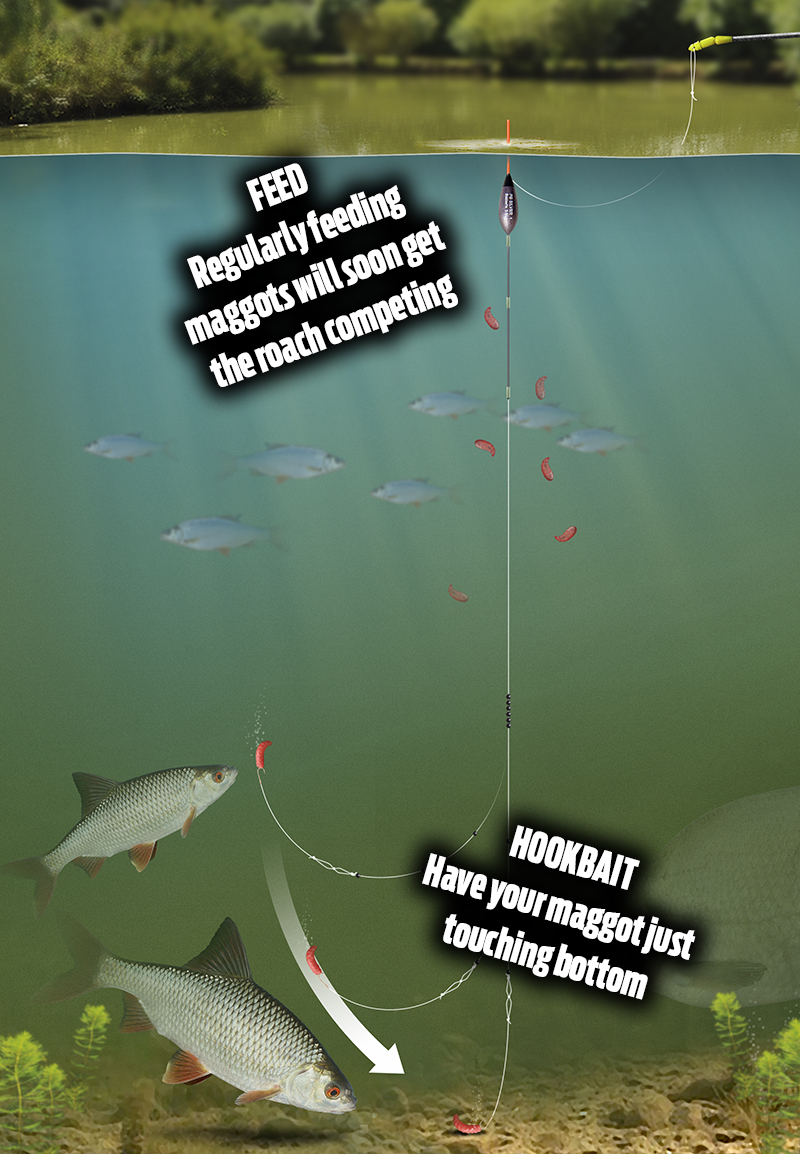
GOOD FOR: Quality roach that will only feed if the hookbait looks natural.
TACKLE: Keep it light with 3lb mainline, a 2lb hooklength and a size 18 or 20 hook.
HOOKBAIT: Red maggots will keep the bites coming. Alternate between single and double.
The Pellet Rig

GOOD FOR: Catching F1s and carp in open water swims on commercials.
TACKLE: A narrow float will help you spot every bite. Use 5lb mainline to a 4lb hooklength and a size 16 hook.
HOOKBAIT: Start with a 4mm expander, switching to a banded pellet if small fish show.
The Margin Rig
GOOD FOR: Catching the biggest carp and F1s in the lake, especially late in the session.
TACKLE: Don’t risk getting bust by a big carp and use 6lb mainline to a 5lb hooklength. A strong float with a thick tip is a must.
HOOKBAIT: Corn is unbeatable in the margins.
The Meat Rig

GOOD FOR: Fishing in open water for carp, F1s, big bream and tench on commercials.
TACKLE: A balanced rig helps catch all species. Use 5lb mainline, 4lb hooklength to a size 16 hook.
HOOKBAIT: A 6mm cube of meat will catch all species that are stocked in the fishery.

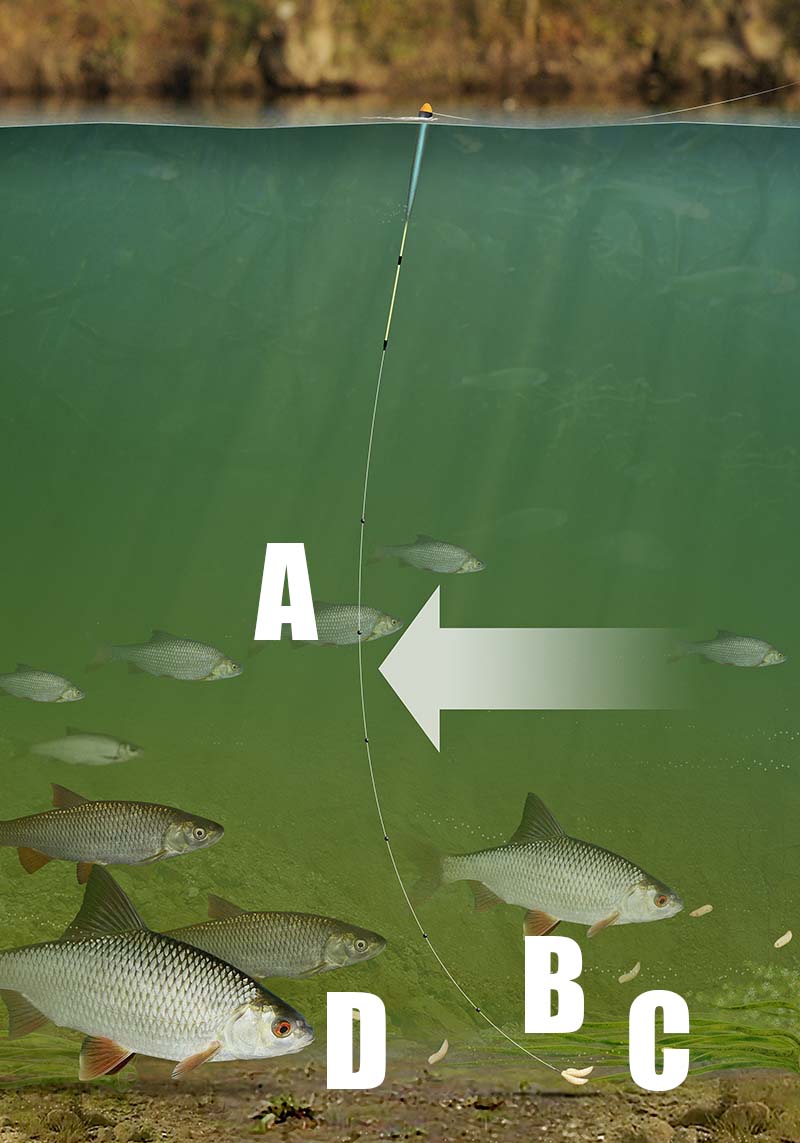


The best pole rig for fishing with chopped worms
This simple pole rig is perfect for fishing with chopped worm for a number of reasons - it's stable so the bait remains still, it pushes the bait to the bottom quickly to avoid smaller bait-snatching fish, and it is perfect for lifting and lowering the bait to entice a bait.
A A rounded or body-down pole float is ideal for this rig. They can be held back against any surface tow well, in windy conditions.
B Always attach your pole float using three silicone strips of tubing to ensure it does not slide along the line.
C Mainlines and hooklengths for this rig should be quite strong as you may encounter tench or carp when fishing with chopped worm. A mainline of 0.14mm tied to a 0.12mm hooklength will suffice.
D Using an olivette around 10in from the bottom will ensure that the bait is forced through the depths quickly, straight past any smaller fish that may snatch at the bait as it drops. Olivettes also help steady the rig in adverse conditions.
E Use two dropper shot equally spaced between the olivette and the hook. No8 or No10 shot are ideal for this as they are light enough to provide a slow, gentle and natural drop of the bait through the final 20 inches of water.
F Fish your bait around 3-5in overdepth, and remember to use a strong hook. One of the best for chopped worm fishing is a Kamsan B711.
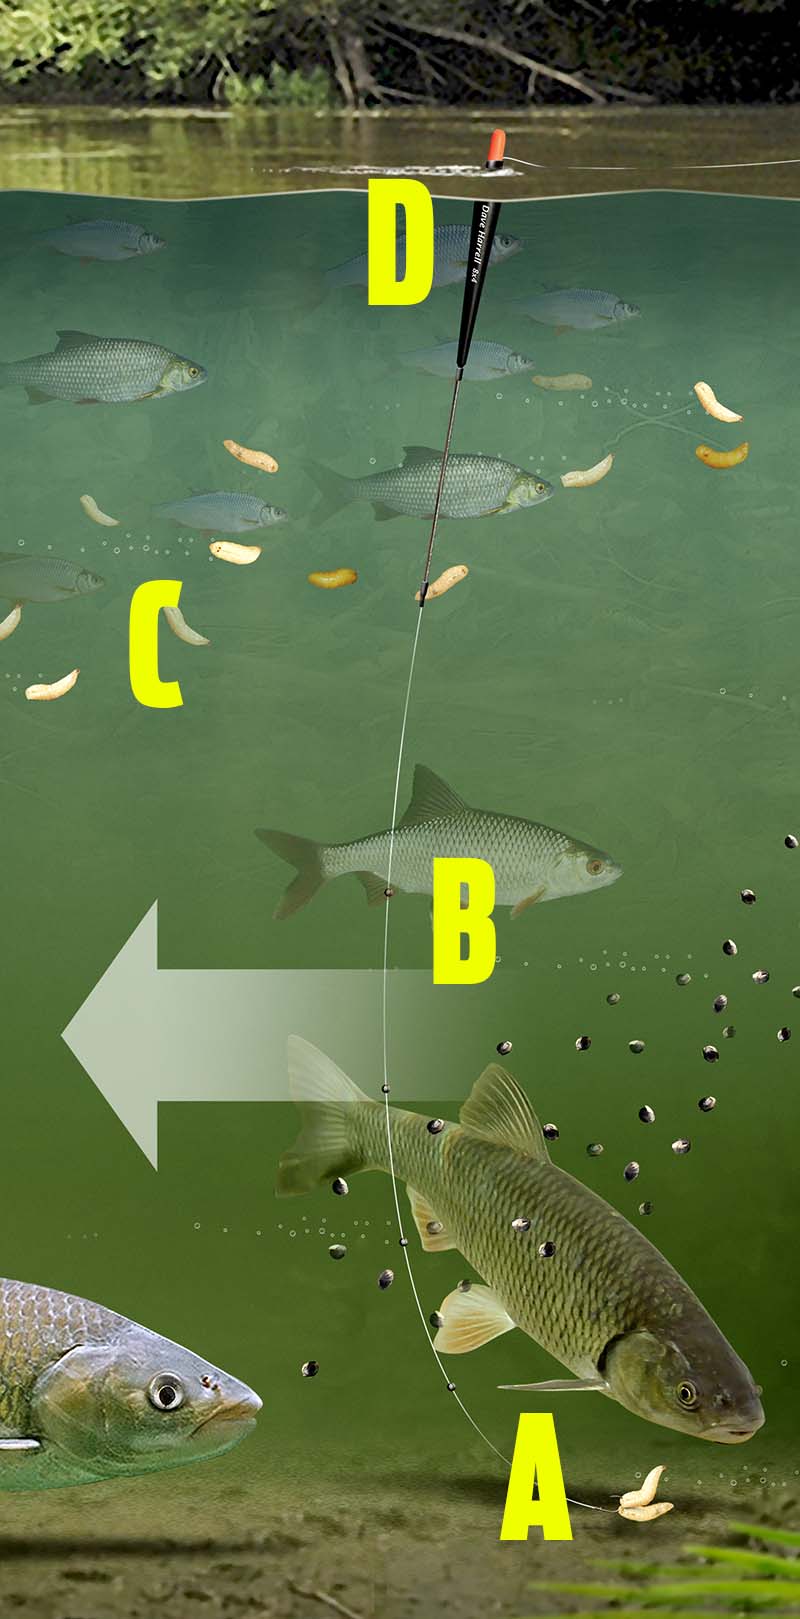
Prevent foul hooking carp when margin fishing
We've all done it at some time - foul hooked a carp in the fin or flank when pole fishing tight to the margins or an island. It's almost inevitable that the feeding carp will, at some time, swim into our lines and become foul-hooked.
Not only is this unsporting, but playing a foul-hooked carp is twice as hard as normal, putting your pole, elastic, hook and line under incredible pressure that often ends in disaster.
Although we cannot guarantee that this technique will prevent carp becoming foul-hooked, it will certainly decrease the chance of that happening. And in turn it will increase your confidence too.
Here's how it's done and how to tie it...
The key tackle requirements are a strong hook (eyed or spade end, it doesn't matter), strong mainline and a short dibber pole float. Then you'll need a handful of No8 shot to dot the float down to the bulbous sight tip.
When we say strong mainline, choose a high-tech line of around 0.18mm to 0.22mm diameter (between 6-10lb). That will be strong enough to cope with the rigors of this style of fishing.
All your shot should be placed together, in a line, below mid-depth.
You'll also need strong pole elastic. A grade 18 will be spot on, but you may get away with a 16 if the fish aren't enormous.
Finally, to fish this technique effectively you will need to use as short a line between pole tip and float. The reason for this is simple. You're going to have to push your rig as close to the margins or island as is possible. Having a short length of line above the float will help you do this effectively.
Plumb the depth carefully as your bait should just rest on the bottom an inch or two. Now you're ready to take the swim on, feed it and start catching.
The trick to the effectiveness of this rig is really very simple. If your rig is presented as close as possible to the margins it'll be positioned just out of the way of the feeding carp. Also, when a carp does pick up your bait and you strike, there's a very high likelihood that the carp will swim directly away from the margins and into open water, where you'll be able to gain control of it quickly. Obviously there's no way the carp can swim forwards, because of the island or the bank.
Take a look at the diagrams below and you'll see why it's important to fish as close as possible to the feature.
THE RIGHT WAY
THE WRONG WAY


How to find the depth when pole fishing
Plumbing and finding the depth of the lake, canal or river when pole fishing is a lot easier than finding the depth when you're float fishing because you can simply lower the plummet into your swim and gently drop it onto various areas of the swim to gain a true picture of the venue's depth.
It's a vital part to a successful session as it will give you a true picture of what's under the water and therefore give you a great insight into where you should be feeding and placing your bait.
You can also use your plummet to locate any underwater obstacles too by gently 'swinging' the plummet through the swim to see if it becomes lodged against anything that's submerged.
Here's how to go about finding the depth on your pole line...
STEP 1
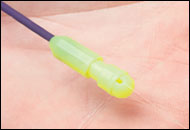
Pass your hook through the eye in the plummet
STEP 2
Secure your hook into the cork in the base of the plummet.
STEP 3
Lower the plummet into the swim below the end of your pole.
STEP 4
Add a section of pole at a time and plumb around the swim, lowering the plummet straight down, not at an angle, to ensure an accurate reading of the swim.
STEP 5
Once you have got the exact depth of the swim, hook your hook into the base of your pole top kit. This will pull the elastic out slightly and secure your rig. With Tipp-Ex, mark the point where the top and the bottom of your float sit against the pole. This means you always have a point to refer back to should you change the depth you are fishing during the day.
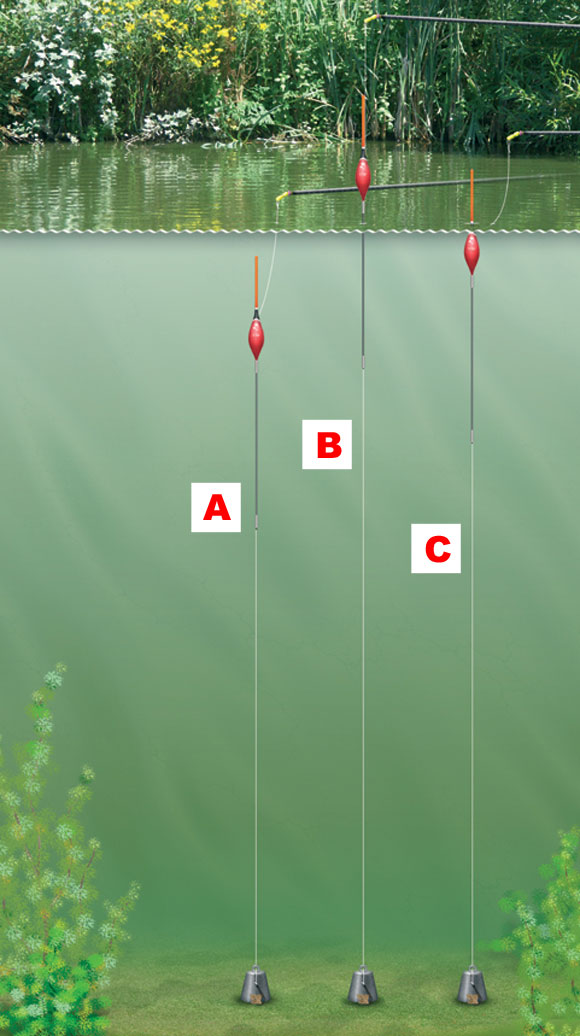
A. This shows the float is set too shallow
B. This shows the float is set too deep
C. This shows the float is set perfect
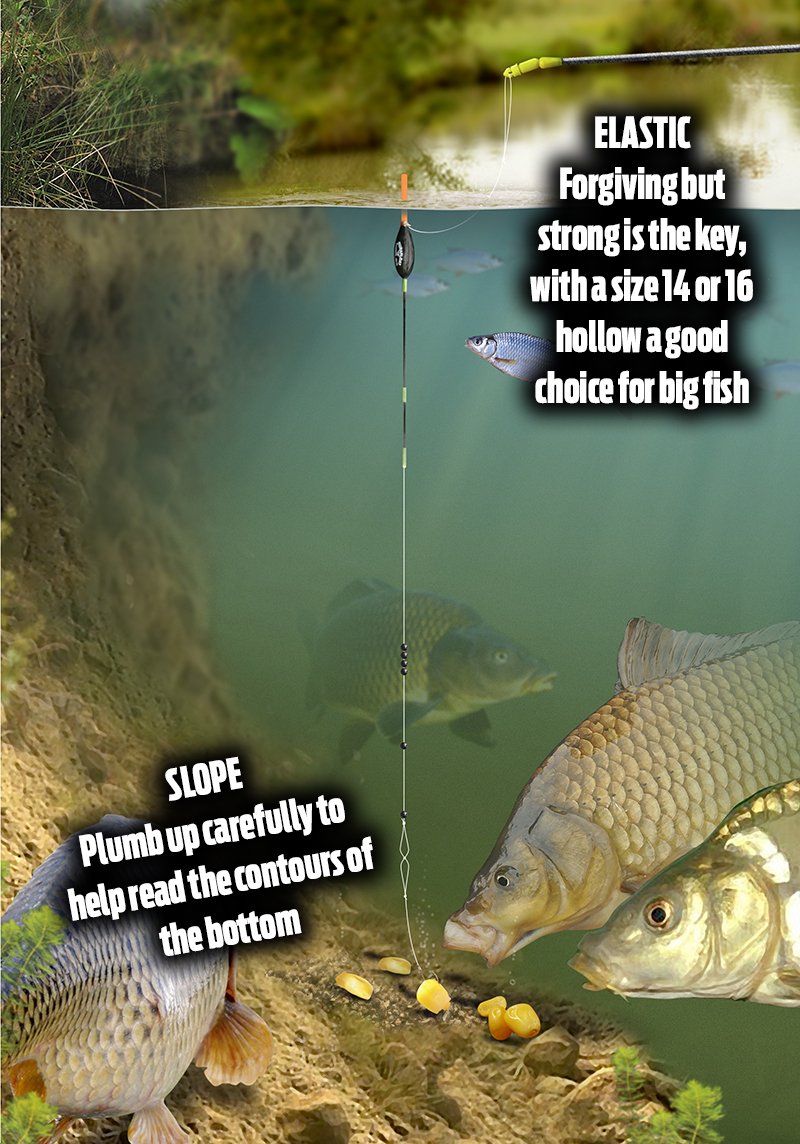
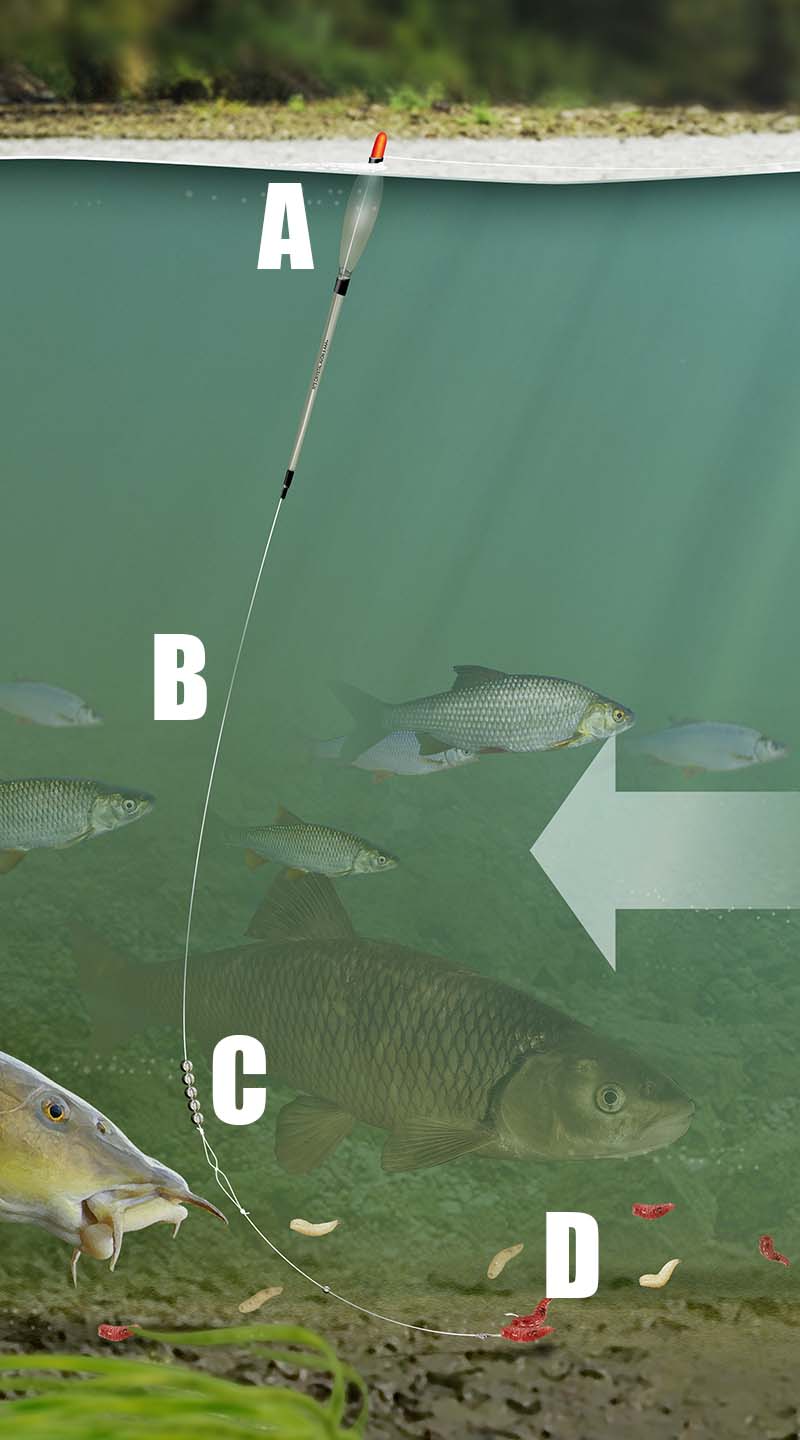
Catch huge carp from the margins with the margin dibber rig
No matter what the depth is tight to the margins of your local commercial carp fishery, this rig will catch you fish from there. It is one of the best rigs to use to catch the huge carp that patrol the outer perimeter of all commercial carp lakes countrywide.
A A short, fat and dumpy dibber pole float is best for tackling the shallow water in the margins. Often these floats are only 3 or 4in long, so therefore they won't interfere with the carp in water only a foot deep. They are seriously strong too, and because of the buoyancy in the tip they are ideal for use with big baits like meat and multiple grains of corn.
B Mainlines and elastic must be strong when fishing in the margins as you are not only dealing with big fish, but you are also fishing really close to snags. Ideally use 0.16mm lines at least, and elastics no lighter than grade 16.
C Attach your pole float using three strips of silicone tubing - this will help lock the float upon the line securely.
D Use only a few shot to cock the float. Three No8 may be perfect. Group the shot together below half depth to push the bait to the bottom quickly.
E Your hook must be set so that it either just touches the bottom or is fished slightly overdepth. The margins often slope quite steeply, so plumbing the depth is absolutely critical to successful margin fishing.
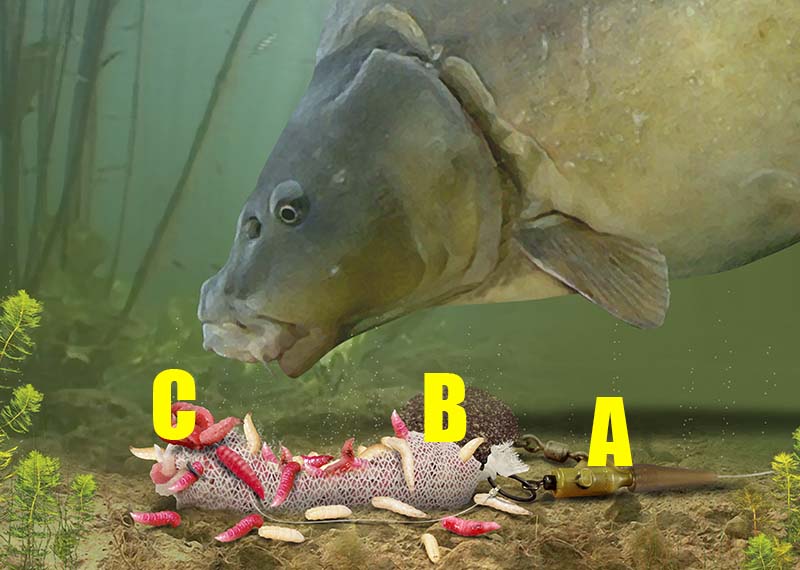
How to make a pole rig for paste fishing for commercial carp
Of all the various pole rigs that anglers use, the paste rig is perhaps the most misunderstood but it’s one of the easiest to tie, easiest to fish and it catches absolutely tons of carp each year.
The most important thing that you need to get right when paste fishing on the pole is to plumb the depth accurately. So, you’ll need to lower your plummet all over your swim to locate a flat area where you can be 100 percent sure that your bait will always be touching the bottom.
The float is important too. The perfect paste float will be seriously long, have a large balsa body and a very long and thick sight tip. All these features are vital to ensure that your float performs in the way it should.
Shotting paste rigs is easy – you just need a bulk of shot set just above your hooklength. It ought to be positioned around 8ins from the hook. One thing you must bear in mind is that you need to add enough shot to take the float down to the top of the balsa body – all the sight tip should be visible above the water.
The next important thing to do it tie on the largest hook you have, bearing in mind the rules of the venue. You can use huge hooks when paste fishing because the paste is moulded around the hook, therefore the fish can’t see it.
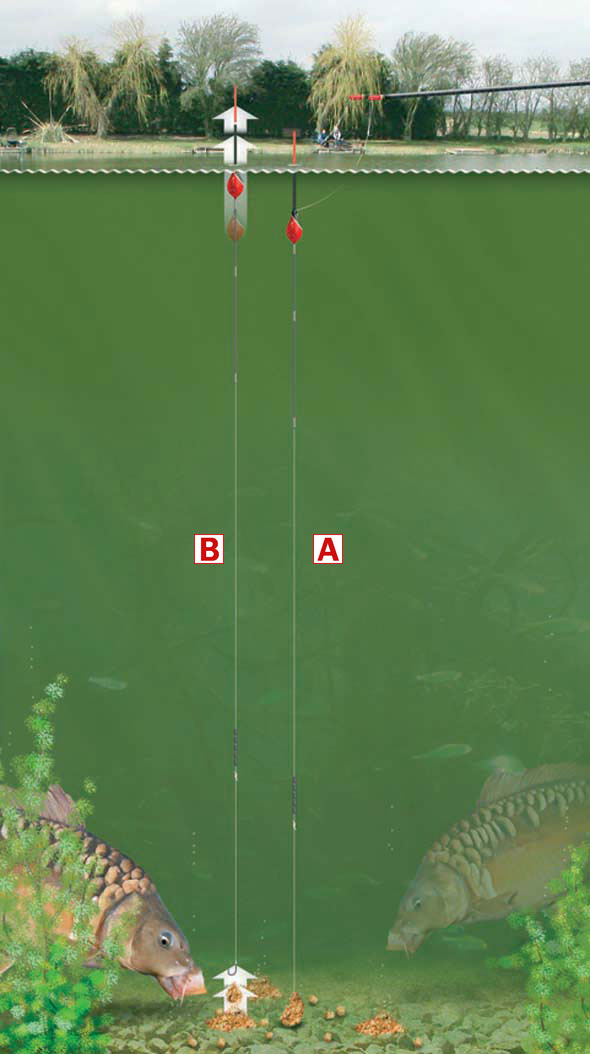
When you have found the area that you are going to fish, it’s time to set the correct depth of your rig. Clip a plummet onto the hook, lower it into your swim and if the whole of the float’s sight tip is showing you have the rig set too deep. You will need to slide the float down the line a little until only 1cm of the float is showing when you lower the plummet and rig into your swim. This is crucial.
Take a look at the paste rig on the right (A). Here the plummet has been removed, a large chunk of paste has been moulded around the hook and the float sits perfectly in the water – this is because the weighty paste is anchoring the rig to the bottom – it’s pulling the float down.
Now take a look at the rig on the left (B). Here the paste has dissolved and broken down, therefore it has lost its grip on the hook. The buoyant pole rig will pull free from the paste and you’ll immediately see the float pop up to the surface. That’s the time to ship the rig back and bait the hook with some more paste.
No other rig tells you that your bait has fallen off quite like this paste rig – it’s perfect and helps you save time waiting for a bite when your bait has dissolved ages ago!
Bites are unmissable – the float will either shoot under, rise to the surface then go under, or just bob around and go under.
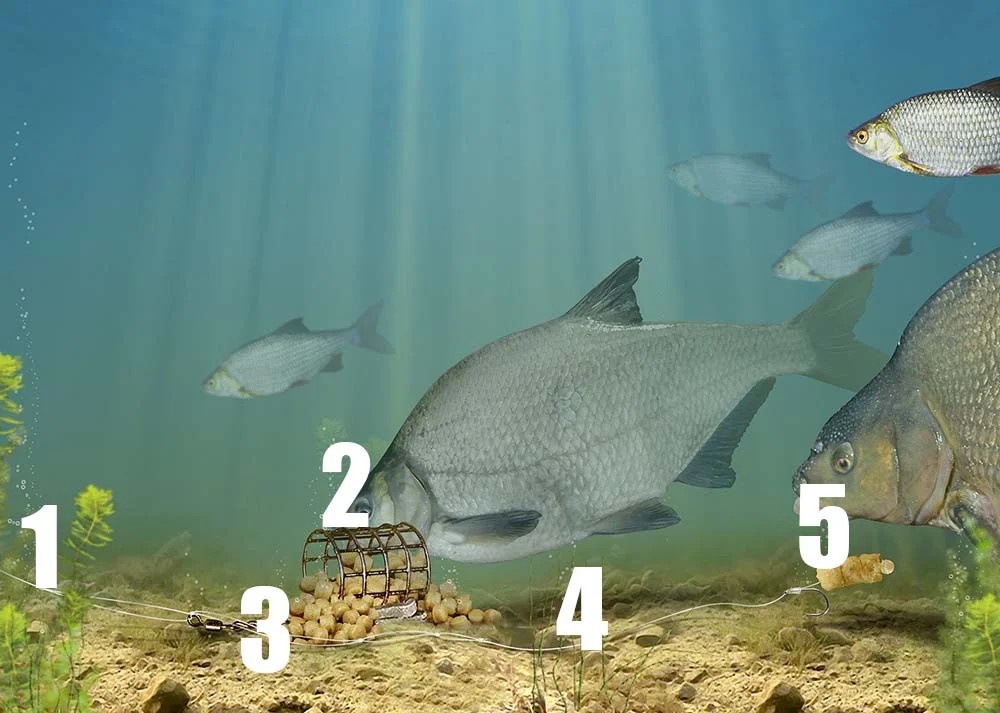
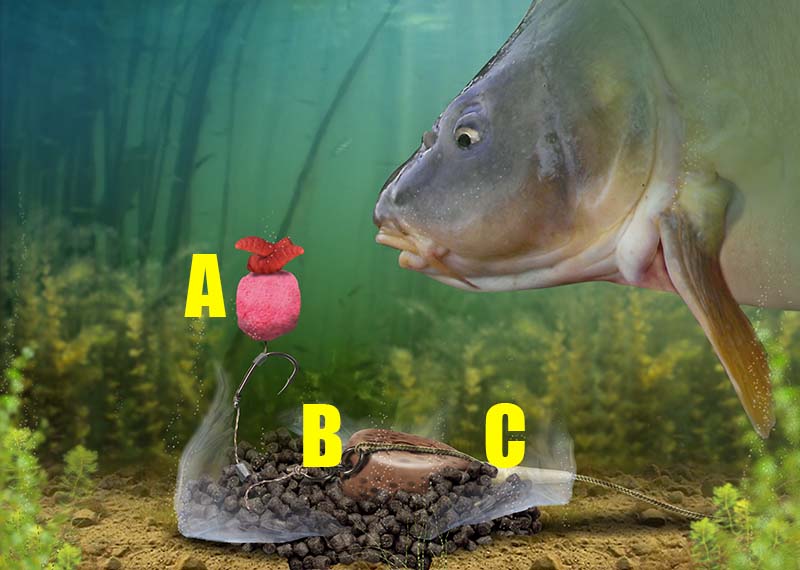
Presenting expander pellets on the bottom with the pellet deck rig
This rig is ideal for presenting expander pellets on the bottom for carp, tench and bream. It can be used in depths of 3ft or more and when fished correctly it can tempt bites when all other pellet rigs fail.
A Use a long, body-down pole float for this style of fishing. One having a long plastic bristle is perfect as bite registration will be near instant.
B Cock the float with an olivette to form a bulk. This needs to be positioned around 12in from the hook.
C Place two dropper shot equally spaced between the olivette and the hook. Ideally they should be No10 shot that are light enough to create a gentle and natural fall of the bait through the final few inches of water.
D The hookbait should be set so that it just touches the bottom, so accurate plumbing is vital with this rig.
E The best way to tempt extra bites with this rig is to loosefeed little and often with sinking pellets, then lift and lower your rig regualrly. This gives the expander pellet plenty of movement, and the simple waft of the bait dropping down to the bottom can bring a bite when a static bait is often ignored.
Make a rig for your pole fishing
Here Jamie Masson shows how to make a pole rig at home, from individual components, so you have a complete set-up ready to fish with. Plus you'll be able to make the perfect pole rig for tackling your favourite venue. What you’ll need is:
1) Genesis Extreme II mono.
2) Pole winders and anchors.
3) Maver Black Ice pole floats.
4) Maver Match This hooks or hooks to nylon.
5) Silicone pole sleeve and a variety of shot.


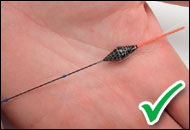
1. Start by cutting three pieces of silicone pole float sleeves, two small and one three-times as long
2. Thread the rig line through the float eye then thread on three pieces of silicone in this order
3. Push the pieces of sleeve on to the float’s stem. The top piece is placed 1in below float’s body


4. Don’t push it right up to the float’s body as this causes too much pressure on the float’s eye
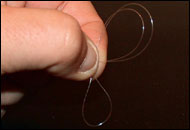
5. In the end of the mono above the float, double over the line and form a loop
6. Pass the tag end through the loop twice to form a double overhand knot


7. Lubricate with spit and pull the knot tight to form a loop in the top of the rig
8. This loop is used to attach the rig to the stonfo connector when you want to fish the rig.
9. To attach hooklink, make a loop in end of the mainline and pass through the hooklink loop

10. Now pass the hook through the loop in the end of the mainline
11. Pull the mainline and hooklink tight to form the loop to loop knot. (Hooklinks not used on carp rigs)
12. With the hooklink on, shot the float using Jamie’s guide (right) to the amount of shot you’ll need


13. To place the finished rig on a winder, first place the hook on to the winder’s peg
14. Carefully wind the rig on to the winder,then place a rubber winder anchor into the end loop
15. Pull the rubber pole winder anchor and slot it over the peg in the end of the winder

16. Always make sure the float sits in the deeper side of the winder so it doesn’t get damaged in your box
How to balance your tackle
Elastic size
Line size
Hook size
No5 solid
0.06mm - 0.12mm (1lb - 3.3lb)
22 - 18
No8 solid
0.12mm - 0.16mm (3.3lb - 5.7lb)
18 - 14
No12 - 20 Dual Core
0.14mm - 0.20mm (4.2lb - 8.8lb)
16 - 12
No 16-20+ Dual Core
0.16mm - 0.26mm (5.7lb - 13.2lb)
14 - 8/6
Jamie's guide to shotting
Styl wt.
Shot wt.
Pattern 1
Pattern 2
4x10
0.1g
4xNo10 bulked
4xNo10 strung out
4x12
0.2g
5xNo10 bulked
3 bulked & 2 droppers
4x14
0.35g
4xNo8 bulked
3xNo8, 2xNo10 drop
4x16
0.5g
5xNo8 bulked
3xNo8, 3xNo10 drop
Shopping list
The bait and tackle to get you started
l Genesis Extreme II mono – £5.99
l Pole winders and anchors – £2
l Maver Black Ice pole floats – £1.50 each
l Maver Match This hooks – 99p for pack of 10 hooks
l Silicone pole sleeve and a variety of shot – £4
